0
45777
The main distinguishing feature of corner cabinets is their functional capacity and space saving. A process such as assembling a corner cabinet can be carried out independently at home. In order to do the job correctly, it is worth familiarizing yourself with its main nuances.
Choosing a cabinet design and model
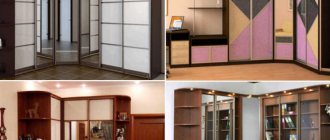
There are not many models of corner cabinets.
There are only 4 varieties:
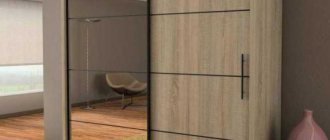
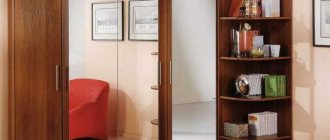
- Triangular wardrobe. The model differs from others in that the insides (shelves) are not attached to the cabinet wall. Everything is attached to the wall to which the cabinet is placed. That is, it does not use side walls. A triangular cabinet brightens up corners and adds harmony to the room. One of the cabinet subtypes is the “radius cabinet”. The overall design is practically the same, the only thing is that it has a much more interesting door shape. They are made in the shape of a semicircle, which is provided by guides. But the originality of the model does not end there. A door of an interesting shape can also be concave, convex or wavy.
- Trapezoidal. One side of the cabinet has a side wall. Due to this, the whole structure looks very interesting; it has the shape of an irregular trapezoid. The closet space is very convenient to use, as you can place things of non-standard shapes and sizes there.
- L-shaped wardrobe. This is the most common type of corner cabinets. They are universal and most often suitable for any interior. The design takes up much less space than other types, which is also a definite plus. The design of the L-shaped cabinet is assembled from two straight lines, so it is the easiest to assemble. It looks compact and concise.
- Five-walled. The structure is made up of several side walls that are connected to each other. Due to its non-standard nature, this variety can rarely be found in stores. But it is quite possible to assemble it yourself. If the desire arises, it can be supplemented with the necessary elements inside.
Minimalism is a trendy style at all times.
The cabinet design is selected to match the interior.
The only thing that is important to consider is that corner cabinets will look harmonious only in modern styles. Historical styles such as baroque and classics do not imply the presence of modern interior items.
How to assemble a corner cabinet
Assembling a corner cabinet is a simple process if you carefully read the instructions and prepare all the necessary materials.
Preparing parts
Preparation of parts consists of preliminary measurements. It is important to take into account all the nuances of the design and calculate the dimensions. A cabinet diagram and a drawing of the proposed location are created. It is important to measure everything and put it on paper.
Before you order a cabinet, you should design it.
The usual design involves one large compartment for placing things on hangers. The other section is narrower; it is divided into compartments by future shelves. If desired, you can perform the so-called open pencil case on the left or right side.
Use special programs to design the cabinet.
Each department has its own part prepared. They are made taking into account allowances. If the cabinet has a back wall, then much more material will be needed.
Installation of fittings on corner elements
Installing fittings is one of the most crucial moments. Therefore, everything must be done with extreme caution. Each action is checked several times, only after which the transition to the next occurs.
Fittings are an important element in furniture.
The first fastening element, the eccentric tie rod, is screwed to the lowest part of the cabinet, that is, to its bottom on the sides. In sequence. Then the dowel and lock are inserted. The same procedure is done with the top part, that is, with the “roof” of the cabinet. The fittings are installed on it in the same order.
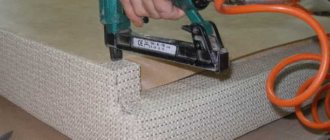
Preparing the Side Panels
The side panels are the tallest parts of the cabinet as they are the side walls. It is necessary to nail the legs to their bottom so that the future cabinet stands stable. Then the rods are screwed in and the dowels are inserted.
There is a difference between assembling a regular and corner wardrobe.
There is no need to rush; it is better to check everything several times and correct it if necessary. In the first stages there is a good opportunity to dismantle everything, so you need to use it to avoid mistakes. The side of the cabinet is attached to one of the side panels (right first). The hinges are being installed. And on the left side you need to secure several shelf holders.
Internal vertical panels
Metal connecting corners are installed on the rear internal vertical panel. Then the locks and small rods for the largest and top shelves are installed. It is necessary to drive several shelf holders into the adjacent wall and screw in rods (small) for the remaining middle shelves.
You can make a built-in corner wardrobe.
Since this stage involves the introduction of shelf holders into the design, they must be checked for quality of installation. Otherwise, there is a risk that all things may fall off of them as a result.
Installation of the housing structure
The bottom is placed on the previously installed legs. Next, the internal vertical panel is installed. Each one in turn on top. The part adjacent to the inner vertical panel is attached in the center, and the vertical panel itself is attached to the background at the edge. They can be securely connected to each other using metal corners.
Leave the assembly of the structure to professionals.
The next step is to attach the opposite side panel. The locks are closing. The part needs to be held a little. The corner top of the structure is applied and the part with panels that stand vertically is fixed. Since the structure is probably high, you can use a stepladder.
A corner cabinet is a great way to rationally distribute room space in a small room.
The left vertical panel is attached, the locks are all locked immediately. Next, all the shelves are inserted using small rods. Then the back wall is filled according to the principle of installing all the others.
Arrange the shelves in your closet functionally.
After which all the allocated space for shelves can be safely filled.
Hanging a door on a corner cabinet
Hinges are installed on the door and screws are screwed in. Door hinges must be inserted into the hinges. The hinge structure is usually equipped with a special screw, which regulates the correct insertion of this screw into the hinge.
Try to accurately align all the holes, do not force them together by inserting a tie when the holes do not yet line up completely.
All hinges are fixed with screws. The door is adjusted in the required direction and aligned. The last step will be to install the handle on the door.
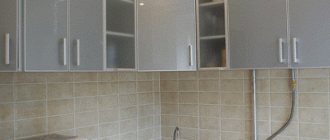
How to work with laminated chipboard - a popular material for cabinet furniture
Currently, laminated chipboard is mainly used in the production of furniture. This is the first principle. It is wood shavings of coarse dispersion. Using the hot pressing method, it is given the shape of a sheet. In the manufacture of slabs, formaldehyde resins are used; they are an additional component. The difference from simple chipboard is the coating with a film made of paper and melamine resin. In terms of environmental indicators, it is better to use materials of class E1. Laminated chipboard boards have good compaction, due to which furniture made from them is strong and has a long service life.
Fastening the rails to the cabinet door
If you think that this material has the same composition, then you are mistaken. Based on their coating, they are divided into veneered, rough and laminated. Based on their quality composition, they can be divided into three grades: first, they use first-class sawdust (usually wood of the same species). The surface is flawless, not a single chip. The plate is decorated, laminated with film or veneer. Second grade – you can already see small defects. There may or may not be cladding. Third, there are already noticeable defects here. Such slabs are not covered with anything.
Until the cabinet is fully assembled, make sure that the attached parts do not tilt, as the fasteners may break off.
In addition, laminated chipboards are moisture-resistant and fire-resistant (withstand high temperatures). They are mainly used to make furniture frames, but are also used in the production of partitions or used as interior decoration. It is worth mentioning that laminated chipboard, due to its composition, perfectly holds nails and screws.
In order to give rigidity to the wardrobe, it is necessary to secure the back wall.
The main “steps” for assembling sliding wardrobes with your own hands are indicated in the instructions.
Furniture made from these boards has many advantages compared to other materials.
- Acceptable price indicators.
- No difficulties in manufacturing.
- Good quality.
- Significant period of use.
- Variety of colors and decorations. This will help you choose the perfect furniture for your living room, kitchen or children's room.
- Blends perfectly with other materials.
Such furniture looks great in any interior.
Another important feature of laminated chipboard is that these boards have heat and sound insulation. Therefore, they can sheathe the walls of the room.
Make sure that the holes for the shelves and hanger rod mounts match the holes on the opposite rack.
Also, if you have started remodeling an apartment/house, knowing how to assemble a wardrobe yourself will help you easily and quickly resolve the issue of moving this furniture.
How to make a corner cabinet with your own hands
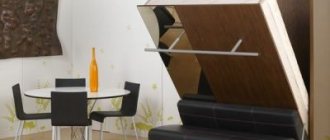
You can assemble the corner cabinet according to the instructions provided. If you follow it, you will get a standard version of the cabinet. The design will have a swing door. It can be made from any material, even durable glass. The most important thing is to carefully mount it and attach the handles so as not to damage the glass.
Follow the instructions when assembling the cabinet.
If you want a more complex version of the corner cabinet, you can make your own adjustments. Let's say you cut it at an angle to get a trapezoidal shape. This design will look much more interesting and attractive. Well, for lovers of standard options, this instruction on how to assemble a corner cabinet with your own hands is perfect.
The number of shelves in the cabinet is not limited. It can be filled completely or completely, or you can leave space for placing a beam under the hangers. If desired, you can also install a storage structure below.
What tools are needed
Significant expenses in purchasing the tool will not be required. To assemble a kitchen set, a wardrobe or a hallway, you need to have the usual set of tools: a screwdriver, a hex key for confirmation, a screwdriver, various drills, a bat for confirmation, an awl, a pencil, a tape measure, a square, fine-grained sandpaper, an electric drill, a stationery knife, iron, joint knife, rubber mallet, clamp for parts.
The distance between opposite corners should be the same.
Assembling a wardrobe with your own hands is quite easy and anyone can do it simply by following the instructions.
It is unrealistic to guess what tools will be needed to assemble furniture. It depends on what kind of project it is - difficult or not.
Now you need to install the wardrobe doors.
To open a closet, you don't need to remove chairs or move other furniture.
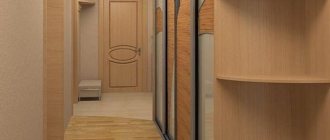
Where to put the closet
Choosing the right place to install a corner cabinet is 40% of the success in its design. If you correctly compare the footage of the room and the dimensions of the future cabinet, then you won’t have to dismantle it later.
A corner cabinet is placed in the corner.
Additional Information! It is important to evaluate the location not only for a few months in advance, but also for several years. For example, triangular corner cabinets cannot be reinstalled or moved. Such structures are installed thoroughly and irrevocably.
For a clear example of installation, you can make a detailed drawing of the room and calculate all possible options to choose the most suitable one.
The cabinet drawing will help you quickly assemble it.
It is worth saying that cabinet furniture can be reinstalled, but this process is very labor-intensive and time-consuming. A cabinet that has all the walls, that is, not attached to the load-bearing wall of the room, can also be easily moved to another location.
Often corner cabinets are built-in.
Required Tools
Almost every cabinet model comes complete with the necessary bolts, nails and washers, but you need to prepare the tools yourself. To assemble the wardrobe, you will need the following tools:
- Phillips screwdriver.
- Bit PZ2.
- The screwdriver is straight.
- Screwdriver or drill.
- 4 mm drill bit for metal.
- Hammer.
- Level.
- Pliers.
- Stationery knife.
- Hex key.
You may also need additional parts to assemble a 3-door wardrobe. For example, if the floors are uneven, it is necessary to prepare the underlays in advance. Depending on the model, a confirmat and 6 mm drill may be required.
Advantages and disadvantages of a corner cabinet
Any design has its advantages and disadvantages. The corner cabinet is very popular due to its multiple advantages.
Corner furniture has many advantages.
The positive aspects of a corner cabinet include:
- Compact design.
- Saving room space.
- Due to the proper arrangement, cabinets of this design are large.
- Spaciousness.
- Convenient storage of all things and their location.
- If the design is carried out independently, then additional storage space is specially installed.
- Versatility.
- Large selection of design solutions.
- Practicality.
Assemble furniture directly at the installation site.
The negative aspects of the design can be considered:
- The cabinet is not mobile.
- A large number of parts will have to be purchased to order.
Specialists know exactly how to assemble the product correctly and quickly.
Self-assembly of a corner cabinet is a labor-intensive process and requires concentration. Any wrong action can lead to a major reinstallation of the structure. It is important to observe all the nuances and follow clear instructions for assembling a corner cabinet.