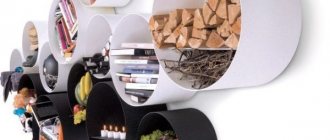
To store wines in the cellar, you need a special rack, where each bottle will be assigned a separate cell. If the house does not have a cellar, but the stock of wines is substantial, and these are collectibles that need to be stored at a certain temperature and humidity, you will need a special wine cabinet for them. A ready-made wine cooler is more of a household appliance (refrigeration equipment with a compressor) than furniture, and it is very expensive. For ordinary wines, a shelf or a small cabinet where the bottles are arranged horizontally is sufficient. You can make this option yourself from scrap materials.
Start with the body
1. From 19 mm plywood lined with cherry veneer, cut out the side walls A , top panel and shelf B , and bottom C according to the dimensions specified in the “List of Materials”.
2. On the inside of the side walls A , cut grooves and folds 19 mm wide and 10 mm deep ( Fig. 1) for inserting the top panel and shelf B. , cut a 6x10 mm fold along the back edge to insert the plywood back wall I.
D from a 19 mm thick cherry board . Mill a 6mm wide chamfer on the front side of the posts along both edges, not extending 50mm to the ends. How to do this carefully, avoiding chipping, is described in the “Advice of the Master” on the next page.
Master's advice
When milling partial chamfers, avoid burns
Surely you have already encountered chips and burns when milling incomplete chamfers. Chipping usually occurs when you try to rout an entire bevel in one pass. Burns occur when the rotating cutter becomes stuck in one place, so it is necessary to quickly move the workpiece away from the cutter at the end of the pass. There is an easy way to avoid these problems. Having placed the workpiece on the edge and resting its rear end against the stopper, move it towards the cutter with a rotating motion, as shown in (left photo below). Without worrying about chipping or burning at the end point, mill about two-thirds of the bevel length. Then turn the workpiece 180° with its ends and turn it face down so that the partially chamfered face is facing the longitudinal fence (right photo below). Mill again, finishing the pass on the already finished area.
4. Glue the posts D to the side walls A (Fig. 1), aligning the ends and outer sides. Once the glue has dried, sand the parts using 220 grit sandpaper.
5. In the top panel B , make a pair of mounting holes, countersunk from the bottom, and two slotted holes (slots) 4x10 mm for attaching cover G (Fig. 2). To form each slot, drill a series of overlapping holes.
Insert a spacer between the D posts and press the bottom with the C/E/F pads against the body, aligning it in the middle.
Using a 4mm pointed drill bit, mark the centers of the holes in cover G through the slots and mounting holes of top panel B.
Where to place the wine cabinet
When choosing a place to store wine, you need to consider the following points:
- The cabinet should be located at the maximum distance from heating appliances and heat sources. Ideally, you need to maintain a temperature of +10-15°;
- To store wine, a humidity level of 60+/-10% is required;
- bottles must be hidden from sunlight;
- constant air flow is required;
- the cabinet, shelf must be stationary, they should not be moved - unnecessary movements do not benefit the wine;
- bottles can be placed parallel or perpendicular to the wall, but always parallel to the floor.
When choosing a design and size, you need to decide how many bottles you plan to store in the closet.
How to make a wine storage cabinet
IMPORTANT! Do not skimp on manufacturing materials; when constructing a cabinet, use valuable wood with high moisture resistance (ash, Karelian birch, oak, walnut). And don’t fill it entirely - leave room for copies of the future collection.
You can make a wine storage cabinet yourself at home.
- Prepare a drawing with exact dimensions and layout of the internal shelves. Keep in mind that the depth of the shelves should be no less than the height of the bottles.
- Assemble two frames: front and rear. To do this, fasten the timber with self-tapping screws, using corners for rigidity.
- We cover the frame with a board that has been pre-sanded and coated with protective compounds.
- We cut partitions from sheets of plywood with a width equal to the depth of the cabinet.
- On the shelves at an angle of 90°C, we make cuts according to the size of the cells and rigidly connect them to the vertical partitions. We attach this structure to the rear wall of the cabinet.
- We paint the cabinet or treat it with paints and varnishes.
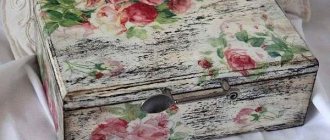
There is no one right solution when choosing a wine rack. The material of manufacture, dimensions, decor and distinctive features of the structure are determined by your abilities and capabilities.
For a small room, preference should be given to small narrow built-in shelves and racks.
It is quite possible to make a nice piece of furniture. After all, there is nothing more pleasant than an interior composition made with your own hands and filled with comfort, warmth and light.
Such designs can be varied and allow you to correctly position the bottles in a home or city apartment.
How to make a wine rack or wine rack
If you are the happy owner of a country estate, then the issue of storing the gifts of Dionysus can be resolved in the best possible way. Just equip a real wine cellar in compliance with all rules and regulations and enjoy a noble drink all year round. For urban conditions, a hand-made rack or shelf for wine is suitable, preserving all the taste qualities.
A wine rack is a functional element of your home, which can also be decorative.
Following generally accepted storage conditions:
- the optimal temperature range is 10-15° Celsius.
NOTE! At higher storage temperatures, the wine quickly “ages”: the “flavor bouquet” becomes less subtle and refined. Low temperature starts the process of oxidation of the drink and ripening stops;
- The optimal indoor humidity level is 60%. It will prevent the cork from drying out and losing its seal;
- the main storage condition is to prevent direct sunlight from falling on the bottles, the sun destroys the drink;
- The required position of the bottles is horizontal.
ATTENTION! This rule only applies to stoppers made from natural materials; bottles with synthetic stoppers can be stored in any position;
- static and calm. With shaking and vibration, a deterioration in the taste and quality of the wine is guaranteed.
All guests and friends will be glad when they come to your house to see neatly stacked bottles that are easy to get.
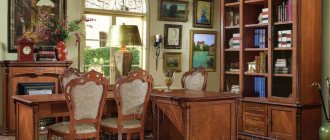
We decide on the place in the apartment where we plan to place the future structure - as a rule, this is the kitchen, dining area and living room area. If you have a modest square footage, you should opt for space-saving stands and shelves that are mounted on the wall, and if you have enough space, you can, for example, make a wooden wine cabinet with your own hands.
Such designs can be varied and allow you to correctly position the bottles in a home or city apartment.
TOP manufacturers of wine shelves
The market of the Russian Federation includes both domestic and foreign brands that supply shelves for wine. The most popular products of the companies are:
- IP Industry (Italy);
- Liebherr (Switzerland);
- Dometic (Sweden);
- VINKASE LLC;
- Vestfrost (Türkiye).
A branded wine rack for the kitchen is an expensive purchase, but it is worth the expense, because world-famous companies offer not only a unique original design, but also quality for many years.