All animals need their own personal living space, so it is imperative to take care of arranging their own corner. And your favorite Barsik or Ryzhik is no exception here either! We have collected 11 great ways to make a cat house with your own hands from available materials. Watch and get inspired!
We live out of suitcases
Of course, this formulation does not sound very good, but as far as building a house for a cat is concerned, it is quite possible.
Moreover, if you do a little tinkering, you can place not one, but even two cats here. In its structure, such a design will resemble a children's bunk bed.
To create it, you need to divide an old suitcase into two halves and insert supports between them (their role can easily be played by the legs from an old stool). Next, we set up a warm bed. Voila, the “apartments” are ready!
"Lyuli-Luli"
Many young mothers know how much cats love to huddle in strollers and cribs. And this is not without reason - because it is very warm and cozy there. In addition, our four-legged meowing friends always feel positive energy.
If your child is already older, use a stroller basket or crib to create a cat house. Believe me, your pet will definitely like these apartments!
Now it will be possible to designate the new “owner” of the home with a unique decor, for example, embroidering a nickname or other identification mark on the hood.
Cardboard box house
It's no secret that all cats love to hide in boxes. You can make an excellent home for your pet using cardboard packaging from appliances.
Fold the house according to the diagram, using tape and odorless glue to attach the parts. Now you need to cut out the doors, and, if desired, the windows. Inside, place any insulating material and a pillow or blanket on the bottom (the cat should be warm and cozy).
The top of the house can be decorated with carpet, wallpaper, fabric or any other material. But as practice shows, people with mustaches like carpeting much more.
Criteria that a cat house must meet
When creating housing for a mustachioed pet, the following requirements must be taken into account:
- the house should be installed at a height that is comfortable for the animal to be in;
- the dimensions of the home must correspond to the parameters of the cat - it must sit, stand and lie freely, stretched out;
- the structure of the building must be strong and stable;
- There should be no strong or unpleasant odors.
Compliance with these simple conditions will make your pet’s stay in the house comfortable and safe.
Old clothes come in handy too
If you have a couple of unnecessary T-shirts lying around in your wardrobe, make a house out of them for your cat. For work you will also need: a sheet of cardboard or plywood, thick wire (you can take two wire hangers), two T-shirts, tape.
Making such a house is very simple! Bend two arcs from the wire and fasten them with tape crosswise at the top point. Cover the edges of a square of cardboard with tape, cover it with a T-shirt and make holes in the corners. Screw the edges of the arcs to the cardboard base. The frame is ready.
Take a second T-shirt and place it over the structure, but make sure the fabric fits snugly. The sleeves can be tucked under the bottom, pinned or sewn on, and the neckline will act as the entrance to the house. To make the cat feel softer, you can put a small pillow on the bottom.
We take old things as a basis
Surely in every apartment there are clothes that you would hate to throw away, but they definitely won’t be worn. First, you need to make an audit of your closet and boldly begin creating a new house for your cat.
T-shirt
To form a kind of tent you will need:
- Decent sized T-shirt;
- pins;
- two wire hangers;
- pliers;
- a small piece of the wire itself;
- tape and a sheet of cardboard 40x40 cm.
To make a house out of a T-shirt for a cat with your own hands you will need:
- Remove the hooks from the hangers and give the items the appearance of an arc.
- If a sheet of cardboard does not look aesthetically pleasing, it can be improved by covering it with tape.
Comment! Additional decoration of the cardboard with tape will give the base of the cat house greater strength.
- Make small holes in the corners of the cardboard sheet to insert the wire frame for the T-shirt. Leave a sufficient distance from the edge so that the structure of the house does not become unusable ahead of time.
- Connect the hangers with your own hands perpendicular to each other and carefully fix them at the point of intersection of the arcs.
- Place the resulting T-shirt frame on a cardboard base so that the ends of the wire coincide with the prepared holes.
- Bend the edges of the wire using pliers and secure with tape.
- Check the geometry of the future T-shirt house: place the structure on the floor and make sure the frame is correctly positioned and the base is level. If it deviates to one side, bend the wire more carefully.
Pull the T-shirt onto the frame so that the collar forms an entrance. Sleeves and other excess clothing are wrapped under cardboard and secured with pins or thread. It is important to make a high-quality stretch of the T-shirt so that it does not sag.
It is advisable to decorate the interior of the house with soft material or a compact pillow so that your cat can rest comfortably in it.
Sweater or jeans
If your cat prefers to be in plain sight, you can make a simple bed with your own hands from an unnecessary sweater. The main steps for registration are as follows:
- Take a used item and fill the internal volume with a small soft pillow.
- The bottom of the sweater is sewn with large stitches.
- The top (sleeves and neckline) are rolled up and wrapped around the pillow.
- The folded edges should also be sewn.
Just four steps – and a comfortable do-it-yourself bed for your domestic cat is ready. The following video will help you verify the simplicity of the process:
Advice! When using clothes to decorate a house or bed, choose items made from natural fabrics. A cat will not be happy with material that can accumulate a static charge.
You can also simply make a non-trivial couch out of jeans. Your actions:
- Sew up the bottom of the trousers.
- Fill the space with unnecessary knitwear. You shouldn’t compact things too hard; jeans should bend easily.
- Cover the top of the trousers with jersey and sew them up.
- Give the structure the shape of a person sitting in the lotus position.
This idea will help out cat owners who love to be held in their owner’s arms; it will also suit small dogs.
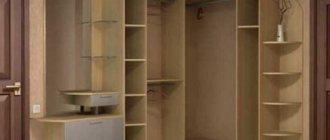
"Built-in" cat house
If you have an old bedside table, you can set up a house for your pet right in it. Get rid of unnecessary drawers or shelves, if any, make a small curtain that will add privacy to the cat.
The inner walls of the cabinet can be upholstered with soft fabric, and a warm bed made of a pillow can be arranged on the floor. If the bedside table is a closed type, then simply cut out an entrance in one of the walls.
House made of newspaper tubes
Don’t rush to recycle old newspapers – you can also use them to build a beautiful house for a cat. In addition to newspapers, you will need knitting needles or wire, glue and scissors.
First you need to form a lot of tubes: take a sheet of newspaper, coat one edge with glue and roll it into a tight tube. When the main building material is ready, start construction. Form a “sun” from knitting needles or wire, fastening the ends together, and braid it with tubes. The result was a foundation.
Bend the wire up and continue braiding, not forgetting to leave a gap for the entrance. The house should be large enough for the pet - take any object similar in size to the future “tenant” (for example, a ball) and place it in the middle of the structure. Finally, to be safe, open the structure with varnish.
General recommendations
First of all, decide on the materials. Many people think that only those who are greedy for money for finished products undertake to make a cat house with their own hands. Actually this is not true. Why does a person want to make a homemade house?
- The issue of saving, of course, is far from the last in matters of handmade cat houses. How much does a good house for a cat cost? About 12-20 thousand rubles. The amount is quite large, and not everyone can afford it. Of course, there are cheap goods on sale, mostly made by Chinese craftsmen. But most owners do not want to risk the health of their pet.
- A question of original design. Some people want to have a unique home interior item, others care about the size of the cat house, others want to make the animal’s palace safer and stronger.
- The love of handicrafts is a great reason to make something for your pet. We are so rarely able to work with our hands with pleasure that some are specifically looking for an excuse, and benefiting our beloved Murka is not the worst thing to do (otherwise you might end up with tire swans).
Another option on how to make a house for a cat:
Useful tips
If you doubt your abilities, then first try making a very small house out of cardboard to evaluate the convenience and stability of the structure. Naturally, the miniature can simply be glued together - it is not necessary to make it soft and very beautiful.
Be sure to choose a place for your furry’s future home. You may have to reconsider the design somewhat and adapt the pattern to suit yourself - as you know, cramped apartments are quite common.
Try not to use small elements that the cat can tear off or chew off. My daughter thinks the cat house would look better if it was decorated with beads and buttons, but unfortunately my mom's cat isn't very smart.
House-tent
Such a home for a furry pet is made of cardboard, fabric and foam rubber. To do this, you need to draw a complete blank of the future house on cardboard, and then cut out all the details. Next, we apply the templates to the fabric and foam rubber and cut them out.
Sew each detail one by one, creating several layers: cardboard-foam rubber-fabric. When all the parts are ready, assemble them into a single structure.
To make your cat feel warm and cozy, you can sew a soft pillow separately and place it on the bottom of the new house.
What kind of house can you make with your own hands?
There are many types of housing for pets. When choosing a model, you should take into account the character and habits of the animal. Cats love privacy, and cats need an elevated vantage point to be able to look around their property.
Cardboard house
This type is easy to manufacture. An ordinary cardboard box is suitable for its construction. The disadvantage of such a home is its fragility.
House-bed
This type has not only a cozy mattress, but also soft sides and a roof. The animal can hide there and at the same time observe what is happening around. This option is suitable for cats who are big lovers of privacy. Pet owners will like this option, since such a pet corner takes up little space in the room.
House-booth
This is an ordinary small house with a roof. Often it is additionally equipped with a scratching post and an observation post on it. It can be single-tiered or double-tiered. It is an excellent option for cats.
Built-in house
It performs several functions. For example, from the outside it looks like a bedside table, but inside there is a home for a mustachioed pet. A very convenient option for a small room or apartment.
Game complex
Includes everything necessary for pets' rest and leisure: a place to sleep, a scratching post, a hanging toy, tunnels, hammocks. An excellent corner for a cat with kittens or a large group of pets. The only drawback for the owners is that it takes up a lot of space.
Technology comes to the rescue
Is your TV or monitor hopelessly broken? It's no problem! Now, instead of boring TV shows and dull websites, it will “show” only your cat!
Clean the inside of the TV from parts, lay a soft rug - and the cat will be happy to spend all its free time here.
The interior walls of the home can be decorated with fabric, and the exterior can be painted and depicted with cat identification marks.
Sew a hammock
Make it easier than ever! This original cat house can be hung from the legs of a chair, on a wooden support, or using hangers.
The simplest hammock does not require any special circuits. Cut two identical rectangles from fabric and sew them together. You can form “passages” on the sides, through which you can then thread holding ropes. You can also separately sew loops of fabric to the corners, from which you will hang the structure.
Scratching post options
In addition to the most common scratching posts for cats, you can make simple but original analogues. So, it is permissible to make a scratching post in the form of a picture. To do this you will need a simple piece of plywood (rectangular) and carpet.
When there is a lot of space, you can afford to build a large house
The carpet is fixed to the board using nails and a hammer. The corners of the fabric should be hidden on the back. They even attach a mini hanger. Then the finished painting is hung on the wall in the corridor or room. It should hang at the height of the pet. This refers to the cat's height at the withers, and not from the floor to the tips of his ears.
VIDEO: How to build a house for a cat with your own hands?
Cat's house
Do it yourself
Making a house from plywood
You can make a beautiful house for a cat with your own hands and from construction scraps - plywood, thin boards, etc. You will also need beams that will act as supports for the vertical structure, and fabric for upholstery.
In order for the house to turn out just right, first draw a diagram with all the calculations on cardboard and only then transfer them to plywood.
The pillars can be wrapped with any twisted rope (jute, hemp, etc.), and for shelves and houses - use carpet. The main thing is not to use fabrics with long pile, as over time they will accumulate dust, wool and various small debris.
Instructions for making a house for two cats
The family has two cats. The older cat is the aggressor and the younger one is more active. Therefore, the design was designed so that the youngest could hide on the highest platform, but the elder, due to his weight, could not get there. They decided to place the house high, since both cats prefer heights. They made it larger in size so that both individuals could be there at the same time.
Source material and results of labor
For this design, thick furniture plywood (12 mm) measuring 75*50 cm, timber posts 50*70 (4.2 m), jute-based carpet - 1*2.5 meters, 20 meters of rope were purchased. Fasteners - corners. For the house - 15 * 20 mm, for attaching platforms - 40 * 45 mm, 55 * 20 and 35 * 40 - for insurance, and a couple of large ones - for attaching to the wall.
We prepare the platforms and attach them to the poles
There are three pillars in the chosen design: one is 220 cm, the second is 120 cm and the third is 80 cm. They will be attached to a base made of plywood sheet. The pillars should be placed on the base so that the longest one is closest to the wall. To avoid confusion, when marking on a sheet of paper, using a ruler and pencil, we first drew a stencil on paper, on which the location of the pillars relative to each other was marked. The markings for installing the pillars were transferred from the finished layout. They were fastened with long nails through the base (4 pieces each), drilling holes of slightly smaller diameter in the plywood. Then they were secured on the outside with corners 55*20 for the large post and 35*40 for the smaller ones.
Markup is the most important thing
Using the same template, the location of the pillars was marked on the platforms, then holes were cut out for them according to the markings. To do this, we took a 12 mm feather drill and drilled holes in the corners marked for installing squares into which the jigsaw blade fits perfectly. From experience: it is better to make the slots for the posts a millimeter or two larger. The platforms are still held in place by the corners, and if the slot is made too small, it will take a long time to refine it with a file or sandpaper.
We fasten the prepared platforms
Before installing the platform, we “try it on”, adjusting the slots if necessary. Having placed the platform horizontally (using a building level) at the required level, mark with a pencil where the platform stands. Using this marking, we then install the corners, so that we make clear marks on all four sides. When all the platforms are installed normally, we cover them with carpet.
Assembling the house body
Two pieces of plywood 75*50 cm were cut into 4 rectangles. They made the roof, floor and two side walls. When making one of the shelves, there was a piece of plywood left with a semicircular hole in the side. It was decided to make it an “entrance”, and the back wall was cut out from one of the pieces. All that remains is to assemble the house, which is not difficult at all. Small metal corners were used, which were fastened with short self-tapping screws.
Preparing a “nest” for a cat
Before covering the house with a roof, it was upholstered from the inside, thus covering the fasteners and increasing comfort. Working inside the case is not so convenient, but you can manage. The roof was covered on both sides, after which it was secured using the same corners, but placed on the outside. Not very pretty, but not deadly. The finished house was secured in its designated place. The corners came to the rescue again, but larger ones - 35*40 mm.
We wrap the pillars
The last stage is to wrap the poles, making a scratching post. The easiest way to secure a rope to a pole is with staples. A few staples and you're done. Next, tightly pressing one turn to the other, we wrap the pillars in a spiral. We reach the obstacle, secure the rope with brackets again and continue on the next section.
As it turns out, the rope needs to be hammered...
From experience, I must say that no matter how hard we tried, the turns of the rope did not fit one to the other very tightly; over time, they “got soft” and began to “move” up/down a little. After working through the mistakes, we found a way: after laying several turns, we knock them out with a hammer. Everything is simple, but if I had known in advance... That's all, we made a house for the cat with our own hands. It took about 6 hours.
A similar design is discussed in the video below.
Cozy fabric cat house
A comfortable “nest” for your cat can also be made from fabric and foam rubber. First, draw a template of a wall with a roof on paper. Cut out 8 such blanks from fabric (two for each wall). Four similar blanks need to be cut out of foam rubber, only the size should be a couple of centimeters smaller. Separately prepare the bottom in the same way.
Next, sew each wall from two fabric and one foam (inside) blanks. Don't forget to cut and sew an entrance hole on one edge. Now you can completely sew the structure together, including the bottom. Place a soft mat on the bottom and launch your pet!
DIY cat house - photos and ideas
We hope that our article helped you decide what kind of cat house you will make. Don't forget to check out our photo gallery! Here are many successful examples of how folk “homemade crafts” build cozy homes for their pets.