Sliding wardrobes are increasingly appearing in modern apartments to replace traditional wardrobes. However, the advantages of such cabinets in the form of a convenient storage system and compact size do not exclude the disadvantages in the form of frequently observed problems with door adjustment. Doors in closets can bend, pop out of their tracks, squeak, and have other sliding problems. Most of these problems are quite capable of being solved by the owner of the cabinet himself, having a basic understanding of the functioning of the structure. Today we will talk about how to deal with ordinary faults in wardrobe doors and successfully adjust them.
Adjusting wardrobe doors
The most common breakdowns and remedies for them
In order to structure possible cabinet defects, it is necessary to decide on its design. Repair of each category has its own specifics.
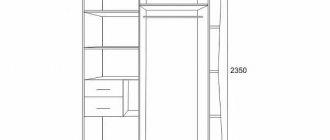
A standard wardrobe consists of:
- Frame (side walls or so-called “backing” made of chipboard 10 cm wide, if the cabinet is not built-in, but free-standing, the system is mounted inside a regular cabinet with a roof and plinth);
- Fillings (shelves made of chipboard, hanging rods, pantographs, hooks, baskets, retractable hangers, microlift, drawers, etc.).
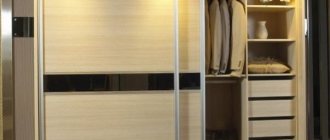
Photo: option for filling a sliding wardrobe
Repair of the frame consists of either a complete replacement of parts, or a partial one. As a rule, repairs are required if the edge has moved away from the material, cracks or abrasions have appeared. Partial replacement involves the difficulty of finding material that matches what is already available.
This is why it is recommended:
- Dismantle the old structure, having previously measured every detail;
- purchase the required amount of chipboard and PVC edges;
- use a jigsaw and a grinder to make parts;
- use the hot processing method to glue parts and edges (this is not necessary on invisible parts);
- use a screwdriver to assemble the structure.
Breakdowns of sliding doors are associated with the failure of the sliding system. The cause of wear may be a long period of use.
To select remedies for a defect, it is necessary to accurately determine the cause:
- Replacing rollers;
- Door adjustment;
- Replacement of the profile if it is severely scratched or damaged;
- Replacing guides, etc.
In some cases, only a thorough cleaning of the system is required.
Regarding the repair of the internal reorganization of the product, we can advise the following:
- Dismantle the failed part;
- Take its dimensions;
- Manufacture and install new elements.
In some cases, a complete update of the contents is required (the number or nature of stored items has increased), then you should first decide on a new configuration and carefully consider the location of new shelves and drawers.
IMPORTANT! When remodeling the inside of the cabinet, you should take into account the dimensions of the retractable structures - they should not be located at the door joints, otherwise they will lose their functionality!
Working principle of the stopper
How does a stopper manage to fix a sliding door in the desired position? Everything is very simple! You see, the photo on the left shows what the stopper looks like installed in the lower guide rail. Due to their spring properties, the upper curved plates rest against the upper part of the rail track. But in the middle of the stopper, a gap forms between the curved plates. The door roller moves inside the bottom rail track, runs over the curved stopper plate and falls into the gap between the plates. As a result of this, the roller is blocked, and when closing the door is fixed in the place we need.
To open a compartment door, you just need to apply a little extra force in the direction you want to move it. As a result, the roller will move out of the gap between the stopper plates, and the door will roll freely along the lower rail. As you can see, there is nothing complicated here.
So the study of the topic dedicated to the independent production of wardrobes has ended. Friends, I sincerely hope that this series of publications has helped you thoroughly understand all the production issues, and you don’t have any questions.? Maybe there are some unsaid moments left? If yes, then write to us, we will definitely prepare and add to this section the information you are interested in on making sliding wardrobes with your own hands. Stay with us! After all, everything we do is for you!
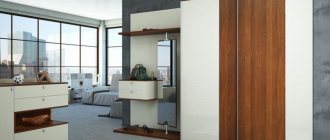
In a spacious or small apartment there are always wardrobes, cupboards, and bedside tables that provide places for organizing and securely storing clothes, dishes, books, and other necessary things behind a closed facade. This is why cabinet doors perform one of the most important structural functions.
Today it is proposed to use various methods of fastening traditional swing doors, as well as sliding ones, which are installed mainly in sliding wardrobes. You can install any doors into a closet with your own hands if you familiarize yourself with the mechanisms of their operation and follow detailed instructions.
DIY repairs or professional help?
Self-repair is justified only if:
- The damage is minor or only parts need to be adjusted;
- The repair warranty expired a long time ago;
- The owner has the appropriate skills, tools and place to carry out the work.
In all other cases, it is better to entrust repairs to professionals. Thanks to specialized tools and free access to materials, restoration of the product will take little time. The cost of the service usually depends on the extent of the repair. At the same time, manufacturing defects and adjustments are carried out free of charge within the warranty!
Repair of sliding wardrobe guides
Over time, wardrobe parts are subject to serious wear and tear. Emerging defects can impede not only the optimal operation of the mechanism, but also distort the appearance of the doors - distortions, sagging, loose closures give the cabinet an untidy appearance.
In some cases, adjusting the rollers or redecorating the guides by tightening the screws does not help the situation, then it is necessary:
- Purchase a new set of guides (top and bottom);
- If the cabinet has a non-standard width, trim the elements;
- Dismantle the old system (remove the doors, unscrew the old guides);
- Decide on drilling locations for new components;
- Drill holes, covering the old ones with putty;
- Tightly screw the guides on which the doors are installed;
- Adjust the height and direction of the wheels, check how securely the stoppers are fastened.
Eliminating contamination of grooves in guides
Over time, dust, wool, lumps of dirt, and threads accumulate in the grooves of the lower guides along which the doors “run,” preventing the rollers from sliding smoothly.
You can fix this problem as follows:
- Using a hook or screwdriver, remove the largest accumulations;
- Remove residues using a vacuum cleaner.
To prevent large blockages, it is recommended to carry out preventive cleaning at least once a month.
Incorrect installation of guides
There are cases when, almost on the second day after installing the wardrobe, it is discovered that due to incorrectly installed guides, the doors do not close, or the curvature of the structure is revealed.
In this case, it is recommended to remove the system, unscrew the elements and experimentally determine the exact position at which the doors will move with maximum ease. At the same time, it is better not to make new holes close to existing ones - the material may crumble. Old holes can later be neutralized with putty to match the color of the wood.
Guides for sliding doors: fastening elements
Before proceeding directly to the installation of the sliding structure, it is necessary to prepare the doorway. First of all, the slopes must be leveled using metal corners and gypsum plaster, and then the dried corners can be puttied. Next, the doorway is decorated with wallpaper or paint, but a decorative door frame looks best.
The door frame can be made of different materials, but most often it is made from MDF. Installing such a structure does not take much time and anyone can handle it. The door frame is assembled in a vertical position. Elements that are too long are filed down and adjusted to size. The assembled box must be inserted into the doorway, and secured with wooden spacers and pegs, leveled.
Step-by-step instructions for attaching a guide for sliding doors:
- Give the wooden beam the required length. The guide must match the size of the beam. The cross-section of this wooden element can be 50X50. The wooden beam should be twice as long as the top of the doorway.
- A guide is attached to the underside of the beam, which is held in place with self-tapping screws.
- Now the structure needs to be hung over the opening. It is leveled so that its middle is at the edge of the opening on the side where the door will open.
The guide should be installed not in the opening, but above it, then the door can move freely. The door leaf will be raised a few millimeters above the floor.
All modern options assume the location of such a structure only in the upper part of the wall, however, for older options, the rail guide system must also be placed on the floor near the doorway.
Installing the guides yourself is quite difficult. It is advisable to have an assistant who can hold the structure in the desired position while you fasten it.
Doors don't close tightly
The main reason that the doors do not fit tightly to the frame is that the stopper is not clearly fixed on the lower guides. The stopper is located in a groove near the edge of the guide, where the roller wheel slips, thanks to which the door is fixed. Light tapping with the tool will help you adjust the stopper to the right place. You can use a screwdriver to tighten loose screws. The main thing is to make sure that the door does not start to roll back. The appearance of a creaking sound while the door is moving is a signal that the rollers have begun to become dirty. Necessary:
- Clean the guides from dust and dirt;
- Lubricate the moving parts of the roller with special oil (apply a small amount to the roller axis);
- Roll the door several times to distribute the oil evenly.
How does a wardrobe door positioner work?
Door stops can be bottom or top, but they work on the same principle. They have recesses. The lower roller wheel rolls along the guide, runs over a metal spring, falls into the recess and is fixed. The upper roller wheel is parked in the recess of the plastic retainer, the working part of which is U-shaped. The top stop itself is glued to the inner side wall of the top profile.
To put the door on the stop, you need to apply little force. Even a child can handle this without any problems. On the lower fittings of the door you need to roll over the spring, on the upper - through the riser.
If the roller fails
Replacing the roller, if during operation it has changed its shape or worn out, causing the door to sag and slide, is quite easy to do.
To do this you need:
- Purchase a set of new videos;
- Remove the sliding doors from the guides (each roller has a special latch);
- Unscrew the old rollers and thoroughly clean the mounting area;
- Using screws, install a new set and return the doors to their place.
It is necessary to “run in” the doors in order to, if necessary, adjust the height of each wheel.
Adjustment nuances depending on the type of breakdown
A sliding wardrobe is a significant element of any interior. It is chosen for its smooth movement and silent door opening. The products are practical to use and can accommodate many different things. There shouldn't be any strange sounds when opening. The mechanism must be inspected regularly to avoid complex malfunctions and possible deformation.
Styles and colors of beautiful sliding wardrobes, popular designs
There are four main types of breakdowns:
- distortion of the structure;
- low closing density;
- unnecessary sounds when moving the doors;
- partial loss of doors.
With prolonged use, backlash may occur and the smooth operation of the mechanism may deteriorate, this happens when the doors are skewed or the guides are broken.
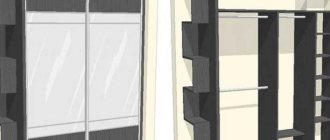
Installation of compartment doors with top suspension
The device of the lower support system of compartment doors
Skewed structure
The problem appears when the door leaves sag. A gap occurs in the upper and sometimes lower areas of the structure, near the side edge. Deformation occurs if the screw responsible for the adjustment is unscrewed. Thanks to it, the side edge is fixed in the correct position. Breakage is caused by slight vibration that occurs when the door is regularly opened.
The adjustment occurs as follows:
- On the bottom side edges there is a bracket with several screws. If they are located under the tape, it is advisable to carefully peel it off.
- Using a hexagon, you need to unscrew the slot of the lower fastening element, which provides adjustment to the structure.
- By turning the tool in different directions, you need to monitor the result. The side edge of the piece of furniture will rise or fall. A full turn will ensure a displacement of the structure by 1 mm.
Such manipulations will help level the cabinet and eliminate the gap. After closing the door, you need to make sure that the end and side posts are located strictly opposite each other.
The permissible gap between the guides and the doors is 6 mm.
The cause of the door misalignment may be a problem with the adjusting screws.
The optimal gap is 6 mm between the bottom sash and the guide
To adjust, you need to rotate the lower screw located on the vertical aluminum profile at the end
Low closing density
Closed doors may not touch each other tightly. This defect occurs when the floor is sloping. It may be insignificant, so there is no way to evaluate it visually. In order for the sashes to return to their normal position, the locking stop needs to be adjusted.
How to create a wardrobe design on your own, stages and nuances of work
Adjustment of wardrobe doors must be performed in a certain sequence:
- It is recommended to raise all the doors to the same level so that they are pressed against the side edges of the furniture.
- Then you need to make marks in the places where the central part of the video will fall. It is important to consider the orientation and position of the canvases.
- Move the canvas to the side. Using a screwdriver, move the stopper in the direction in which its center coincides with the marks left.
When the stopper is positioned as it should, the doors, pressed against the wheels, will lock in the correct position. They will fit tightly to the side edge of the piece of furniture. If there are two or more doors in the structure, they will displace the stoppers, then you will have to adjust it on all doors. The whole process is quite simple and does not require professional skills.
Installing the stopper
With proper installation of the stopper, you can achieve a tight fit of the doors
Extraneous sounds when the doors move
There should be no sharp sounds when opening or closing the cabinet. Rail-mounted mechanisms move smoothly and do not make unnecessary noise. An unpleasant and sometimes very loud grinding noise means that the fixation of structural parts has become loose. Most often, the sound comes from rollers that move from the guides. In the event of such a breakdown, it is impossible to expand the upper rails; this will entail a malfunction of the entire system. To fix the problem, you need to reconfigure the roller mechanism, which ensures smooth movement of the blades. To do this, you need to pull out the doors and tighten the fastening firmly. The additional weight installed on each side of the rollers must be equal.
Options for using a white wardrobe in the interior of different rooms
If there is no weight or the roller is skewed, extraneous sounds will occur. If you do not pay attention to the defect, the deformation will affect the entire mechanism. The sliding system will fail and will require urgent replacement. Even with minor noise and vibration, you need to conduct a full inspection of the device and eliminate the problem.
If the door rises and moves to the side, then the roller may encounter some kind of obstacle while moving.
If extraneous sounds occur when opening the cabinet, check the tightness of the buffer tape
Partial door falling out
From time to time, the blades may partially jump out of the guides. Before adjusting them, it is important to understand where the door falls out. The most common reason is that the runners are dirty, which will cause the roller to move in a different direction.
When cleaning, you should always clean the cabinet guides from small debris and dust.
Regular cleaning will help prevent dirt from accumulating. You also need to watch the videos. Debris may wrap around them, and then these parts will become the source of failure. To change the fittings, you will have to remove the doors and install a new mechanism. The procedure is simple, but finding suitable parts can be quite difficult.
Sections of a piece of furniture should not be too loaded, otherwise the frame may become deformed and slide off the guides. The absence of a stopper will also cause the element to fall out. To prevent this, you need to understand how to properly adjust wardrobe doors.
The work to eliminate the defect, although it requires some effort, will not take much time. Anyone can repair doors; the main thing is to first study the nuances of the process. If the work is done correctly, the repaired cabinet will serve you well for many years.
This is what a worn roller looks like compared to a new one.
Stages of installing wardrobe doors
Replacement of mirrors and glass in doors
If the most fragile part of the door is too damaged or broken during operation, or there is a desire to replace an out-of-fashion pattern, its replacement is carried out in the following way:
- The doors are removed and untwisted;
- The dimensions of the element being replaced are taken, and the hole markings are also measured;
- You can order a mirror, colored glass or with photo printing at a factory or glass workshop. If the equipment necessary for drilling holes is not available, this service can be ordered for an additional fee;
- Often it is necessary to replace the rubber gasket in the profile and partition strips. It is designed to ensure that the glass element fits tightly into the product and does not dangle when the door moves;
- The finished glass or mirror is mounted into the door with screws, and it is carefully checked that it is securely fastened.
Reconstruction of filling and frame
If the wardrobe was installed ten years ago, and the apartment has undergone many changes during this time, the furniture product may not fit into the updated interior due to the shade of the wood or non-functional content.
The filling of most modern cabinets is made of white chipboard due to its low cost. However, it is still better to choose an edge made of PVC rather than paper. It is much stronger and more reliable in operation.
It is necessary to carefully consider all the distances - between sections, the height of mezzanines and shelves, the depth of the cabinet.
ATTENTION! When marking the cabinet, you need to remember that the thickness of the chipboard can be 16 or 18 mm! These values are very important!
Replacement of all chipboard parts is carried out as follows:
- Old elements are being dismantled;
- They are measured. Or a plan of new elements for the cabinet is drawn up;
- The chipboard is cut and the parts are glued with an edge on the visible side;
- With the help of a screwdriver, confirmations and screws, all elements are assembled into a single structure.
Closers for sliding doors
A closet door closer is a system for smooth, automatic and comfortable use of doors and includes stoppers, limiters, latches and other elements to ensure convenience and aesthetics. Some cabinet models may require two closers. This is due to the need to close doors in two directions. The adapter that controls the operation of the system is mounted in the upper track, and the closer itself is mounted in the upper part of the doors.
In addition, another important role that the automatic system takes control of is maintaining security. The presence of a door closer minimizes the likelihood of injury from sudden closing of doors. In addition to the safety of the owners and their household members, the body of the structure itself is also protected from gradual loosening. This becomes possible thanks to the shock-absorbing effect created by the auto-closer system.
The choice of system is influenced by the following factors:
- dimensions and weight of the structure;
- door opening direction;
- system material - steel or aluminum.
Sliding closet door latches and stops allow you to secure closet doors so that small children or animals cannot reach the items inside. Such devices are in wide demand. When choosing the right element, it is important to pay attention to the quality of the device. In this case, any part will serve for a long time and reliably.
Drawer repair
Most often, replacing drawers is due to the fact that the guide system fails. To do this, you need to remove the drawer, unscrew the guides and replace them with new ones. This is done very simply, all you need is a screwdriver and a new system purchased in advance.
ADVICE! Roller guides quickly fail due to the fragility of the mechanism. It is better to choose ball guides as a replacement. In hardware stores you can now also find guides with a shock-absorbing effect, which ensures smooth closing.
To strengthen the box and change its appearance, you can also:
- Replace the bottom of the drawer with either a more durable chipboard base or upgrade the fiberboard;
- In place of the old handle, screw a more modern version.
Replacing doors
A complete replacement of sliding doors makes sense if the design has completely fallen into disrepair or does not correspond to modern design trends.
For a global rework you need:
- Decide on a design. Choose a more modern material - glossy and mirror surfaces visually increase the space; you can use a combined option. You can select a design using a large number of photographs on the Internet;
- decide on the sizes. If the cabinet has a non-standard size, the guides and horizontal profile must be trimmed;
- purchase or order from the workshop all the necessary components and equip the place;
- prepare all the details. Carry out cutting and drilling;
- assemble the structure and install it in place of the old one.
Installing a sliding door leaf with your own hands: step-by-step instructions
The most important and crucial step is the installation of the canvas itself. Rollers are attached to it, by which the door must be hung on the guide. However, if the door dimensions were chosen incorrectly, the design will look unaesthetic.
If you purchased a piece of wood larger than you need, it can be trimmed. The main thing is to do it carefully, using the correct dimensions, and decorate the cut areas so that they look aesthetically pleasing.
In order not to make a mistake when buying a canvas, you need to measure the parameters of the doorway in advance. In the case of a sliding system, the door should be several cm wider than the doorway. Also, its height is measured not from the beginning of the upper door slope, but from the inside of the guide system. In this case, you must take into account that the canvas should not touch the floor, otherwise it will not be able to move freely.
How to place the door leaf on the guides:
- Holes for rollers are drilled in the upper part of the canvas on different sides. In order to do this kind of work accurately, you will have to use a drill attachment called a “feather”. With its help you can make perfectly round holes of the desired size.
- In the place where the holes are drilled, the plates are attached. Rollers inserted into the guide rails must be placed in these holes. The rollers are adjusted to the required height.
- The canvas is leveled and placed under the guides. In this case, the rollers should be parallel to each other and move freely along the guide.
At first glance it may seem that installing a door leaf is very simple, but this is not so. If you make a mistake with the dimensions of the door or install the rollers at the wrong distance, then big problems can arise with the design.
To avoid them, you need to carefully measure the doorway and choose the right materials. You also need to understand: in order to install sliding doors, you should make sure that you have all the necessary tools in advance.
When the door is installed, foam is poured between the walls and the door frame. This substance should not remain on the door rollers, otherwise they will stop moving.
Renewing cladding using self-adhesive film
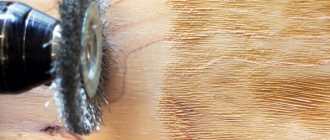
Cosmetic updating of the frame can be done using the popular self-adhesive film, the color range of which is very widely represented in the furniture industry.
To do this you need:
- Sand the chipboard frame, removing the top layer of film;
- Remove dust and remaining shavings with a slightly damp cloth;
- carefully adjust the size of the film to the size of the part;
- remove the protective film and, starting from the top edge, pressing tightly against the chipboard, glue it to the frame.
Useful tips
- When planning a reconstruction or repair of a wardrobe, it is important to remember that the more correctly the work is done, the longer the wardrobe will last.
- Careful planning of updated parts will extend the life of the product for many years.
- By making your stocking shelves adjustable, you'll create a practical closet for years to come. Holes in 5 cm vertical increments will help you rearrange the shelves to a convenient height.
- Mirror doors will last much longer if the reverse side is covered with a special protective film.
- If there are children in the apartment who, while playing, can touch the glass door, it is better to make more dividing strips. Due to this, the shock absorption of the door will increase, and damaged elements will be easier to replace than the entire structure.
Order a sliding system
You can order a sliding system in your city at any store that sells furniture fittings and furniture fasteners. But I would advise you to find at least five such stores and find out the cost in each, after giving them the dimensions of your opening. Thus, you will choose and purchase the system at the lowest cost.
You can use our tips for choosing a sliding system for a sliding wardrobe.
My order turned out like this:
- System – Lika (Type – open)
- Opening 2318-1318
- Number of doors – 2 pcs.
- Profile color – Wenge
- Filling – Mirror
Here they recommended to me a company that specializes in cutting and sandblasting mirrors, as well as assembling doors for wardrobes.
Their assembly services amounted to 12 USD. for both doors. Since I don’t have free space for assembly in my apartment, this suited me, and after sandblasting, they immediately sealed the back wall with oracal and assembled the doors.
There is another plus to this. When assembled, compartment doors are much easier to transport, and the likelihood of breaking mirrors is reduced to zero.