With the help of a chandelier and other lamps, as a central link in the interior, the intended style direction is created in the room. It is difficult to find a ready-made suitable option, so it is worth making an effort and making a chandelier with your own hands at home.
In addition, such products are popular, individual and represent the owner as a creative and skillful person. And for exciting work, the material lying at hand is suitable.
Choosing what and how to make a chandelier from
When planning a craft, the main thing is to imagine or draw what it looks like. When choosing a material, take into account the style of the room and harmonious combination with other objects. And relying on your own imagination, you can create an original product from unexpected things:
- made of glass or wood,
- made of plastic or paper,
- from cardboard or disks,
- from bottles or spoons.
The technique of work is also different. Some people restore and decorate old “grandmother’s” chandeliers, while others like to make and decorate them themselves. This is achieved using: embossing, origami or carving.
Some people prefer knitted or woven lampshades using the macrame technique, decorated with appliqué or beads.
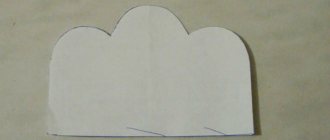
Beautiful DIY night light with bright stars
It’s easy to make an LED night light from a glass jar and decorated in the form of large stars, and you can choose any decoration. Such a children's lighting device consists of the container itself, LED lamps, cardboard decoration, and for its manufacture a certain sequence should be followed:
- decoration for a jar in the form of stars will require gluing a template from a cardboard base with cut out stars onto the jar; for this, the cardboard is cut according to the size of the container;
- a blank for the lining is cut out of similar sizes from yellow corrugated paper, which allows you to give the stars color without reducing the ability of the night light to transmit the light of the bulbs;
- silhouettes of several large stars (5-7 pieces) are applied to the workpiece, they must be carefully cut out; a stationery knife with a sharp blade is perfect for this, which easily cuts through the material;
- using glue, it is not necessary to take a heat-resistant adhesive composition, a cardboard blank with cut out stars is glued to the jar, and the glue should not get into the space not covered by the paper;
- It is best if dark blue cardboard is chosen for the craft, and soft yellow corrugated paper can be used for the lining; the stars can be decorated with a small amount of glitter;
- after both paper layers are securely fastened, the jar needs to be turned upside down, and it can also be decorated with a cardboard circle with one or two stars lined with yellow corrugation;
- The container is closed with a lid with a hole, a cord from an LED lamp is threaded through it, you can use strip lights, they will give more light, or use several economical light bulbs.
The lamp is installed on a bedside table, on a windowsill or on a desktop and perfectly illuminates the room in the evening. This master class can also be used to make night lights from other containers, using fabric or paper decor, creating unusual crafts.
Any room needs not only basic light sources, but also additional lighting that emphasizes home comfort. Using simple recommendations, you can make a cool lamp that imitates the night sky or the underwater world, playing puzzles or using construction sets.
Draw and color
Prepare an acrylic or metal primer with acrylic paints. In addition, stock up on pearlescent aerosol, paints: metallic and fluorescent, as well as colorless acrylic varnish.
You will also need a product to degrease the surface and tape for protection.
Before painting, remove anything that can be removed from the chandelier and seal the non-removable parts. Clean and dry the chandelier, then degrease.
Drawing:
- Treat the surface with an aerosol primer, moving from top to bottom.
- After drying, apply 2 more layers.
- Draw patterns and outline with a marker.
- Paint over the elements of the drawing.
- Coat the product with varnish. After drying, remove the tape and install the removed parts.
More: Choosing the right fireplace for an apartment
What are the techniques for making ceiling lamps?
Ceiling lamps can be created using origami, carving, embossing, and decoupage techniques. Lamps made using knitting or weaving techniques also look very beautiful.
Original chandeliers made using the origami technique will be an excellent addition to a modern interior.
Important! When creating an origami lampshade, do not use very thick paper, as it will not transmit light well.
If you're into crocheting, use a few doilies as a base for your lampshade. This chandelier looks amazing and can be hung in your bedroom to create an intimate atmosphere.
Homemade chandeliers with pendant lampshades consist of a frame and decor (paper butterflies, beads, wax paper, artificial flowers, etc.). These elements are attached to the fishing line with glue and then fixed to the base.
Chandeliers that are created from a certain material (thread, glue, special paste, rope, etc.) and a balloon are very popular among home craftsmen.
Ceiling lamps made of fabric can be painted with acrylic paints, use the decoupage technique, or place any decorative elements on the material.
Chandelier made of plastic parts
An original and budget lamp for the hallway or kitchen
Elements cut from colored plastic bottles are attached to a bundle of sections of thick steel wire or to an old frame. To make the blanks bend or twist, they are brought to a candle flame.
Lampshade made of hoops with plastic flowers
Cut the bottles crosswise and cut each part into 1 cm strips. Bend the strips outward using a knife or scissors. After this, if desired, paint the workpieces with spray paint.
When dry, they are attached with wire to two metal or wire hoops. The hoops are also fastened with wire, at a distance of 10-20 cm from each other, and attached to a hook above the lamp.
Brutal lamp made of reinforcement
The manufacturing process is as follows:
- To begin with, you should cut the reinforcement with a cross-section of 0.8 cm into pieces with a length of 12 cm, use an angle grinder for this.
- You will need 15 of these blanks, and the more accurately you cut them, the fewer problems there will be when welding the parts.
Next, you should make a simple jig and weld several triangles, after which you can continue assembling the body in volume and weld all the elements together.- Afterwards, a piece should be cut off from the shock absorber body along the length of the cartridge and welded to the main body.
- Now it turns out that the length of the reinforcement segments is not 12, but 10 cm.
- All connections should be thoroughly welded and cleaned with an angle grinder on which the flap disk is installed.
- Next, you can paint everything with spray black paint (preferably matte).
- Moreover, you need to add a washer to which the cartridge will be attached and weld the loop.
- Insert the cartridge into the desired location and screw it on. Please note that ceramic sockets are quite fragile, so you should be very careful when installing them.
- When the last link of the chain is straightened, you can install the LED lamp.
After the design is ready, you can experiment with different lamps - warm, cold light, etc.
Chandelier for music lovers
Old CDs make a cute, shiny lampshade. A lamp socket is passed into one disk. A row of 5 disks is attached to this disk with brackets. Others are attached to them in the same way. The lower edges of the last row are attached to one disk - the base of the lampshade.
Lamp. Take a round board thicker than a disk, insert a starter with a switch into the hole made and connect it to a fluorescent lamp. Place disks on the lamp, strengthening it with stands on the outside. Secure a thin board on top.
Openwork made of threads
Sizes and colors are optional, depending on the interior and location.
- Inflate the balloon to the desired size and mark the top and bottom lines of the thread boundaries with a felt-tip pen.
- Using a brush, apply Vaseline to the surface of the ball.
- Wrap the ball with cotton or woolen threads, without going beyond the marking lines, and coating the layers with PVA glue.
- Let dry for 24 hours.
- The next day, pierce the ball and remove.
- Check the strength of the lampshade by inflating a second balloon inside.
- Install the lamp socket.
Method details
Advantages and disadvantages
Please note that at the moment, unusual patterns of artistic forging are obtained through standard stamping, and not from hard labor by hand, but even this fact does not reduce the value of lighting fixtures.
Such beautiful products are often used to decorate the apartments and country houses of respected rich people. With the help of a properly selected forged lighting fixture, you can emphasize the status of the owners and the entire home as a whole. In addition, it is worth noting the durability and strength of such lamps. The metal itself can withstand even heavy loads, and is also a wear-resistant material. To damage a structure made of such material, you will need to put in a lot of effort and spend a lot of time.
A high-quality lamp made by forging can last for many years. You can even say that such products have no limitations on their service life. In order for the device to retain its beauty for as long as possible, it should be treated with special paints and protective coatings.
Metal lamps are fireproof because such durable material will not burn and does not support combustion in any way. Due to this property, a wide variety of lamps can be installed in luminaire models.
But it would be dishonest not to note what disadvantages such lamps have:
- The metal is highly susceptible to corrosion. This can even have a negative impact on the decorative properties of the lamp. You can avoid defects only if you regularly clean the material from rust stains and treat it with special solutions.
- Forged lighting fixtures are very heavy. Because of this, it is unacceptable to install them on certain surfaces, and if there is no alternative, then before installing a metal lamp, the ceiling or walls should be well strengthened, which is very, very expensive.
- During the manufacturing process of such a lamp, all the component elements are connected to each other by welding, but, unfortunately, this does not have the best effect on the appearance of the product. But you can cope with this problem if you cover the ugly seams of the chandelier with stained glass windows of different colors or other interesting details.
Next, we invite you to consider what types of metal lamps there are.
Varieties
Forged lamps, which are possible but difficult to make with your own hands, can be divided into several types.
They have non-standard designs and are installed on different surfaces:
- Wall-mounted. I install such lighting fixtures made of metal or fittings on vertical surfaces using special fasteners. Wall lamps are the most common and popular devices. They are used for both interior and exterior decoration of housing. As a rule, such devices are very easy to install and are distinguished by their unusual appearance.
- Ceiling. Such lamps can be found very rarely, because metal chandeliers are often used instead of them, and usually such lamps are installed on special pendant systems.
Please note that before installing such lighting fixtures, the ceiling should be strengthened in advance, if necessary.
- Floor-standing. Floor lamps made using the forging method boast a luxurious and original design. Such models have a Gothic appearance, but at the same time they look organic in a variety of interiors. True, the cost of such products is also “luxurious”.
- Pillars. Such structures are used to illuminate the street. The light source in such products is usually mounted on a metal support. Such models are very similar to standard street lamps, but are often supplemented with various decorative elements.
In addition, there are candelabra, and candles are installed in such interesting devices instead of the usual light bulbs. This looks especially impressive in an antique design. Beautiful forged lamps differ in the way they are created. There are factory-made or hand-made models, but handmade lamps are more unique and popular because their designs are unique and one of a kind. Such devices are very expensive.
As for lamps, the following types can be used:
- Halogen lamps.
- Incandescent lamps.
- LEDs.
The first two types of lamps are extremely common, and such models fit best into the design of rich forged lamps. When choosing a lamp for a floor lamp or a metal chandelier, be sure to take into account that the shape of the lampshade and the lamp may differ significantly. This will not in any way affect the appearance of the product or safety characteristics, but will not make it possible to simulate a beautiful natural fire.
Design
Forged metal lamps have no restrictions in terms of size and design. A variety of approaches and methods are used in the production of such luxury products.
But at the same time, such a system is based on the following main details:
K arcas. Usually it is made from reinforcement with different degrees of density, and the future shape of the finished product will directly depend on the shape it takes.- Decorative details. This includes all metal structures that are used to decorate the lighting fixture. There are no restrictions in this matter, and the master can use anything for decoration, from small curved leaves to unusual wavy frames.
- Base. Such a detail may be in the design of the lamp, but sometimes it is not there at all. Everything will depend on the type of device.
- Lighting system. This includes everything from lamps/LEDs to electrical cables.
And then we invite you to consider the fittings for lamps, or rather, how to make an unusual lighting fixture.
Wood decoration
Wooden saw cuts, branches, roots and wood products are used to decorate home lamps.
To create home comfort in the bedroom or living room, it is easy to assemble a structure from dried flexible branches.
More: Using stairs and stepladders in the interior of an apartment
Options:
Branches intertwined into a nest and coated with varnish.
Branches of equal length are attached to a finished lampshade with even and smooth surfaces.
Round sphere made of branches . To do this, a ball covered with film is glued with twigs. After drying, the ball is removed, and the craft is painted and varnished. Hangs on a chain.
Minimalist decor
Plastic lamp
Leaves are cut out from green, yellow, brown bottles. To make the part bend slightly, it is heated over a candle. The veins are outlined using a burner.
Then, with a hot needle, holes are pierced at the ends of the workpieces, into which wire is inserted for attaching leaves to the frame or collecting twigs.
Disposable spoons
Plastic spoons are inexpensive and not difficult to find. The chandelier itself is not difficult to make, and it will last for many years.
To work, you will need a 5 liter plastic bottle, the bottom of which is cut out, and a hole is burned in the lid for a copper cord, where a socket with an energy-saving light bulb is attached.
The scooping parts of the spoons, with the handles cut off, are glued with the concave side inward, to the lower edge of the craft. The next row covers the first by 1 cm, observing a checkerboard pattern. The finished product looks like a coconut or lotus.
Wooden ball lantern
This option is also distinguished by its simplicity and the absence of any complex manipulations. To create a ball, you will need to collect a bundle of small twigs and branches, find or buy a balloon (inflatable ball), and glue (PVA, wood glue). The process itself is simple and clear:
- wooden blanks are broken so that short sticks are obtained;
- Having inflated the ball, twigs and twigs are glued onto it in random order;
- the master determines their number independently, but it is necessary to leave space for placing the socket with a light bulb;
- the finished semi-finished product is removed for a day (or more) to dry;
- the ball is pierced or deflated, and a socket with a light bulb is placed in the lampshade.
This street lamp can be hung on a chain, or mounted on a stand made of metal.
There are many ways to get what you want, since a DIY street lamp can be made from all materials except paper. So there's no shortage of ideas, and one potential option is shown in this video:
Romantic style
A cloud of shiny butterflies made of silver paper on sparkling threads under a black rim - what else looks more romantic. The paper chosen is thick, and the butterflies are the same or different sizes. For hanging, a fishing line or nylon thread is used.
In another version, a wire ball is decorated with butterflies, attached with glue or thin wire. The color of the craft depends on the interior of the room.
Lampshades with hanging ribbons, around fringe or lace resembling jellyfish, look no less romantic.
More: Lambrequin in the interior: types, choice, features
Country style chandelier
Cozy home light pours through the bottle glass. Cut off the bottom of multi-colored containers with a glass cutter. A wire is inserted through the necks and a socket with a lamp is attached, and the necks are brought close to the wooden base. Or 3-5 bottles are collected in a bundle and secured on a wooden saw.
Instead of bottles, they also take glass mugs or jars.
Conclusion
With the help of a homemade chandelier, the room will “sparkle” in a new, fashionable and original way, reflecting the individuality of the owners. In addition, it is not a shame to give such a craft as a gift to a loved one.
Design ideas
Now I will present to your attention some original ceiling lamp ideas for your home. So, how to make a lampshade for a chandelier with your own hands?
Idea 1: photographic film
A lamp made from a lampshade from an old chandelier and photographic film.
Such a lamp cannot be used as the main lighting: the old photographic film transmits too little light. But for zone lighting it’s easy. Here is a small master class on making a lampshade:
| Image | Description |
| We cut the photographic film into pieces of equal length along the height of the lampshade and cover its surface with glossy decoupage glue. | |
| We glue the pieces of film end to end, carefully smoothing them, and wait for the glue to set. | |
| We cover the lampshade with another layer of glue to get a smooth, glossy surface. |
Idea 2: steampunk chandelier
Steampunk lamp with incandescent lamps.
Antique-style incandescent lamps with long spirals with low temperatures were used as light sources. This feature increases the life of the lamp. Ebonite sockets and wires are painted with bronze paint, and improvised lampshades are wound from wire.
Idea 3: decorative braid
Lampshades made of decorative braid on a wire frame.
Very interesting retro lampshades are made from multi-colored fabric ribbons. The braid is wound around a wire frame.
Winding the ribbon around the lamp frame.
Idea 4: glass bottles
Make a chandelier from bottles of refreshing drinks? Just a piece of cake!
Don’t rush to throw away beautiful bottles of expensive alcohol. They can be used to make a chandelier. Some tips for creating it:
- In this case, you will need sockets and lamps for a small base (E14);
- It’s easy to cut the bottoms of bottles with a grinder and a diamond wheel;
- The power cord is pulled through the neck, and only then the base with the lamp is attached to it;
- Use low-wattage, retro-style incandescent bulbs.
Idea 5: plastic bottles
Not a fan of elite alcohol? Well, plastic beer bottles can also make an unusual and stylish lampshade.
The transparent ball is glued together from fragments of plastic bottles.
Polyethylene containers are easily cut with a stationery knife. For gluing, use transparent silicone sealant: it will not be visible in the light and will not darken with prolonged heating.
Idea 6: Beer can openers
Another idea: you can make lampshades from scrap materials with your own hands by rummaging through the garbage accumulated at home. In particular, the material for them can be... beer can openers. To glue them together, you can use the same silicone sealant: it adheres perfectly to degreased metal.
Such a lamp will immediately indicate to your guests your preferences in the field of drinks.
Idea 7: Embroidery hoop and fringed braid
How to decorate a ceiling lamp with fringe? It's very simple: hang embroidery hoops of two different sizes on cords and glue fringed braid to their outer surface. The easiest way to do this is to use a hot glue gun.
The frame of the lamp is made of hoops on cords.
Covering the frame with fringed tape.
The result is a neat and cozy-looking chandelier shade.
Idea 8: paper
Do you like retro-style floor lamps and table lamps? A paper lampshade will help give new life to an old lamp.
Remaking an old table lamp: a new lampshade is made of paper, tied with a twisted cord or ribbon.
Idea 9: gramophone record
Do you have old gramophone records lying around in your closet, but you haven’t had anything to play them on for a long time? Don't worry: even the rarest compositions can long ago be found in digital form on the Internet. There are other uses for records.
Lampshades in the shape of a flower from old vinyl records.
To make a lampshade, heat the plate over a stove burner or using a hair dryer, then carefully bend the plastic edges into folds.
Idea 10: fairies and butterflies
If you need an original lamp for a nursery, no problem: we will use animals, butterflies and fairy-tale characters.
Butterfly lampshade. They are made of colored cardboard and secured with fishing line.
There is a fairy living on the lamp in my children's room.