/Accessories and decor/Decoration/
If you have a couple of free evenings, why not start making crafts for the kitchen and home? After all, you can create a bunch of useful or simply beautiful little things with your own hands from improvised, natural and even waste materials. In this material, we presented 50 inspiring photos and 12 super ideas with step-by-step master classes on making decorative items, storage accessories, kitchen utensils and more.
Idea 1. Tablet stand made from a cutting board
Watching your favorite TV series on your tablet or peeking at a recipe book while cooking will become easier if you make a special stand for this from... an ordinary cutting board. Making this kitchen craft with your own hands will take no more than two hours, and it will be used every day.
To make a holder for a recipe book or tablet you will need:
- You can use an old cutting board or buy a new one (wood is best, but bamboo will work). Its size should not be much larger or smaller than the tablet.
- A small wooden plank, or better yet, a piece of molding (this is what will hold the tablet/book).
- Another block of wood or plywood from which you can cut a sharp triangle;
- Paint or stain of the desired color, for example, to match the countertop, facades or kitchen backsplash;
- Paint brush or staining rag;
- Jigsaw or saw;
- Wood glue or any other strong adhesive.
Instructions:
- Using a saw or jigsaw, cut your strip or molding to the desired size (the width of the board), sand the edges with sandpaper, then simply glue it to the bottom of the board.
- Cut a support for the stand from a piece of wood in the shape of an acute triangle with a right angle as in the photo below and glue it too.
The angle of inclination of the holder will depend on the inclination of the hypotenuse of the triangular bar
- Paint the entire piece following the paint manufacturer's instructions and leave to dry.
- If desired, the handle of the resulting stand can be decorated with jute rope or ribbon. This way, when the stand is not needed, you can hang it on a hook.
Also, the craft can be further decorated - for example, by artificially aging it as in this master class, by drawing inscriptions, by burning a design, or by covering it with slate paint. In the following selection of photos you can get ideas for decorating original cutting boards.
Idea 2. Jute coasters
If your kitchen (or, for example, a country or summer kitchen) is decorated in a rustic, Mediterranean, rustic or nautical style, then you will probably love this kitchen craft idea. In just a couple of hours you can make coasters for plates for the whole family and guests with your own hands.
To make one substrate with a diameter of 33 cm you will need:
- 10 meters of jute rope 1 cm thick (sold in construction and hardware stores);
- Hot glue gun;
- Scissors.
Instructions:
Just start rolling the rope in a circle, applying glue to small sections one by one and fixing them for a while. Once the mat is formed, cut the end of the rope and glue it down.
Idea 3. Organizer for cutlery and kitchen utensils made from cans
Tin cans cost nothing, but they are durable, easy to clean, and their shape is just right for storing all kinds of spatulas, ladle, forks, spoons and other utensils. If you put in a little effort and creativity, you can make a convenient and cute organizer out of them, which, even if it doesn’t fit into the interior of a city kitchen, will definitely fit in at the dacha. You can also use an organizer made with your own hands from cans to store tools, brushes, felt-tip pens and other small items.
Stand for spoons and forks made from cans
To make such a stand for spoons and forks, you will need:
- 4 or 6 clean and dried cans, without lids or burrs;
- Acrylic paint for metal or enamel paint (it will protect the cans from rust);
- Several wood screws and a screwdriver;
- Thick nail and hammer;
- Furniture handle or leather strap with fittings;
- A small wooden plank.
Instructions:
- Paint the jars inside and out and let them dry for one day.
- If necessary, saw the wood to the desired size, sand it, clean it and finally paint it (not necessarily to match the cans).
- Take a nail and a hammer and make a hole for the screw in all the cans.
Tip: To make this process easier and not damage the paint layer, place a small block on the table using a clamp, then wrap the block in felt and only then put a jar on the block (see the picture in the lower left corner in the next photo collage)
- Place the cans against the board and align them the way they will be mounted later. Mark the location of the holes on the board with a pencil.
- Make small holes in the board where the marks were marked, using a hammer and nail.
- Screw a screw into the hole of the first can to attach it to the board. Repeat the procedure with all remaining jars.
- Finally, install a furniture handle or leather strap on the end of the wooden board using the same self-tapping screws. Ready!
Here are a few other deco ideas and modifications to the design of cutlery stands made from cans.
See also: Remaking tin and glass jars: workshops and ideas
Decorating glass jars
The decor of a glass jar is more varied; moreover, this product has a wider range of uses compared to its tin counterpart. Since the shapes, sizes and colors of glass jars can be varied, the methods of use are correspondingly different.
Storage for spices
Small jars, such as baby food, can be reused for spices. It is better to decorate jars for the kitchen with your own hands in a minimalist style so that the decorative elements do not fall off and fall into the food.
First, the factory label along with the sticky glue is removed from the glass. You can make your own decorative sticker from paper or you can paint it directly on the jar with paints. After this, you should decorate the lid. Most often, decoupage technique is used for this. But you can also paint the surface or cover it with gift paper.
Related article: 8 options for decorating with branches for the home
On video: decoupage of glass jars.
For cosmetics and bath accessories
Larger jars are used to make containers for bathrooms and decorative cosmetics. Often, the decor of the cans in this case is minimal and concerns mostly the lids. It is decorated with beads that serve as handles. For a more romantic style, the container itself can be decorated.
The most common decorative elements are ribbons, beads or beads, and combined weaving of them is also possible. Often the entire jar is simply sprinkled with glitter and opened with colorless varnish.
An interesting option is to decorate a glass jar using the dot painting technique. The result is very impressive.
On video: decor of jars for the bathroom.
Jar as a candlestick
Often candlesticks or vases are made from such fragile jars. Making such a product is very simple. Since in both the first and second cases the product is subjected to use in extreme conditions, the only correct solution would be artistic coloring.
All kinds of patterns and designs are created with acrylic paints; in extreme cases, it can even be nail polish.
These are the main areas of application for decorative glass jars, but their number can be easily increased. The main thing is to think about the conditions under which the product will be used in order to select the appropriate decoration technique.
In the video: decorative candlesticks made from jars.
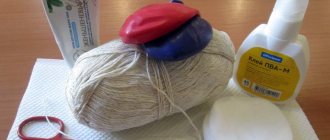
Idea 4. Topiary for kitchen or home decor
Topiary is a small decorative tree that is used to decorate a dining or coffee table, chest of drawers or mantelpiece. And topiary is an excellent addition to a gift, especially if you decorate its crown, say, with candies or flowers. Making such a craft with your own hands does not take much time, does not require the use of expensive materials, and even beginners can do it. Once you master the basic principle, you will be able to create topiary for any occasion, any shape and design. Take a look at our selection of DIY home decor photo ideas, you're sure to find something you'll like!
Kitchen Decor Idea for Halloween
To make this craft you will need:
- Base made of polystyrene foam, plastic or floral foam in the shape of a ball or other desired shape;
- A trunk (a straight tree branch, a pencil or any other small stick);
- Decorative elements for creating a crown: coffee beans, artificial flowers, pine cones, colored beans, etc.;
- Decor to disguise the pot filler, for example, moss, pebbles or sisal fiber;
- Flower pot;
- Filler for a pot that will fix the trunk. For example, cement mortar, the same polystyrene foam or alabaster (the best option) will do;
- Thermal glue in a gun;
- If necessary, you will need paint to decorate the trunk, base or pot. The trunk can also be decorated with ribbon or twine.
Basic instructions:
- To begin with, it is advisable to paint the base in the color of the crown elements so that possible bald spots are not noticeable. You can also paint the trunk and pot and leave them to dry.
- Cut a hole at the base of the crown, a couple of centimeters deep, for the trunk, fill it with glue and secure the trunk.
- Take the base of the crown and start gluing the decorative parts one by one. The principle of action at this stage is simple: first, large parts are glued, then medium-sized and, finally, small elements fill in the bald spots. You need to glue the decor quickly, before the glue is absorbed into the base.
- Dilute the mixture to fix the trunk in the pot according to the manufacturer's instructions and fill the pot with it, not reaching a couple of centimeters to the edge. Next, insert the barrel, hold it for a while and then leave it to dry for a day.
- Disguise the filling of the pot with a decorative “cover” (you can fix it with a little glue).
For detailed master classes, see the materials:
- How to make topiary with your own hands - 4 instructions for beginners and more
- Topiary of cones, acorns and chestnuts - photo ideas and 2 master classes
- How to make topiary from coffee
We decorate kitchen walls with our own hands
Kitchen wall decor is not always about drastic changes
To decorate the walls of the kitchen room you can use:
- various compositions from shelves on the wall, on which you can place pots with indoors or vases with artificial flowers, photographs, paintings, various figurines, beautiful decorative dishes and other elements that attract attention;
Shelves in the kitchen are a great option for decorating bare walls
But you can also use the shelves to store utensils
- a collage of photographs and a painting on the wall; their reproductions can be used to decorate “bare” walls. In this case, you should take into account the style and design of the room - for a minimalist, high-tech style, abstract modern paintings are suitable, for a city apartment - various landscapes, for a good-quality country kitchen - paintings depicting wildlife;
A photo collage is suitable for vintage or loft styles
Ceramic mosaic is another option for wall decor.
- You can also paint the walls using various stencils, vinyl stickers, or, if you have an artistic gift, come up with a composition yourself.
Painting the walls won't take much time. especially if you like to draw
Bright pictures on the walls look interesting
Idea 5. Serving board-tray
But the idea of an unusual serving board-tray, which, although not a cutting board (intended for displaying food only in dishes), can nevertheless be very functional. For example, it can be used to beautifully serve snacks, drinks (olives, pistachios, nuts, chips, etc.), sauces, honey, sour cream, jam. Thanks to the slate part, while the board is not being used for its intended purpose, it can simply be hung on the wall and used for writing.
To make this DIY kitchen craft you will need:
- Wooden board 5 cm thick;
- Stain of the desired color (for example, to match the countertop);
- Sponge, rag or brush;
- Chalkboard paint;
- Two furniture handles and wood screws for fastening them;
- Jigsaw or saw;
- Screwdriver or screwdriver;
- Masking tape;
- Ruler, pencil.
Instructions:
- Cut your board to the desired size using a hand/power saw or jigsaw. In this master class, the board is 60 cm long, but you can make it shorter or longer.
- Stain your board according to the manufacturer's instructions and let dry.
- It's time to paint the inside. To do this, first apply masking tape along the edges of the board to limit the painting area. Next, apply slate paint (in this case, you use paint in a can) and let it dry.
- Screw the handles to the edges of the board.
You can replace furniture handles with leather straps, paint the board a bright color, burn a design onto it, or attach two “legs” to the back of it.
See more details here: Do-it-yourself serving tray - ideas and master classes
How to make a towel hook with your own hands
Hook made of stone
In some cases, the parts necessary for the job are literally lying around underfoot. And imaginative thinking and a little imagination helps to see a future masterpiece in them.
A simple but very effective idea - a stone hook. Having found an oblong pebble of an interesting shape, do not rush to throw it away. By attaching them to the wall (for example, with special glue) you can get wonderful hangers.
They should not be too massive and not disturb the aesthetics of the interior.
An even more interesting idea is how to preserve memories of a holiday at sea. Such a model can be made using screws and metal cylinders. After inserting the screws into the cylinders, we screw them into the wooden block. And we attach stones to the screw heads using universal glue.
It is important to arrange the hooks in such a way that it is comfortable for all family members to use them.
Wooden hooks
Since there is no shortage of twigs of interesting and suitable shapes, you can make towel racks using them.
This towel holder will become an attractive element of the interior of a bathhouse or country bathroom.
The wooden element you like must be treated with fine sandpaper so that its surface is smooth. Then cover it with any paint and attach it to the wall.
The more varied the shape of these hooks, the more creative your bathroom will look.
This accessory will decorate your bathroom.
Leather hooks
To make such a hanger with your own hands, you will need pieces of leather, wooden cylinders and long screws.
Perhaps this idea is not so practical, but it is very non-trivial.
We remove the caps from the screws and insert them into wooden cylinders with the sharp end outward. Fold a piece of leather belt in half and drill a hole. Then, after drilling a hole in the wall, we fasten the structure with a screw.
Concrete hooks
It is worth noting that if you do not want to tinker with concrete, you can take any material that tends to harden (clay, for example).
Play with shape, color, size of hooks.
To make such a hanger, use a cookie cutter. Pour the mixture into it and let it dry. Then a regular metal hanger is applied to the back side and filled with a thick layer of cement or clay. Dry again.
The accessory is ready.
Water tap hooks
A bold and interesting idea. If you find deposits of water taps in the pantry that you are unlikely to use for their intended purpose, do not rush to throw them away
Towel racks in the bathroom are integral elements of a functional space.
Find a wooden base and attach these simple objects to it in random order, after painting them in different colors.
The result will surprise you.
You don't need expensive materials or superpowers to make towel racks. Perhaps everything you need to create a creative accessory is at your fingertips, the main thing is to use it skillfully.
Idea 6. Stand for mugs and glasses
If you're the type of person who collects wine corks (either for fun or in the hopes of one day making something useful out of them), then you'll love this craft idea.
To make one mug stand you will need:
- 8 corks (accordingly, to make a set of 4 stands you will need 32 corks);
- A roll of cork board, mat or coaster (for cutting out the base of the coasters);
- Hot glue;
- Leg-split.
Step 1: Lay out your corks in pairs in a square format as shown in the photo below. Using hot glue, apply a bead of glue between the two corks and press them together for 30 seconds. Repeat the procedure with all other pairs.
Step 2. Cut a square from sheet cork (board, rug) corresponding to the size of the future stand. Next, apply thermal glue on it, wait 15-20 seconds. and glue your blanks.
Step 3: Fill the gaps between the corks with glue and let it dry. For better adhesion of the glue to the corks, you can put some kind of press on the workpiece.
Step 4. Wrap the craft with twine and tie a knot.
Handmade coasters for mugs, glasses and glasses can be beautifully packaged and given to a friend
If desired, the stands can be made round, triangular or hexagonal by cutting off the excess with a knife.
Using the described principle, you can make such a hot stand with your own hands. By the way, an old CD will work as a basis in this case.
Textiles as decoration
“I can’t think of a better way to emphasize the modernity of the decor than to decorate the kitchen with hand-made products from specific textiles”
Professionals, of course, assign a significant role in kitchen decor to textiles. Its texture must exactly match the design style. So, for the rustic trend, such fabrics as chintz, linen, calico, and sometimes even ordinary burlap are relevant. The designs usually chosen are elegant checks or floral prints.
textiles as decor for tables and chairs
How to decorate a kitchen with textiles in an original way and what can you use to saddle with your own hands? It is natural to create unique curtains, with ruffles and frills, with unusual tiebacks. For curtains, it is better to choose light, airy fabrics, like chiffon. In addition to curtains, housewives can easily sew bright potholders, pillows for chairs or covers for stools. The main thing is that the rest of the textiles are in harmony with the main element - the curtains.
Modern decors will require modern curtains. Particularly popular today are Roman blinds, decorated with elements of photo printing or ornate patterns. Such curtains do not “steal” space; on the contrary, a successful design can make it endless, leading into the distance. In addition, the material of Roman blinds is easy to care for. It can be washed indefinitely, which is important for a kitchen.
I can’t think of a better way to emphasize the modernity of the decor than to decorate the kitchen with hand-made products from specific textiles. To do this, you need to use fabrics of pearl or steel shades with a matte, smooth and certainly flowing texture.
Austrian curtains and a long tablecloth will create a cozy atmosphere in the kitchen interior
Of course, tablecloths will help convey the spirit of the Renaissance. Delicate, in pastel colors, with tassels that go to the floor, they look incredibly harmonious with the same curtains and furniture upholstery.
Having chosen the style of ancient centuries, you will have to take into account all aspects of the situation at that time and select the right decorative elements. In spacious kitchens, when trying to convey the features of eighteenth-century life, you need to make an extravagant and lush design. In small rooms, it is better to stick to the strict lines of Roman architecture. How to decorate too “correct” kitchen decor without extra costs, with your own hands? Of course, with arches and various columns, which will also change the visual perception of space.
For textiles in French decor, you need to use spectacular fabrics from a series of organza, brocade and silk. It would be great if they were embroidered with gold thread.
the black apron is decorated with white inscriptions and drawings
Idea 7. Wall panel
Another craft idea for the home and kitchen that you can make with your own hands from wine corks is a wall panel for decorating the interior and storing notes, memorable photos and postcards.
Framed cork panel from Ikea
To work, you will only need a beautiful frame (from a picture or a mirror), paint of the desired color, hot glue and a large pile of corks. Corks can be laid out in a herringbone pattern, in a checkerboard pattern, in even rows, and in other ways that you like. If necessary, for example, if there are not enough corks, they can be cut lengthwise or crosswise. To make the corks easier to cut, you need to soak them in hot water for 10 minutes.
Find other interesting ideas for making wall panels with your own hands here.
Trendy decorating ideas
In addition to the standard DIY decoration of jars, non-etching methods of decorating them are often used. Recently, natural and organic materials have become increasingly popular, which, at least in a minimal amount, simply must be present in the interior of the room.
One such material is textiles, in particular burlap. With its help, you can create stunning compositions on any surface, and jars made of any material are no exception. You can sew decorative covers, flowers from burlap and glue them to the surface, just wrap the container around the perimeter.
Additional decoration can include: cereals, coffee beans, beans, twigs and much more. Similar to burlap, knitting thread can be used.
Another interesting solution in the field of decorating jars was the vine. In addition to its aesthetic value, it also protects the jars from mechanical stress. Thanks to the wicker weaving technique, you can create a variety of compositions in the form of covers and cocoons, which can additionally be decorated or painted with other colors, forming an interesting pattern.
Related article: Posters and paintings for modern interiors
Other ideas (1 video)
Decor of different jars (36 photos)
The best posts
- DIY mirror decor: creating an original element to decorate a room
- Selection and installation of balcony flower boxes (+ homemade pots)
- Burlap accessories: strength and design
- Decoupage paintings from postcards and napkins (step-by-step process)
- Making three-dimensional paper flowers: 6 MK (+43 photos)
- DIY wall painting: choosing and placing a picture
- Decorating a beautiful ceiling with your own hands (+50 photos)
- Plasterboard partitions: features and installation (+42 photos)
Idea 8. Universal knife holder
A knife holder is a very useful kitchen gadget that helps keep your workspace tidy and keeps your knife blades sharp for longer.
Making a knife holder with your own hands is very easy - just pick up a small vase and fill it tightly with bamboo/wooden skewers, colored beans or... colored spaghetti, as in our master class.
To make a knife stand, prepare:
- A container or vase is the height of the blade of your largest knife. The shape of the container can be any, but without any bends;
- Spaghetti, lots and lots of spaghetti;
- Several large ziplock bags (or just large bags that can be tightly tied in a knot);
- Alcohol (for example, vodka);
- Liquid food coloring in the desired color (or several colors if you want to make a multi-color filling);
- Baking trays;
- Aluminum foil or old oilcloth tablecloth;
- Paper towels;
- Kitchen scissors.
Instructions:
- Make sure your container is clean and dry, then fill it tightly with spaghetti. When the container is full, remove the spaghetti and add a couple more bunches of pasta to the pile as a reserve (in case you make up for broken sticks).
- Divide the spaghetti evenly between the bags and pour enough alcohol into the bags to wet all the sticks. Next, add 10-40 drops of food coloring to each bag.
- Seal or tie your bags, then place them in additional bags to avoid leaks. Slowly shake and turn the bags to mix the coloring into the alcohol and pasta. Next, place the bag on one side and leave for 30 minutes, then turn the bag over again and leave it for another half hour. Continue soaking the spaghetti in this manner (no more than 3 hours) until it reaches the desired shade.
- Cover your baking sheet with aluminum foil, then a layer of paper towels (or oilcloth). To protect your hands from staining, it is advisable to wear gloves. Remove the spaghetti from the bags, after draining all the liquid, place them on a baking sheet in a single layer and leave to dry. From time to time, the spaghetti needs to be sorted to dry evenly.
- Once your spaghetti is COMPLETELY dry, start placing it in the container.
- Shake the filled container and smooth out the spaghetti. Insert your knives to determine the optimal filling density, adding pasta or removing excess if necessary.
- Now, using kitchen scissors or other very sharp scissors, trim the spaghetti to the desired length without removing it from the container (it's best to do this over the sink). It is important that the spaghetti does not exceed the height of the container by more than 2-3 cm, otherwise it will break quickly.
Idea 9. Jars for storing spices and bulk products
When you don't have enough storage space in the kitchen, the bottom of a wall cabinet and a few glass jars with tin lids will help you out. Depending on the volume of the jars, you can store spices, cereals, sugar, salt or any small items in them.
Instructions:
- Make three holes in the lids using a nail and hammer.
- Screw the lids to the bottom of the wall cabinet using self-tapping screws. It is best to choose a cabinet that is closest to the stove and work area.
- Fill the jars and screw them onto the lids. Voila, the organizer is ready!
Idea 10. Storage basket
There can never be too many baskets in the house, because they are so cute and help organize the storage system more rationally. Fortunately, you can make baskets with your own hands from newspaper tubes or just sheets of paper. Moreover, paper baskets can be very strong and practically no different from baskets woven from rattan. Perhaps this is one of the best ideas for crafts for the home and kitchen using scrap materials.
Read how to make such a basket for storing household items with your own hands in our step-by-step master class.
Today we will talk about an express technique for making a paper basket, which can be used to store small items (keys, stationery), yarn, as well as for an unusual presentation of fruits, Easter eggs, bread or pastries for a holiday table or as a gift.
Even a child can weave such baskets quickly and easily
You will need:
- About 15 sheets of thin A3 paper, cut in half lengthwise (this can be printer paper, a full sheet of newspaper, or even baking paper);
- A container of suitable size with straight sides (for example, a jam jar);
- Glue in stick;
- One skewer;
- Spray paint (optional).
Instructions:
- Starting at one corner, begin to roll the sheet of paper tightly around the skewer to the diagonally opposite corner to create an even and long tube. Once the tube is ready, add a few dabs of glue to the corner of the paper to hold it in place and remove the skewer. Do the same with all the remaining sheets. In this master class, 30 tubes were required to weave 2 baskets.
- If necessary (for example, if you used newspaper sheets) or if desired, paint the tubes with acrylic paint.
- Take an even number of tubes and connect them together as shown in the photo in the upper left corner. In this master class, for a basket the size of a jam jar, 6 tubes were required, for a larger basket - 8 tubes.
- Start braiding: Take one of the outer tubes (which is under the grate) and lay it over the adjacent tube, then pass it under the next tube, then run the tube again over the next tube, etc. Continue weaving by lifting the already entwined tubes vertically (from now on we will call these tubes stands).
- When 2-3 cm remains from the first working tube, increase its length. To do this, apply glue to the new tube and insert it into the remaining “tail”. Continue weaving over and over again, adding paper tubes as needed.
- Once you have weaved a base of the desired diameter (the same size as the container), place the container on it and begin weaving around it, pulling the stand tubes close to the walls.
- Having weaved the basket to the end, remove the jar and carefully wrap the end of the working tube into the weave.
- Tuck the ends of the posts inside the weave and trim if necessary. Next, you can spray paint from a can as in our master class.
How to turn kitchen utensils into stylish decorative accessories
Don't rush to part with unnecessary dishes. From the remnants of your favorite tea set, a beautiful lid from a broken sugar bowl, spoons and forks that lie idle, you can get exclusive decorative items for your home or summer cottage.
A fountain made from a rusty vintage teapot and a wooden barrel is not an easy idea to implement, but it looks very impressive.
Not everyone can replicate a fruit dish made from old cutlery either. Although all you need is a mountain of unnecessary spoons, forks and knives, superglue and strong fingers to bend metal. Of course, no one forbids using pliers.
You can simply attach curved spoons and forks to a rectangular multi-colored piece of wood that is attached to the wall as decoration. So you have a hanger or pendant for keys.
Those who know how to use a drill can do the experiment with their old kettle. What if you also manage to get him to give your home such lacy lighting?
A chandelier made of knives and forks may appeal only to thrill-seekers. Bizarre shadows on the wall and metallic tinkling from the slightest movement or draft... Gothic and exotic.
But a chandelier made of only spoons does not look intimidating, but romantic. Real metal flowers. Snowdrops or tulips.
A lonely elderly ladle on the wall will not be so gloomy if you introduce it to a beautiful candle. Isn't it true that it turned out to be an interesting candlestick?
An old sieve or round iron cookie boxes nailed to the wall will make an equally interesting holder for small round candles.
An unnecessary grater will do for storing jewelry. How many earrings can you hook on?! For elegance, you can attach intricate legs to the grater. Surely, men will also find something that can be stored this way.
An ordinary glass jar will make a cute storage for a sewing kit, and a cup will make a cute pincushion.
A few plates that have been collecting dust in the closet for a long time as unnecessary will do the job of a mini-fence for your flowerbed.
Use unnecessary plates to make an interesting bird feeder.
And if cups and saucers are placed on twigs, they will turn into birdbaths.
Decorating walls with beautiful plates is not a new idea. But even here you can use your imagination.
Old lids from a sugar bowl and a teapot will become a convenient holder for all the necessary little things in the kitchen - scissors, pencils, towels.
If you attach the remains of the tea set to the finished shelf with glue, you will get a strange, but quite functional hanger.
Old enamel mugs also look beautiful as storage units for small items. For country decor - just right.
An ordinary tea cup is a godsend for home-grown interior designers. A curtain holder, a container for storing jewelry, a Christmas tree toy - all this can be made from an ordinary cup.
Place several cups upside down on slightly larger saucers - that's a pile for sweets.
Nowadays, many people are interested in making their own scented candles. So why buy special molds if you can make candles in cups that no one drinks coffee from anymore?
It is ideal when the color of the wax or stearin is in harmony with the color scheme of the cup.
If you attach cups, a saucer and a milk jug to the candlestick, you will get a whole set of everything you need for a romantic tea party.
A colander as a lampshade is, at least, not trivial.
But using cups instead of lampshades, you can make unique lamps that will add a special flavor to the interior of the kitchen or dining room.
A cup can be turned into a night light if you attach a beautiful transparent cup to the fittings of the simplest lamp.
Cup-lampshades in the wall are a very stylish and unusual decoration for the kitchen.
From the remnants of the service you can build the base of a floor lamp. To do this, you just need to drill holes in all the base elements and connect them with ceramic glue.
The remains of tea sets or individual cups (it’s okay, even if they are of different sizes) can easily be turned into a spectacular chandelier.
The variety of possible tableware chandeliers is limited only by your imagination.
A chandelier made of plates laid out in such a shape is a stylish piece of furniture.
Compositions of plants in disused dishes are now a fashionable decoration for a coffee, coffee or dining table, bedside table or chest of drawers.
Unnecessary dishes can be easily turned into an original flowerpot.
Do not throw away a teapot whose lid has broken; it will come out as an original flowerpot.
A resourceful housewife uses any old dishes in her garden design.
Even an old rusty grill becomes a nice flower bed.
Beds or flower beds can be decorated directly on the wall if you plant the plants in transparent jars.
And in the most ordinary white glass bottles with a high neck, plants look great. To do this, the bottles need to be attached to the wall with metal holders. If you choose tightening clamps as fastenings, you can remove the bottles and wash them.
Dwarf succulents (plants that retain moisture for a long time) are planted in mini-pots made from wine corks with magnets. By the way, do not forget to occasionally water such vegetation with a teaspoon.
If you place a garland in an empty bottle, leaving the fork outside, you will get a simple decoration for a romantic evening or for celebrating the New Year.
By the way, you can use egg cartons to store glass Christmas toys.
It turns out that broken dishes in the house are not only fortunate, but also beautiful. Shards of broken dishes are used for mosaics, for example, table tops, chair seats. Surely no one will have such a unique thing.
The remains of beautiful dishes as tiles on the kitchen wall are an original solution.
There are people who spend years collecting the most beautiful cups and plates from friends and acquaintances in order to one day create such a masterpiece.
The dial and hands can be attached to anything. Therefore, a large old plate, an unnecessary frying pan, or a tea set will make a lovely watch.
One of the most creative ideas for using old household utensils is a mirror framed with assorted broken dishes and cutlery.
Even decorations are made from dishes. If large cups or bowls “successfully” break, sand the edges and wear the remains of the beautiful dishes now as jewelry.
Check out ideas on how to make garden lamps from scrap items and garden sculptures from tires. Our video will show you how to make original box beds. And in this FORUMHOUSE section you will find a lot of interesting solutions on how to decorate and diversify the interior of your home.
Idea 11. Wall holder for towels and kitchen utensils
From an ordinary grater you can make such a convenient and beautiful holder for a towel and storage of kitchen utensils or even live or artificial plants.
From a flat grater you can make your own kitchen decor in a country, Provence or shabby chic style
To make a heated towel rail and a tray for small items you will need:
- A grater (preferably an old one, but a regular new grater will do, as long as it is metal);
- Patina for metal (for artificial aging of the grater);
- A small cutting board or just a wooden board;
- Wooden die (for the bottom of the grater);
- Glue.
Instructions:
- Following the manufacturer's instructions, cover the grater with a metal patina, for example, green as in this master class.
- Install a wooden bottom in the inside. It must first be cut to the size of the upper part of the grater. As a rule, at the top of the grater there are protrusions from metal handles; it is on them that the bottom will be attached.
- Screw the grater to the board using self-tapping screws, after making holes in it with a nail and hammer.
- Place the board on the wall near the sink, hang a towel on the handle, and put your spatulas, ladles or flowers inside.
Original kitchen with your own hands. Knife holder.
Prepare a regular, empty glass (metal or wood) container.
Bamboo sticks (can be replaced with skewers)
Spray paint (or acrylic paint) - optional
One of the important and necessary furniture accessories in the kitchen is a towel rack. The item is simple, but at the same time very useful in everyday life. You can now find a huge number of such products in stores, but they are all similar to each other, and often cost a lot of money.
But you can make such a piece of furniture yourself from unnecessary scraps of wooden boards, with a little ingenuity and a little effort.
Idea 12. Flower vase
Glass bottles for wine, milk or other drinks are almost ready-made vases that are just waiting to be painted with acrylic paints and/or trimmed.
You can find detailed instructions on converting bottles into vases and candlesticks, as well as about hand-painting vases in these materials:
- Vases made from glass bottles: decor, painting and trimming
- Hand painted vase: 3 master classes and 45 decor ideas
Support the project - share the material with your friends on social networks: