Types of fireplace grills
In addition to the purely practical properties that a barbecue oven will have, you need to remember about its aesthetic characteristics.
Beautiful barbecues are a real decoration of even the most sophisticated landscapes. Brick structures look especially impressive. They look great on any site, are multifunctional, strong and durable. Since fireplaces are designed to heat rooms, this factor must be taken as a basis. There is no point in heating the street, wasting firewood to no avail. It is better to adapt the grill to the gazebo, even if it is open. Some of the heat will still remain under its roof. Also a good solution is to build a brick barbecue in close proximity to the terrace.
At the place of installation, fireplace barbecues can be as follows:
- Free-standing without canopy or chimney. Externally, they are practically no different from the simplest barbecues. The only difference is the presence of an open hearth.
- Freestanding with chimney and roof. Such buildings look very impressive. When designed appropriately, they look like a stove from a fairy tale.
- Combined with one of the buildings on the site. Attach a barbecue to a house, gazebo, veranda or bathhouse. Less often, outdoor fireplaces and barbecues are built next to garages or sheds.
They make barbecues with a hearth made of steel, brick or stone. Metal structures are decorated with artistic forging. Stone and brick themselves look quite beautiful; they are rarely finished.
An outdoor stove can have a wide variety of shapes. Depending on the size and layout of the site, stoves of the following configuration are built:
- semicircular;
- triangular;
- square;
- trapezoidal;
- with broken lines.
In small buildings it is better to install a corner grill. In addition to saving usable space, such a structure looks compact and neat. Tables and shelves can be made folding, using them only during cooking and feasting near the barbecue.
Any combined grill is done in stages. Let us dwell on the sequence of construction of this structure.
Varieties
As with fireplaces at home, there are several types of fireplaces that can be installed outdoors. Before making a choice in favor of one of them, you should get acquainted with their external design features and operating principle.
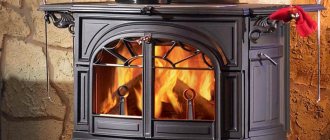
- Stove-fireplace. The prototype of this model is the Russian stove. It is popular because it makes it possible to cook food by baking. Outdoor stoves have their own distinctive properties. Since heat transfer occurs at a higher rate, it must be reduced in every possible way. To do this, the insulating properties of the furnace walls are increased with the help of an additional layer and the formation of voids containing air.
- Built-in grill. For us, the grill is associated with shish kebab or the method of preparing it, although many Middle Eastern peoples consider it a universal cooking tool. The firebox of such a fireplace is made in the form of a bowl with vertical walls. After the wood burns, the remaining coals are used for frying, baking and even smoking food. A fireplace with a barbecue in a country house is always in demand during family holidays.
- Asian tandoor. The design features of this type of oven allow you to cook food on the hot surface of the firebox walls. This method came to us from Central Asia and is still popular among lovers of food prepared in nature. The tandoor can be combined with a classic fireplace insert. This device will allow you to cook food and admire the flame at the same time.
Fireplace complex of a country house
- Smokehouse oven. This type of device is considered rare for a private home. It is based on the fact that the combustion chamber and the food compartment are separated from each other. The smoke that results from burning wood does not immediately enter the chimney, but passes through the chamber with the products. It is possible to implement models for cold and hot smoking methods.
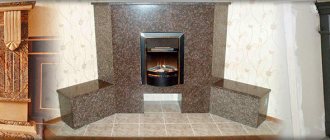
- Classic fireplace. It earned its name thanks to its external outlines. This is an outdoor fireplace surrounded by a portal made of stone or brick. In fact, the stone can be just a decorative finish, and the firebox has expanded functions of a grill, barbecue, or grill.
Good to know: How a fireplace door is made, how to do the work yourself
Brick barbecue projects: drawings, photos
Features: the length of the firebox should not exceed 1 m - this is enough for 8-10 skewers at a time. The width should be consistent with the length of a standard skewer - 47-62 cm. The height of the frying area is ideally just above the waist of the person who will cook.
Since a stationary barbecue often becomes the central decorative element of a site, this should be taken into account when designing and choosing a location. Its reverse side looks like a solid brick wall, so it is advisable to position the structure so that it is not visible from the reverse side. Or provide for its decoration taking into account fire safety.
Installation of beautiful decorative fireplaces for the home
Before you start building your brainchild, we recommend that you familiarize yourself with its structure.
So, the fireplace consists of:
- A firebox made of fireclay. This is where a miracle happens—fuel combustion.
- The portal is located outside the firebox and creates a decorative load.
- The grate, which is located under the firebox and helps the combustion process occur, supplies air from below to support the fire.
- An ash pan is a metal compartment that serves as a collection point for ash.
- The area in front of the firebox prevents sparks from the fire from falling onto the floor in front of the fireplace, and also serves as a decorative element.
- Hailo is the first source of smoke in front of the chimney.
- Gate valve for regulating air supply.
How to make a barbecue out of brick with your own hands at the dacha - step by step instructions
A lot depends on the model you choose to build a barbecue with your own hands, and not just the quantity and quality of bricks you will need. Some people think that since they are involved in such an interesting construction project, they need to choose tips on how to make a barbecue out of brick with your own hands in the country, step-by-step instructions
, which concern large, multifunctional ovens.
This includes a fireplace for baking dishes in heat-resistant dishes, a tandoor for preparing delicious oriental dishes, a built-in barbecue grill and, last but not least, a large grill that can accommodate a dozen skewers.
Moreover, all such splendor takes up not only a lot of space, requiring a canopy or a full-fledged gazebo with a barbecue, but also requires a significant, strong foundation, the construction of which is as important a point of work as laying out bricks.
That is why always evaluate your daily or weekly needs before choosing a model and tips on how to make a brick grill with your own hands. Step-by-step instructions with photos
in this case, it can stretch either over several pages, or it will literally take several photos if you settle on the simplest, but quite functional model.
The barbecue structure itself, if you still want to make it look like a stove and not a metal model, is similar to all similar structures, such as a do-it-yourself fireplace.
There is a ash pit that provides draft and oxygen flow for the combustion of coals, there is a place for burnt ash, the so-called ash pan, there is a chamber for direct combustion of firewood and the formation of coals, as well as a hole for a pipe, brick or metal of your choice.
All components are made of brick, only its quality depends on your budget. A compromise and the most popular solution is to build the “hottest” part of the structure - the combustion chamber - from refractory fireclay bricks, and lay out the rest with red brick, which is approximately 3-4 times cheaper than fireclay bricks.
How to make a simple brick grill with your own hands step by step instructions
To figure out how to make a simple brick grill with your own hands, step-by-step instructions
We will definitely find it useful, as well as photo or video lessons from those who have already walked a similar path.
There are several stages, all of them are quite important, because without proper planning and a masonry scheme, you will have many questions during the work process, and if you do not build the foundation correctly, it will not be strong or level enough, then all the work will go down the drain in a few years and the building will have to be redone.
A simple barbecue in its structure is quite similar to a barbecue for a summer house. After all, the most important thing for him is the hearth, inside which the firewood will burn, turn into coals and give off its high-quality heat to the skewers with food, which are located above. All this does not require complex diagrams at all, so for how to make a barbecue out of brick with your own hands, quick step-by-step instructions
will not take very much time.
For a simple model we choose a strip foundation, this way you can save a large amount of mortar and reinforcing elements. Trenches are dug in the shape of the future masonry, formwork is laid out with old boards or pieces of slate, into which metal mesh or rods for reinforcement are laid and the whole thing is filled with mortar. The screed takes from several days to a week to dry according to the technology, depending on the composition of the dry mixture; it is better to withstand this period so that the screed does not crack.
When the site is ready, we begin laying out the bricks, guided by the order scheme that you came up with initially, or that you saw on the Internet. It should indicate both the location of the bricks and their type, so as not to get confused. At the end of each row, while the solution has not yet set, we use a level to check the evenness of the masonry; this is a mandatory procedure.
If the design provides recesses, a place for laying out a barbecue grill, ventilation holes or a small auxiliary tabletop, then all this is done immediately, without waiting until the last row is laid. At the end, you need to decide whether to leave the grill in the same form as you put it together or decorate it like a country architectural object.
The decoration can be decorative plaster (of course, you should choose a special composition for working with high temperatures), facing bricks, tiles imitating natural stone, and even natural stone itself.
Outdoor fireplace for a summer residence - photos and ideas that may be useful in construction
A beautiful outdoor fireplace is a real eye-catcher and a source of envy among neighbors. Moreover, it not only brings a decorative effect, but also creates a comfortable and cozy atmosphere. On cool evenings near the outdoor fireplace you can spend unforgettable moments enjoying the flickering fire. An outdoor fireplace is also great for grilling meat or vegetable delicacies.
So, you want to build an outdoor fireplace in a country or suburban area, however, before you begin construction, you need to consider some features. Use our tips and ideas to avoid problems when building a garden fireplace.
What is an outdoor fireplace?
A fireplace stove or outdoor fireplace is a stationary structure that is not portable and therefore cannot be moved, unlike a grill, barbecue or barbecue. Before building an outdoor stove, you need to choose the right location. It is worth considering the proximity of residential premises. The outdoor stove is not sensitive to atmospheric influences, so it can be used even in the cold season. You can build an outdoor fireplace with your own hands , order work from professional builders, or choose ready-made models that are sold in specialized stores.
Stove-fireplace - build it yourself or buy it?
The finished model of a garden fireplace has one drawback: you will not be able to choose an ideal outdoor stove in every sense. Each suburban area has its own unique style, buildings and landscape design. By purchasing a ready-made model of an outdoor fireplace, you will not be able to 100% select an outdoor stove according to your requirements. If you manage to choose a ready-made and suitable option for yourself, try not to purchase the cheapest one, since appearance and aesthetic appeal play a very important role. There is no doubt that a homemade fireplace or one made by builders in the garden will look more attractive. You can be creative and choose your own design and materials to create the look and style you want for your outdoor fireplace.
Another advantage of making an outdoor fireplace with your own hands or with the help of craftsmen is the ability to equip it with additional compartments or storage boxes. Don't forget to design an area for firewood or cooking. Try to take into account all the nuances, take into account the safe location of the fireplace and the distance from trees or buildings.
Fireplace and terrace - depending on budget
If your summer cottage does not yet have a terrace, then its simultaneous construction together with an outdoor fireplace will be the best option. You can always shelter from bad weather under the roof, during rain or snow. But do not forget that this option is not budgetary and significantly increases the price of the project. So, if you have a limited budget for construction, but want to combine an outdoor stove and a terrace, design these buildings in advance so that you do not have to remodel or rebuild the fireplace.
The advantage of an outdoor fireplace and its difference from a grill and barbecue
The big advantage of a fireplace in a country area is that it has a chimney through which the smoke always comes out upward. Of course, you know the eternal problem with conventional grills and barbecues. When the wind blows, the smoke always goes towards the guests. In the case of a fireplace, this will not happen if you build a chimney of sufficient height.
Plan and Design the Right Size Outdoor Fireplace
Before you begin construction, plan the correct size for your fireplace. This will primarily depend on the space you need on the terrace or in the place where you plan to place the fireplace stove. However, you should not choose an outdoor stove that is too small, thinking that you will be able to save on materials. The law of meanness is inevitable and during the process of operation the understanding always comes that I would like a larger and higher street fireplace. And finally, if you want to use it as an outdoor grill for grilling, then do not forget about the necessary cooking area.
Should I use both sides of the fireplace or not?
You also have the option of building a fireplace that has more than just one open side. Of course, this option is very attractive, especially since the fire will be visible from both sides. This is a very good idea for dividing a room if, for example, you have a kitchen in one part and a place for comfortable relaxation in the other. But this also brings some inconvenience and creates additional problems. The absence of a back wall guarantees less heat and additional wood consumption. Also, we must not forget about sharp gusts of wind.
Choose the right location
In order to build a fireplace in your country house with your own hands, you need to choose the right location. The soil should not be shaky and there should be no flammable materials around. Wooden floors are therefore not suitable. If necessary, install a new foundation to ensure a solid surface before building a fireplace on your property. Don't forget that you may have to secure the area around the fireplace. And finally, flying sparks that can ignite flammable objects nearby.
There should be no buildings in the chimney area
No other buildings or structures should be located above the pipe. Despite the relatively long path through the chimney, the air will be very hot. Wooden structures can shrink to the point where they become damaged. Don't forget that buildings and structures can change their natural color from soot to black. As you can see, the space around the fireplace should be sufficient.
Consider prevailing wind directions
Before starting construction, it is very important to take into account the prevailing wind direction on the site. If the wind blows from a certain direction more often, this must be taken into account so that smoke or the smell of food does not enter the house or neighboring areas. You and your neighbors don't have to feel overwhelmed by smoke. In addition, the wind can interfere with the barbecue and will scatter sparks and ashes around, which, you see, is not comfortable.
Chimney height
In order for your outdoor fireplace not only to look good, but also to be convenient and comfortable to use, the chimney must be of the correct height. So think about what level you will place the open part of the fireplace. This is especially important if you want to use the fireplace for grilling. If the fireplace stove will serve only for heating, the chimney height may be lower.
What material should it be built from?
Concrete is not the only material suitable for building a fireplace. Opt for more natural wall materials, such as brick or real stone. If you build a fireplace with your own hands , then you will get an unforgettable experience from working with stone. The walls can be plastered with a special solution that can withstand high temperatures.
Please note that you will need metal support rods to serve as a base for straight and horizontal surfaces. If you do not have welding skills, then such structures can be ordered from specialists. We will prepare a more detailed specification of the materials needed for the construction of an outdoor fireplace in the next article.
Chimney roof
Suitable materials for making a fireplace head are copper, stainless steel or concrete. It's a matter of taste. It is important that the chimney is sized correctly and that the chimney cap is installed correctly. Construction stores sell a large assortment of ready-made heads.
Closed or open fireplace?
This refers to a fireplace stove equipped with a lockable glass door. Which option is best for you depends on how you plan to use the fireplace and your budget.
In conclusion, we invite you to familiarize yourself with various ideas and look at photos of outdoor fireplaces.
Outdoor fireplace, photo.
Various ideas. Outdoor fireplaces, photos.
Recreation area on a country site, stove-fireplace for heating. Outdoor fireplaces, photo selection.
Recreation area on a country site, stove-fireplace for heating. Outdoor fireplaces, photo selection.
What materials are used?
Outdoor fireplaces, which are equipped with a barbecue or barbecue, can be made from the following materials:
To build a furnace you will need the following materials:
- brick;
- stone;
- metal;
- concrete blocks.
There is also a scheme for constructing stoves from clay, cinder block and some other materials, but in any case a certain level of resistance to high temperatures should be ensured (for example, using heat-resistant finishing elements).
Unlike heating devices that are located inside the house, the requirements for outdoor installations are increased. They must be built from high-quality materials that can withstand the negative effects of the environment.
Wood Fireplaces for Turnkey Homes
When choosing an outdoor brick fireplace, take into account the following features:
Natural stone creates the appearance of the interior. Choose outdoor fireplaces with natural stone fronts to bring the warm, cozy feel of a cozy living room to your entertaining area. The stone is durable and has a stylish look and reflects the interior space.
Spit and other devices
In order to provide maximum functionality to your brick barbecue, it should be equipped with as many accessories as possible. A banal device for preparing barbecue is not worth starting a grandiose project on the scale of a country house.
In the process of laying a fireplace for picnics, it would be nice to also provide a spit on which you can cook a whole small lamb. A device on which you can hang a cauldron would also be useful. In other words, a barbecue oven should become your summer kitchen, only much more functional.
806d9bee2ae82c964ba00b857b11994f.jpeIn the process of laying the side walls of the portal, somewhere at the level of the fourth or fifth brick, you need to make recesses in the bricks on both sides opposite each other.
To ensure that they do not move relative to each other, a pipe is threaded into the recesses, which must remain there until all work is completed. Today, many people have beautiful stoves in their dachas, but not many people have one in which you can take and roast a wild boar on a spit.
How to prepare for construction
Many owners of suburban areas note a positive mood from the opportunity to escape from daily worries and give free rein to skillful hands. The feeling that comes after completing the work cannot be conveyed. Independent construction of a fireplace in the country will allow you to get a multifunctional device with enviable cost savings, enrich your experience in the field of stove work and feel the taste of victory after preparing the first dish.
Good to know: How to make a small fireplace with your own hands, step-by-step instructions
An important nuance at the beginning of construction is the choice of the place where the epicenter of country recreation will be located. Here you will have to take several parameters into account.
- The distance from the country house should be optimal. Fire safety requirements lead to a trend towards a remote location, and the principle of convenience dictates maximum proximity. After all, often when preparing dishes you will have to run into the house, bringing ingredients, tools, and setting the table. The creativity of a novice designer should open up so that he can choose a middle option.
- The location of buildings in a limited area leads to the appearance of air turbulence along the same trajectory. This means that residential areas experience a relatively constant wind direction. This must be taken into account so as not to cause inconvenience to neighboring residents.
- It is necessary to ensure the safety of not only the building, but also the surrounding buildings, bushes, and trees.
- If there is an artificial or natural pond on the territory, then installing a gazebo and fireplace in the immediate vicinity will add new sensations to your vacation on the shore.
Improvised gazebo
The next step will be to create a project. This is all the technical documentation, including drawings of the model, the purpose of the component components, and the main dimensions.
For those who have never encountered drafting, this procedure will seem overwhelming. There is no need to tempt fate and use the method of selection or exceptions to look for a suitable option. In this case, it is advisable to take advantage of the experience of skilled craftsmen who decided to transfer their knowledge in the form of finished projects.
How to get an outdoor fireplace with a barbecue, the usual layer-by-layer construction scheme will indicate in all details. Such diagrams are an integral part of any project. The principle of constructing an outdoor fireplace is absolutely identical to the fireplace that is installed in the house. But due to certain factors, some nodes in the street version had to be modified.
Despite the fact that the order will dictate the sequence of actions, in the process of laying a brick barbecue you should always follow a few basic tips.
Working fireplace complex at the dacha
- The grill and barbecue must have free, unobstructed access. Among all the schemes, choose those in which these elements are located at a height that is comfortable for preparing dishes. Usually it is 0.7-0.8 m.
- A correctly selected distance to the active zone normalizes the process of correct and high-quality cooking. This fact is known to everyone who has ever cooked barbecue. The recommended distance from the oven to the grill does not exceed 15 cm.
- The process of preparing barbecue or other dishes occurs under constant control. It is necessary to move the coals in time, collect them or, conversely, spread them in an even layer, turn the meat to the coals with the opposite side, and adjust the heat. For all these manipulations, certain tools are provided. They should be accessible, but not interfere with cooking. This means that the project needs to be amended to install special mounts for tools.
- When choosing a project, consider the combination of sizes. A barbecue with a fireplace should not only fit in the gazebo, but also leave room for guests, a table, and kitchen utensils.
Good to know: How to install a concrete fireplace at home, the advantages of such structures
Recommendations from experts
The following tips will help improve the quality of the design and the aesthetics of its appearance:
- round the sides of the stove - this will make it look more attractive;
- lay the ash pit made of bricks, with the edges cut at an angle (45°) - the ash will crumble freely during operation;
- to shrink the bricks, use a rubber hammer - this is effective and does not damage the material;
- install doors so that you can open them with your left hand (for left-handed people with your right hand);
- When installing stove fittings, use a level;
- For a firebox made of fireclay bricks, lay them on edge - the space will be used efficiently and food will cook faster;
- Fireclay bricks and ceramics should not come into contact - be sure to lay basalt cardboard between them.
To set up a barbecue with a brick stove, you will have to spend a lot of time and effort, but the result will pay for it all many times over. A well-organized design will last a long time, and it can be used to prepare a variety of dishes.
We lay the walls
Laying a stove with a barbecue or barbecue with your own hands must comply with certain rules:
- the firebox must be laid from heat-resistant materials that can operate normally at elevated temperatures;
- the construction of the device body can be carried out using ordinary materials;
- under the stove body you need to build a strong and level base from several rows of bricks. The evenness of the podium should be checked using a building level;
- the walls must be laid with ligation of the seams;
Arranging a classic outdoor fireplace
- during the construction of the walls, it is necessary to install grates that will supply the outdoor fireplace with the necessary amount of air;
- fasten the stove door to the masonry using welded embedded parts;
- starting from the sixth row of masonry, build a base for the combustion chamber. Lay the brick crosswise so that a small part of it protrudes. This is useful for attaching barbecue nets or if using a grill;
- The wall thickness depends on the dimensions of the stove and ranges from 120 mm to 250 mm.
Oven with barbecue
The design of the barbecue oven resembles an outdoor fireplace. The firebox in it is located, like a garden stove - approximately at the level of a person’s waist. If the garden stove is considered a successor to the ordinary village stove, then the barbecue stove is equipped with a variety of devices for frying shish kebab, vegetables or fish over coals.
Original barbecue oven in the shape of a dragon
Such ovens can be stationary or portable. Portable ones can be put away for the winter period of the year. And stationary fireplaces are best placed under a canopy to protect the structure from the effects of climatic conditions. There is a downside to portable BBQ ovens. They have rather small capabilities and do not have a smoke outlet.
Construction design
The basis for the success of any event is competent planning, the correct choice of building materials and strict adherence to technology and safety measures during work. Initially, you need to decide on the place where the stove will be installed. After this, you should draw up diagrams and drawings of each element of the barbecue.
The paper displays information regarding the following structures:
- foundation;
- the order of each fragment;
- fireplace;
- frying oven;
- chimney;
- roof.
If it is planned to create a universal frying complex, then an oven, a smokehouse and a hob with a hole for a cauldron are additionally developed. A washstand, sink and cutting tables are provided.
Based on the data obtained, construction materials are calculated. They are purchased with a small margin of 10-15% to cover errors in calculations, defects and damage during transportation.
Order and layout of masonry
https://youtube.com/watch?v=oylkEIHYiII
Having removed the formwork and waited until the concrete has hardened, the most important stage begins - laying bricks. Markings are applied to the slab, indicating the dimensions of the future structure. You need to apply the level again and make sure that the surface is horizontal. If significant errors are found, they are eliminated.
Rows from the first to the fourth must be laid with a spoon dressing. In front of the fifth row, a 40x40 mm corner is placed on the front side - it will act as a kind of support. To create bases for the pallet and shelf, the sides of the fifth row are placed with a tying bandage.
The spoon dressing should be followed when laying rows six to eight. Row number nine is made in the same way as row five to form supports for the table top and grille.
At this point, the construction of the table can be considered complete. Next, the barbecue oven with your own hands will be built only from the roaster side. Bricks are laid again using a spoon bandage from the tenth to the fourteenth rows. In front of the fifteenth row, a metal corner is again placed on the front side, acting as a support for the stove vault. The fifteenth row is laid.
1f8683af01cdd717f398a2a01b5a2186.jpe
5b6027f1fd565a39b7d9f054b8937253.jpe d4c248074f8a46e4f1b275d8d06f7af7.jpe
Then you need to arrange a gradually tapering vault. It can be done by alternating the splint and spoon ligaments, gradually moving them to the center. In the sixteenth row, stitching is done on the front side, spoon stitching is done on the sides. In the seventeenth row, on the contrary, in the eighteenth row we change again. The resulting protrusions can be arranged according to their purpose.
From the nineteenth to the twenty-first rows are laid with spoon masonry.
The twenty-second poison begins the pipe. In the twenty-third row, the necessary narrowing is made and work continues in the same sequence to the desired height. The higher it is, the better the traction will be.
In the penultimate row, windows are made to remove smoke. The last row will be laid completely.
The work can be considered completed. While the solution dries, all that remains is to think about the exterior finishing and reliable protection from the vagaries of nature.
We recommend reading the instructions for making a false fireplace with your own hands
Finishing work
It is necessary to install shelves, a finishing countertop, a frying grid and a tray for coals. The latter is made from a sheet of steel with folded edges. The minimum side height is about 5 cm.
You can take the grate from your old oven or buy a new chrome model. The main thing is that it fits in size. Tabletops and shelves are made of moisture-resistant material.
The top of the pipe should be covered with a stainless steel roof. This will protect the smoke windows from rain. The monolithic slab is covered with tiles or porcelain stoneware to prevent moisture from penetrating inside.
You can build a full-fledged gazebo around the barbecue stove, the canopy of which will cover the structure
It is very important that flammable objects and materials are located away from brick walls, which become very hot.
By welding the smoking chamber, the functionality of the stove will expand.
Video instruction
Conclusion
Building a barbecue oven with your own hands is not difficult if you plan each stage competently and slowly and prepare well for the work. The most important stage is masonry. The longevity of the service of the entire structure will depend on the quality of its implementation.
f865172a8d51505597d87f00badffcfb.jpe
Self-construction
To build an outdoor fireplace with your own hands, you need to determine its installation location. It cannot be chosen arbitrarily, since a working device must be not only functional, but also safe.
The most common places to install a fireplace are a terrace, a gazebo, or an open area in a windless place.
When installed on a terrace, the chimney is attached to the wall of the house. It is erected in a gazebo, passing through the roof. An open-air design does not need to comply with the height requirements for the chimney, but it cannot be completely excluded from the model.
Stage-by-stage laying of the fireplace is carried out in accordance with one of the selected ready-made schemes. Like any type of fireplace, outdoor fireplaces cannot be built based only on intuition. This complex theory, confirmed in practice, implies strict adherence to a certain algorithm. At the first stage, all the material should be prepared so that work does not stop for a long time.
Scheme of construction of a barbecue hearth
We will need fireproof bricks, fireclay bricks, clay, sand, crushed stone, cement. There are special requirements for clay, because the strength of the masonry directly depends on its fat content. To evaluate this parameter, you need to saturate a piece of clay with water, knead it in your hand and leave it to dry in the form of a cake. This cake, made of clay, should not crack, but if, when dropped, it remains intact and has strength, then the clay is considered suitable for baking.
Foundation installation
Even the fact that the fireplace is installed outside in the yard does not negate a reliable foundation in the form of a foundation. Its contours are determined as the area of the fireplace, increased on each side by 10 cm. Then a pit is dug to a depth of 70 cm.
In order not to waste expensive solution, the bottom of the pit is filled with crushed stone, which should be compacted well to avoid settlement of the structure. The sand-cement mortar is prepared so that there are two parts of sand for one part of cement.
The foundation must be raised above the ground, so formwork is prepared around the perimeter and filled with mortar. It may take about 3 weeks for the foundation to completely harden. All work will have to be temporarily stopped.
The foundation will allow the structure to stand stably
Main masonry
To properly build a stove or fireplace, you need to lay out each row exactly according to the diagram. But first, two layers of roofing material are laid on the surface of the foundation, which will provide the required level of waterproofing. Next comes the laying of a continuous layer of brick. It is very important to maintain the horizontal level of the base.
Each subsequent row is performed according to the pattern with the ligation of bricks. To install the grate, you will have to process the bricks on which it rests with a grinder, making a recess in them. Before installing the door in a niche, its frame is wrapped with asbestos cord. This is a reliable way to seal the structure.
Using red brick for masonry
The final stage is the installation of a fireplace chimney. It should be noted that the requirements for an outdoor chimney are not as stringent as for an indoor one, so you can use ready-made frames that are mounted on the built fireplace body. The main task of the chimney is to remove smoke from the level at which people are located. The chimney can rise above the structure by only a few centimeters.
Block barbecues
Popular barbecue model made of blocks and bricks
Portable block grill
We removed two blocks and now it’s no longer a grill, but a barbecue
The main feature of this project is that you can always disassemble it, put it in the back of a car and transport it wherever you need it. Since there is no mortar, glue, nails or anything like it in its design, the block grill can be easily moved with minimal effort. You can install it anywhere and forget about it, as the design is weather-resistant and requires no maintenance at all. How to build a grill, I think, instructions are not needed.
If we're talking about blocks, check out a few more options. Here is a collapsible barbecue grill made from blocks with a shelf. It can be assembled like a construction set, anywhere, and after a picnic, it can also be disassembled and stored in a shed until the next event. But it is advisable that you have a permanent area lined with tiles or stones; usually there are always crowds around the grill, everyone wants to see how meat is fried, proven by practice. Therefore, it is not a bad idea to provide a paved path, it can be made of the same material as the site, then you have a chance to preserve the lawn.
And here is another barbecue made of blocks, complete with a bench made of the same material. If you put cushions on the bench and hang a couple of lanterns, you’ll get a very cozy place. And, most importantly, you can make all this beauty yourself. Everyone loves barbecue, and if you decorate everything with imagination, it will delight your family and guests, but in fact, you don’t need to do almost anything, just drag the blocks around for an hour :)
Here's a step-by-step tutorial on how to make a BBQ grill out of blocks. This is a stationary structure with finishing and an upper frame. However, for such designs there is no need for instructions; you can put together any combinations yourself. Photo source www.woohome.com/diy-2/cool-diy-backyard-brick-barbecue-ideas
Grill smokehouse made of blocks
Or this kind of grill and smokehouse, on which you can cook a lot of things at once. This project is labor intensive, but simple and can be completed in just one day. The job doesn't require a lot of skill - it's not like you'll be messing with anything or inserting rebar supports, but you do need to be precise when laying the foundation.
All materials are available, although sheet metal will likely be the most expensive component, so take the time to shop around.
The main thing is to make a plan.
First, sit down and decide what size grill you want. The author decided that he needed a 1.5 x 2.5 m barbecue, which, of course, commands respect. After this, you need to decide at what height the work surface will be, so to speak. In this case it is 60 cm.
Next, you need to think about where you are going to place the holes to place the charcoal. For a grill this large you will need holes at both ends. This is needed for two purposes. First, heat is needed at each end to distribute it evenly across the entire surface. Secondly, having two holes on opposite ends will help with temperature as you can now control the air flow.
Regarding materials. The quantity will naturally depend on the size. In addition to the blocks and metal grating, you will need a metal roof - corrugated metal roofing is used to cover the pit during cooking. This material can be purchased at most hardware stores, but you won't cook on a galvanized surface as it releases toxins. However, it works great as a coating without any danger of contamination.
Yes, there are also metal corners, they are needed to support the block and as supports for the grille.
Step-by-step photos of production:
Photo source caughtsmokinbbq.blogspot.co.uk/2011/10/how-to-build-bbq-pit.html
Construction
To build a fireplace barbecue with your own hands, you need to break the whole process into components and carry out all the work according to the specified algorithm in a certain sequence. If you have no experience in laying stoves, then it is not recommended to deviate from the scheme. Professional craftsmen tend to make certain changes that increase the functionality of the device in specific given conditions.
Kindling the fireplace complex
- First, the foundation is built, because the grill fireplace has a fairly large mass and requires a solid foundation. The depth of the foundation (pit) is approximately 0.4 m. A pit is dug over the area of the future fireplace with a certain tolerance and its bottom is covered with crushed stone and sand. This mixture needs to be compacted well. It is advisable to move the stones by hand so that they lie as close to each other as possible. The rest of the foundation is poured with a prepared solution of cement and sand. Reinforcement will only strengthen the structure. Having brought the surface to the floor level, work is stopped until the foundation has completely hardened. At this stage you can lose up to 10 days. But during this time it is recommended to carry out other, modular work that does not depend on the progress of construction.
- After the specified time has passed, you can begin laying the fireplace itself. The order not only graphically displays the sequence of actions, but also comments on the features of each series. It tells you what material to use for which part. Usually the podium is made of fire-resistant facing bricks, and the parts of the firebox where there will be direct contact with the fire are made of fireclay bricks.
- At the bottom of the fireplace, the brick is placed on cement mortar. This part is usually cold and does not require a special composition, but the part where the firebox is located must be held together with clay mortar. It withstands high temperatures and prevents cracks in the seams between bricks. If it is not possible to prepare a clay solution, then you can purchase ready-made dry powders, which are diluted with water and converted into a heat-resistant solution. When constructing a chimney, lime is added to the cement composition.
- You can make metal parts for a fireplace or barbecue yourself if you have experience with welding. But the necessary elements can be purchased. They have standard sizes, so they will fit any chosen scheme.
- The next moment, which will turn out to be non-standard, is the construction of the arch. But you shouldn’t give in to difficulties, especially if they are apparent. The stages of masonry are accessible to beginners, and the difference from the formation of straight rows is, perhaps, the need to process the central brick of the arched ceiling. All other steps are not that difficult.
- The chimney will ensure the combustion of wood and efficiently remove smoke from the gazebo to the street. Although the requirements for the chimney are not the same as for a home fireplace, they are still presented. Unlike a classic fireplace, a smoke chimney may not be installed here, since the generated heat has already been used, and a short-term overturning of the draft will remain an unnoticed phenomenon on the street.
Good to know: How a fireplace works, we consider all known options for such devices
At the final stage, the fireplace is lined. If you are not satisfied with the appearance of the masonry even after all the bricks have been wiped with a damp cloth, then you can decorate the walls of the fireplace with any fireproof material. Tile or artificial stone are popular. They are made in the form of tiles that are glued to the outer surfaces of the fireplace walls.
Do-it-yourself stove installation
Before starting work, the installation location, the layout of the brick stove, and the availability of all building materials are clarified.
The foundation is planned first; how deep and wide it will be depends on your plans. It also depends on the plans whether a concrete platform will be built near the stove, what additional functions the outdoor stove will perform, and what material will be used.
For masonry you will need the following: sand, cement, crushed stone, rubble, reinforcement, refractory bricks, facing tiles and a trowel.
Roofing felt is spread on top of the concrete foundation in two layers; it will serve as a barrier to moisture. You need to lay them in a checkerboard pattern, the standard laying is half a brick.
Add clay as a binding solution, so it will be resistant to high temperatures, and if you use only cement and sand, the structure will crack.
Check each row with a horizontal level. In order to fasten the walls together, reinforcement or a metal corner is taken.
122054a47c82abd08dd6051beb95a47b.jpe
After the installation is completed according to your drawings, you need to treat the seams - cement mortar is made and rubbed into the seam. Afterwards, when the solution has not yet dried, you need to remove the excess and embroider with the means at hand.
You can use a pipe as a chimney or lay a brick chimney, gradually reducing the width of the pipe from the stove.
A stove in the yard, just like a home stove, requires care; you need to constantly keep it clean, since with each subsequent cooking, cleaning will become more and more difficult, and the appearance will be spoiled.
Any owner will want to be proud of his construction in a private house or country house. Because it will always be in sight and constantly in use. Having spent a small amount of money on building materials, you will forget about the unstable collapsible grill and enjoy your vacation.
Making an outdoor fireplace
Today we decided to tell you how to build a wood-burning outdoor fireplace-barbecue with barbecue. The manufacturing cost is not that high, and if you do the work yourself, this will further reduce the cost of the entire structure.
Choosing a place
This is a fairly powerful stove that will require certain conditions for installation. We must also take care of fire safety and convenience. So:
- Do not install the stove near wooden buildings or in bushes. The place should be open and well ventilated.
Attention! When choosing a place, take into account your neighbors; smoke from cooking can directly enter the door of a neighbor’s house. And then the holiday can end in tears. Take care of your nerves and your neighbors!
- Do not install a wood-burning outdoor fireplace in a low area. If it rains, you may end up in a puddle. Give preference to elevation.
Tools and materials
To build a stove, you need to prepare material and tools. The set will not be so large and, perhaps, any owner will have one. We will need to purchase:
- Brick. Determine the quantity according to your size. Just keep in mind that the firebox will need to be lined with fireproof material.
- Cement.
- Clay.
- Fireclay powder.
- Spacious capacity.
- Kelma.
- A shovel.
- Construction level.
- Construction square.
Making the foundation
Outdoor fireplaces and stoves, like most stationary brick structures, begin to be built from the foundation. This is the basis of the structure. It should not sag in bad weather and should reliably support the weight of the entire structure. So:
- First, let's draw a diagram of what we want to get in the end. After the location is chosen, we stretch the nylon thread along the foundation placement points. We dig a hole at least 70 cm deep.
Making a trench for a strip foundation
Attention! You should immediately take into account the width of the masonry. The hole should be 10 cm wider from the wall. Don't forget about this.
- As a rule, in the manufacture of such a structure, a conventional strip foundation is used. After preparing the trench, fill the hole with crushed stone. You can use all unnecessary stones from the site in your work.
- After this, we need to spill the crushed stone with a solution. To do this, we take a larger container and pour sand and cement into it. For cement grade 300 we use a ratio of 1:3. Start adding water to the dry mixture and mix. To do this, it is better to use a drill with an attachment. With this simple device you can quickly and efficiently prepare a solution for pouring the foundation. Bring the mixture to the state of liquid sour cream. The presence of clots and stones is not allowed.
- After preparing the solution, we pour the foundation and compact the crushed stone. We give the structure time to harden properly.
Attention! If you decide to make a large and very heavy stove, then you will need to reinforce the foundation. To do this, reinforcement should be placed in it at the filling stage. It needs to be spot welded in the form of a lattice. This will provide the necessary rigidity to the foundation.
Laying an outdoor fireplace
The design of an outdoor fireplace is not fundamentally different in all modifications. There can be only one installation instruction; adhere to the basic rules and requirements in construction. There are different modifications of this design, but the principle remains the same:
- Making a solution. Pour sand and cement into the container, as described earlier. However, the following is worth saying and should be taken into account. When in contact with fire the temperature is high, it is best to add clay and fireclay powder to this solution. Fireclay should be added to at least 10% of the total volume of the mixture. It will give the required heat resistance. If you only use a mixture of sand and cement, then it will simply crack after a couple of warm-ups. It is best to take cast iron containers for making the combustion chamber and line them with bricks.
- In areas of high temperature, it is best to use refractory bricks for masonry.
- Let's start laying. First we make a solid plane of brick. It should be perfectly smooth.
- First, we cover the foundation with roofing felt. It will provide the necessary waterproofing of the building.
- We lay the first row with a whole brick. Here you need to strictly monitor the level of the masonry, which must be perfectly parallel to the ground. To do this, use a level. It is best to use a long one so that it reaches from one wall to the other. Then you will get the desired alignment of the structure.
Attention! Throughout the entire masonry, you need to ensure that the corners are made correctly. Use a level and square. Before starting masonry, you should lay out all the elements to dry and check the correct installation. You should never lay a brick directly on top of the mortar.
- The following rows should be placed with dressing. That is, each subsequent row should overlap the seam of the previous one. You can start laying the second row from half.
- When installing the stove, you should install grate bars every couple of rows. To do this, air will flow through them into the combustion chamber and ash will fall out. To do this, we place the grate bars on a brick and outline them with a pencil. After this, we take a grinder with a circle on the stone and make a reduction in the masonry. It should be the depth of the grate and a couple of cm wider. After this, you should lay the grate and make sure that it does not rest against the brick.
- When installing the doors, you need to weld strips of metal to their frame for fastening. These will be mortgages, with the help of which the fastening to the masonry will be carried out.
- The door frame is treated with asbestos cord before installation. This will ensure the desired tightness and will not allow smoke to penetrate. We make mortgages like this: we weld two tires on each side and after that, during laying, we put them in the seam between the bricks. Then they will be securely fastened;
- Approximately from the sixth row, you should begin to form a support base. This can be done by laying bricks crosswise. Then half a brick will protrude beyond the masonry. You can put a frying rack here. For it, also prepare a place according to the dimensions.
One of the options for making a support base
Making a chimney
Like any stove, an outdoor fireplace needs smoke removal. Therefore, you should install the chimney correctly to make your stay nearby comfortable. Moreover, the smoke will be emitted much higher from the ground level, and therefore the possibility of installation site increases significantly. For such structures, it is best to use modular chimneys. It will provide the necessary removal of exhaust gases and is easy to install. Such designs are available for free sale. They have the necessary insulation, and their fastening is quite simple, which is provided by clamps. This work can be performed by a person for the first time. When installing it, the following principles should be followed:
- The installation of the chimney should always begin from the unit itself.
- When fitting the elements, they must be fastened tightly enough. No gaps allowed.
- The depth of fastening of the elements must be at least half the cross-section of the pipe.
- The connections must be freely accessible, which will ensure timely cleaning of the elements.
- Joints are not allowed in walls and partitions. Please take this into account when installing in outdoor kitchens.
- The chimney is mounted on external walls with a distance of at least 2 meters.
Instructions for making a portable barbecue
The model of a collapsible barbecue consists of four legs, walls with holes and a bottom. You need to think over and draw your option in advance.
The list of required tools includes:
- grinder,
- welding machine,
- drill and drill bits,
- mounting hardware.
Step-by-step instruction.
- On a sheet of metal it is necessary to measure and draw the bottom and walls.
- The metal “pattern” is cut out using a grinder, the edges are folded and connected with a weld.
- Drill holes for air.
- You can make slits on the walls for fixing skewers.
- The easiest way to make support legs is from a metal corner, welding (or screwing) them to the base of the box.
Walling
If you lack experience, it is recommended to use the developed diagrams for the construction of a barbecue. They do not carry any secrets, just to get a strong firebox with the ability to install a grate and a brazier, you need to properly tie the bricks. After laying 2-3 layers, you will have to take a short break, otherwise the weight of the entire fireplace will fall on the bottom layer of the mortar that has not yet hardened.
The process of laying an outdoor fireplace
So, after the foundation has completely hardened, you can begin laying the barbecue.
- The structure is made of half a brick, as it is not subject to heavy loads. Complex fireplaces are already being built in brick. Strength will be created by the staggered laying method. It involves shifting all the bricks by half a brick cyclically.
- When forming one row, before moving on to the next, do not forget to insert fastening elements for shelves and grids. For this purpose, metal products or bricks are used, laid perpendicular to the row and forming protrusions inside the firebox. If this nuance is overlooked, you will have to dismantle the entire grill.
- The fryer is mounted on the completed fasteners. It must have holes through which the air necessary for combustion will flow.
Steak grill
The considered variant of the firebox structure is the simplest and can be complicated by closed structures. But you should not start your first independent work with complex options, because the complication leaves a certain imprint on almost all parameters: the formation of a row, jumpers, the number of rows, etc.
Choosing a place for a stove with a brick grill
When deciding on an outdoor grill, you need to take into account many details. One of them is the right choice of location.
One of the important points is the direction of the smoke. If it constantly ends up in the neighboring area, then it will definitely not be to everyone’s liking. To check, you need to light a fire and trace the direction of the smoke.
37214fada9087ab723fea82ee925e66f.jpe 0a146e87efd0f6467385b03601f23762.jpeFor a brick kiln to be safe, you need to build it taking into account:
- distance from trees and other plantings;
- distance from buildings - smoke should not reach them;
- remoteness of other flammable objects;
- protection from wind and rain - a canopy can be provided;
- artificial lighting or the possibility of providing it so that you don’t have to cook in the dark.
You might think about installing a brick oven near the gazebo or building such a structure in the future. In warm weather, you can gather in it - the owner does not need to stray far from the food being prepared, and the fresh air will only whet your appetite.
Construction of a garden stove
Garden stoves are considered one of the types of outdoor fireplaces. The firebox in it is at a level of 1-1.2 m, as in a conventional stove. Such a stove will not only be able to decorate the interior of the garden, but will also be used for cooking. But this should only be done in special fireproof containers, since the fire source will be too close to its walls.
Garden stove design diagram
Since in this design it is possible to remove smoke through a chimney, such a stove can be placed on a terrace or veranda. The garden stove fits very well into the design of a country plot, which is made in a rustic style. It is also possible to build an outdoor stove in a high-tech stylistic direction. It all depends on your wishes.
Projects of brick barbecues with a stove
The brick barbecue project with a slab is another important stage and the next step after finding the right place. First you need to think about the configuration and dimensions of the future stove. It’s better to start with a sketch to visualize everything clearly.
You can draw up a project yourself, find a ready-made version on the Internet, or contact specialists. The drawing is important for clarity and determining the sequence of work and calculation of materials.
Brazier oven with closed stove
A grill with a closed hob is equipped with walls on the sides and back. The stove will only be open from the front. At the same time, such a grill can be equipped with an oven.
The closed-type cooking stove is attractive because it makes the food special. Cooking is reminiscent of a Russian oven.
Brazier oven with open stove
A brazier with an open stove is attractive because less material is required to construct the structure. Another advantage is more space. There is nothing above the stove, so you can use containers of any height.