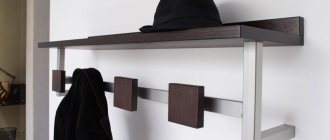
With a key holder in the hallway, you will forever forget about the keys lost somewhere in the apartment. You will no longer have to urgently search for them in all the nooks and crannies 15 minutes before leaving. And your beloved pet will definitely not drive them under the refrigerator or behind the sofa. Finally, order will reign on the table with small change, cards and wallets. Moreover, you can make a beautiful wall-mounted key holder with your own hands!
Plywood key holder
From a sheet of plywood with a thickness of 0.5 cm you can make almost any wall-mounted key holder. You only need a stencil to cut out the desired shape, and a tool for this. By the way, the back wall of old chipboard furniture is perfect.
While you are cutting, the plywood may crack and the edges may break off, but all this can be fixed with a special wood putty. After this, be sure to prime the base so that the paint adheres better, and you can decorate it at your discretion.
Slab key holder
Slabs, or simply cuts, are now very popular in all eco-interiors, Scandinavian style and lofts. To make an effective wall-mounted key holder, you will need a saw cut, a hard metal sponge, sandpaper, tinting or stain, acrylic varnish, as well as several hangers for fastening and the hooks for the keys themselves.
Work the slab along the grain first with a hard sponge and then with sandpaper so that the texture of the wood appears even better. Using a regular wide synthetic brush, apply alcohol or water stain in several passes. After drying, you can transfer the drawing from the printout onto the wood using the decoupage technique.
Cover everything with acrylic varnish on top to secure the result. The key holder will fit more tightly to the wall if you make several fastenings. Do not screw too many hooks onto one saw, otherwise you will constantly catch other ties while removing the one you need.
Key holder made of a wooden branch
This type of key holder does not fit into any of the groups described at the beginning of the article, and is unique in its own way, since it involves working with unprocessed “primordial” material. A wooden branch will look good in all apartments designed in a modern style, be it rustic, lounge, loft, and so on. This branch will fit most advantageously into interiors with an emphasis on other things made from “rough” wood.
Key holder from a branch
Available materials
To make a key holder from a branch you will need a minimum of effort and available materials, including:
- branch;
- a piece of sandpaper;
- metal hooks;
- drill;
- perforator;
- self-tapping screws (depending on the number of hooks);
- dowels
If desired, you can use several branches for the key holder
The most difficult moment in making such a key holder is the preparatory moment, which consists in finding and cutting down a suitable branch. Not every branch is able to survive drilling and subsequently serve as a key holder. This material can be quite capricious, so it is recommended to focus on the strongest wood and consider, first of all, oaks.
Procedure
DIY key holder made from a wooden branch
On top of the branch itself, you can place other wooden figures to add color to the collarbone. An example of such a combination is shown in the photo below.
An example of decorating a key holder from a branch
Prices for wall key holders and cabinets
Wall key holders and cabinets
Key holders made from cutlery
Very impressive and unusual key holders are made from old forks and knives. In addition to these, you will need fasteners, pliers and, if desired, paint for decoration. You just need to beautifully bend the devices, like hooks, and fix them on the base or directly on the wall. Instead of a base, we offer a wooden kitchen board - a spectacular addition to Provence!
Unnecessary equipment for making key holders
If you have panels from old appliances with holes for plugs, you have a chance to make a very unusual key holder. You need to cut out the panel and insert the plugs as hooks for keys. Hang the product on the wall.
The headstock of a string instrument also looks good as a key holder. You just need to add hooks to it. If it’s a pity to spoil an old guitar or violin, you can make an imitation, which is even more interesting.
To clearly understand the instructions for making key holders, look for articles with photos of key holders made by yourself.
Key holder from a photo frame
A wide, beautiful photo frame can be turned into an equally impressive key holder with minimal effort. As a backing, use a sheet of plywood, which can be painted, decorated with decoupage, or covered with fabric. Screw spectacular decorative hooks randomly right in the center of the improvised panel.
Key holder with shelf
Agree, the simplest version of a key holder is not the most practical. After all, we don’t have that many keys for all the hooks to be occupied. Because of this, there are key holders with a shelf for various small items. The formats of such shelves can be very different.
An interesting idea for making key holders is a key holder with magnets. This is an ordinary shelf, at the bottom of which magnets are attached; they hold the keys, attracting them. Although only iron keys are suitable for this.
Closed key holder
An old unnecessary box is an almost ready-made closed key holder with a door. If it already has a latch or fastening, then all that remains is to screw small hooks for keys inside and hang it on the wall. Aging the mini-wardrobe by hand, paint it, decorate it with decoupage or paste it with old wallpaper. Painting with a dry synthetic brush shows up interestingly on wood - it looks careless, but stylish, and emphasizes the texture of the material.
Open wall key holder: ideas and options
If you decide to make a key holder, it is better to start with something not too complicated. First, decide on the place where you plan to hang the product. This will make it easier and faster to choose a model - long and narrow or closer in shape to a square, circle, etc. Then it's a matter of technique. Most of the models are quite simple, even if you are doing something with your own hands for the first time.
If you have patience and are good with a jigsaw, you can make such a masterpiece out of plywood
From wooden planks
As we have already said, wall-mounted wooden key holders are one of the most common options for DIYers. Now you’ll understand why... Probably, it’s not a problem for anyone to find a few planks. Planks of any format and thickness are suitable. You can use long thin strips - 20-30 mm wide, medium ones - 40-70 mm or even wide. They can be connected to each other, folding them into the shape you need/like. Three samples in the photo below. Once you decide on the shape, you can begin processing.
Wall-mounted key holder made of wooden boards
Processing the wood is also not a problem. You can use different methods. If you want something classic and strict, take sandpaper or a sanding machine and sand the surface until smooth. Next, you can cover it with paint, oil, stain with or without varnish. All this gives different types of surface, and therefore looks different.
A few more ideas
If you want a more informal look - a loft or something like that, you can take a wire brush (you can use a drill attachment) and remove some of the soft fibers. A clear wood grain will appear. This is quick and easy to do with pine. You just need to find a board with an interesting design. Next, you can again go through wood oil, stain, water-based varnish with a coloring pigment. They all give a different effect, but the protruding parts are painted worse and the wood shows through. The soft part turns out darker. As a result, the wood grain appears more clearly.
Approximately the same effect, but more “harsh”, is obtained by processing with a blowtorch. The soft fibers burn and the structure becomes clearer. But here you have to be careful not to overheat. It will no longer be possible to restore...
Next, we fasten the boards and nail the hooks. Read more about hooks below, as well as ways to attach the key holder to the wall.
In combination with a shelf
A wall-mounted key holder just for keys is not very practical. We usually don’t have enough ligaments to fill a dozen hooks. Therefore, combined models often appear - with a small shelf for small things, which also have a place not far from the door.
Key holder with shelf
Sizes and formats, as you can see, are different. Difficulty level too. Take your pick. You can make an L- or T-shaped structure and attach hooks at the top or bottom.
There is a very interesting idea in the photo - a magnetic key holder without hooks (on the left in the photo above). There are small magnets glued into the bottom of the shelf that attract keys. It’s convenient to use - you don’t have to “aim”, everything happens very quickly. Magnets - if they are the same and look “civilized”, they can be glued to the front surface; if the sizes are different, it is better to make recesses according to the shape. The magnet itself should protrude slightly above the surface - 1-2 mm. This is enough to find it by touch (if necessary).
From plywood
In some ways, plywood is easier to work with than wood. The surface has already been treated, all you need to do is cut it to shape and run sandpaper along the edge. Then paint, and you can proceed to the final step - attaching the hooks.
Plywood can be cut into any shape
What's great about plywood key holders is that you can cut out any shape. Any shape, style. For key holders, images of keys are often used, but it can also be a dog, a bird, a mouse... whatever.
From picture frames
If you have a picture frame or can make one, it would also make a very nice wall key holder. On the reverse side you need to secure some kind of base, for example, a piece of fiberboard or hardboard. It is more convenient to fasten with staples from a construction stapler. As a last resort, use all-purpose glue.
Regular or fancy frame
Inside the frame, the surface can be painted, a picture can be pasted, plain paper, a piece of wallpaper... Whatever you want or come up with. The hooks can be attached to the frame or to the inside - again, as you wish. The point is their type and the load that is planned.
Wooden and without hooks
You won’t believe it, but there is a wall-mounted key holder without hooks and magnets. It is usually made from natural wood, since this material is the easiest to implement the idea. After all, you can not hang the keys by the ring, but stick them into something. For example, into a gap. All that remains is to make such gaps, and this is not at all difficult.
Key holder without hooks
Moreover, as you can see, the cuts can be either horizontal or at an angle. They can be made using, for example, a milling machine. This is the most accurate and safest way. You can also use a circular saw. Even a regular saw. It is only important to stop in time and then process the cut well.
Dashboards of various devices are also useful
If there are old non-working appliances in the pantry that have panels with sockets into which plugs were once inserted, you have a chance to make an exclusive key holder. Carefully cut out this panel and insert the plugs with key rings into the sockets. All is ready. Can be hung on the wall.
Stylish wall key holders for youth interiors
It works just as well using the headstock of a guitar/violin/cello or any other stringed instrument. You can use pegs, you can add hooks. By the way, no one bothers you to make an imitation if it’s a shame to spoil the instrument. This could make it even more interesting.
Key holder organizer
Using the same principle, you can turn a drawer divider organizer into a spacious key holder with different sections and small shelves. Just choose a material that is dense enough so that it does not deform under the weight of the keys. And all that remains is to attach it to the wall and screw in a few hooks, or simply drive in nails with neat heads.
Types of wall key holders
At the moment, several types of wall key holders are especially popular:
- key holders-boards;
- frame key holders;
- key holders-organizers;
- key holders-cabinets;
- housekeepers.
In short, any creative person with minimal skills in working with available materials will have plenty to choose from. We will talk about what the features of all these types of key holders are below.
Wall-mounted key holders can differ significantly from each other in design and functionality
Keyboards
Boards are probably the most common model for a key holder. They are the easiest to make, and as materials most craftsmen use ordinary wooden waste, which is found in one form or another in every home. That is, you don’t have to additionally look for spare parts for the key holder in stores and spend money on them.
There is no universal layout for a board key holder, since this type, in turn, is divided into subtypes. Depending on the groove, there are three main types of such key holders.
Table 1. Types of key boards
| View | Description |
Key holder with milled groove | In appearance, such key holders are simple shelves on which you just need to attach the required number of hangers and place self-tapping screws for them in the wall. The disadvantage of this “system” is the likelihood that when using two or more ligaments, one of them will constantly be pulled out “for company”, which will only complicate access to it |
| Key holder with oblique grooves | Oblique grooves overcome the disadvantage described above. Even if there are several bundles, access to them will always be open. The main weakness of this key holder is the difficulty in manufacturing - the fact is that the inclined transverse grooves are not easy for even an experienced craftsman, not to mention beginners. In addition, it is important to consider that such a key holder will not tolerate harsh handling. If you pull the keys towards yourself with greater force, you risk tearing the key holder off the wall or losing the chain |
Key holder with transverse vertical grooves | The so-called “bar key holders” are the most reliable type that can survive any careless pulling of the keys. The main feature of this key holder is the mandatory presence of a key fob, through which the keys are secured. However, if desired, this nuance can be easily corrected by replacing the massive keychain with a compact carabiner with an extended chain |
Frame key holders
Strictly speaking, frame key holders are a subtype of board key holders, but we will look at them in a separate chapter. There are three main ways to arrange the frame and hooks:
- Instead of a picture, a durable, scratch-resistant base is inserted into the frame, after which the required number of hooks is attached to it. This method is the simplest and most straightforward;
- If the walls in your hallway are made of durable materials (such as tiles or artificial stone), then the keys themselves can act as a picture. To do this, you need to select hooks that have threaded tails and screw them into the top bar of the frame from the inside in the center;
- In the same way, you can screw the same hooks into the picture frame itself. At the same time, they will not become a witty picture, as in the previous case, but they will still be just as convenient to use. This method applies to frames made of wood or MDF. Any baguette is not designed for drilling and will quickly crumble at the first attempts to do something with it.
Varieties of key frames
Key holders-organizers
Key holders-organizers are still a rarity for most Russian apartments, since this idea migrated to us from abroad. The reason for the popularity of such combined organizers mainly in English-speaking countries is that their residents, as a rule, deal with large volumes of mail, which they store in special compartments in the hallway, as shown in the photo below.
Classic wall-mounted key organizer
The design of the organizer itself is limited only by the imagination of the master. It can become either a simple basket with metal rods and hooks, or a small wooden work of art consisting of drawers, hooks and even a special board on which you can write down your immediate plans and reminders. The main advantage of such organizers is obvious and lies in their versatility. However, those who like to leave everything “extra” in the hallway can soon create such a mess on the shelves that the main purpose of the organizer will come to naught.
Types of key holders-organizers
Video - DIY key holder-organizer
Key holders-cabinets
Key cabinets are responsible for the vintage notes in your apartment, since they imply consistency in a certain style, which you can easily grasp by looking at a few examples. As a rule, such cabinets are decorated with carved details, wooden patterns and other decorative elements that will not fit into a minimalist urban interior and will look foreign. Often such lockers require a clock, which leaves less and less space for storing anything else other than keys.
Types of key holders-cabinets
Among the main disadvantages of key cabinets, we highlight the main ones:
- difficulty in manufacturing. Most owners interested in this style purchase key holders-cabinets ready-made, since only a professional can make the corresponding parts. The complexity of wooden elements cannot be compared with the complexity of elements of key holders, boards or frames;
- bulkiness. Key cabinets take up quite a lot of space, and therefore are not suitable for apartments with cramped hallways;
- stylistic framework. Key holders-cabinets only look appropriate in a classic or rustic style.
Key holders-cabinets imply consistency of the hallway in a certain style
The advantage of such cabinets is their secrecy. Lockers allow you to disguise keys, which can be useful for families with extremely active pets or curious young children. With such a key holder you definitely don’t have to worry about the safety of your keys.
House key holders
The house key holder is a type of cabinet key holder, but compared to the latter it has a number of important advantages:
- compatibility with the interior. A house key holder can be built into almost any style, since it involves freer use of available materials;
- ease of manufacture. The house does not imply the presence of complex parts and can even be created on the basis of an ordinary box;
- variability. A house can be literally anything. Whether a minimalist wooden box or a richly decorated cabinet with mounted paintings and other additions - everything is determined by the desire and capabilities of the master. Often such houses are combined with a clock, which makes them even more useful in everyday life.
House key holders allow you to keep your keys completely safe and hide them from prying eyes
Key holder made of tree branches
If you love eco-style, we have another option for you - a durable and fairly wide dry branch. Such a key holder will always be unique, because identical branches do not exist even on the same tree. You can save the bark by sanding only the damaged areas.
As with cutting, we recommend covering the branch with stain - it will emphasize the texture and give the tree additional protection. Also, be sure to varnish, even when saving the bark - use sprays for convenience. Screw the hooks in separately or use twigs and twigs instead.
Magnetic key holder
Don’t want to drill into the walls, but double-sided tape doesn’t hold a heavy key holder with bundles well? There is an alternative option - glue a fairly strong magnet to it. And then you can attach the accessory to metal pieces of furniture. Or maybe you still have a refrigerator in the hallway from old memory? Then a practical magnet is definitely your option!
Key holders and decorative keys
Wooden key holders and decorative key rings in the Provence style will complement your hallway interior. On the hooks in wall-mounted key holders, your keys will always be in place. A bunch of cast iron decorative keys can be used in the interior of a country house in combination with other cast iron products.
Page: -
1
—
| 15,000 10,500 rub. |
| PC. buy |
| Chocolate Color Shelf with Hooks Kitchen, Bathroom or Room Decor Towel Rack |
| 10,350 8,280 rub. |
| PC. buy |
| Milky white shelf with hooks, decor for kitchen, bathroom or room, towel rack |
| 7,500 5,250 rub. |
| PC. buy |
| Small wall-mounted spice rack with hangers-hooks in milky white color, kitchen decor in Provence style |
| 7,500 5,250 rub. |
| PC. buy |
| Small wall-mounted spice rack with chocolate-brown hook hangers, kitchen decor in Provence style |
| RUB 4,797 3,358 |
| PC. buy |
| A bunch of cast iron vintage keys with patina, the length of the largest key is 45 cm. Decor in Provence, country, vintage style. |
| RUB 3,450 2,760 |
| PC. buy |
| White key holder with hooks, wall-mounted, open, made of solid beech, paneled parts made of high quality MDF, water-based matte varnish, furniture and decor for the hallway in Provence style |
| RUB 1,765 1,235 |
| PC. buy |
| Decorative keychain in Provence style, Provence decor |
| RUB 1,765 1,235 |
| PC. buy |
| Decorative white keys, decor in Provence and country style |
| RUB 1,150,805 |
| PC. buy |
| Wooden hanger with hooks for towels in the kitchen, home decor |
| RUB 1,150,805 |
| PC. buy |
| Wooden hanger with hooks for towels, things, keys, decor for the kitchen, hallway, bathroom or children's room |
| RUB 1,150,805 |
| PC. buy |
| Wooden hanger with two hooks for towels, things, keys, decor for the kitchen, hallway, bathroom |
| RUB 1,150,805 |
| PC. buy |
| Wooden hanger with hooks for towels, keys, things, decor in Loft style, vintage America |
| RUB 1,150,805 |
| PC. buy |
| Wooden hanger with two double hooks for towels, things, keys, decor for the kitchen, hallway, bathroom or children's room |
| RUB 1,150,805 |
| PC. buy |
| Wooden hanger with two double hooks for towels, things, keys, decor for the kitchen, hallway, bathroom |
| RUB 1,150,805 |
| PC. buy |
| Wooden hanger with hooks for towels, things, keys, decor for the kitchen, hallway, bathroom in the style of French Provence |
| RUB 1,150,805 |
| PC. buy |
| Wooden hanger with hooks for towels, things, keys, decor for the kitchen, hallway, bathroom |
| RUB 1,150,805 |
| PC. buy |
| Wooden hanger with hooks for towels in the kitchen, Provence decor |
| RUB 1,150,805 |
| PC. buy |
| Wooden hanger with hooks for towels in the kitchen or bar “Irish Whiskey Jameson”, Loft decor |
| RUB 1,150,805 |
| PC. buy |
| Hanger with hooks for towels, keys, things, decor for the kitchen, in the hallway, for a girl's or boy's child's room |
| RUB 1,150,805 |
| PC. buy |
| Hanger for things, keys or towels, decor for a nursery, hallway, kitchen |
| RUB 1,150,805 |
| PC. buy |
| Hanger with hooks for a girl's children's room, Provence decor |
| RUB 1,150,805 |
| PC. buy |
| Wooden hanger with hooks for towels in the “Coffee Time” kitchen in the Loft style, Vintage America decor |
Page: - 1
—
Key holder with shelf
To combine useful things with useful things, combine the key holder with a shelf - and you can immediately put your wallet, business card holder or sunglasses on top. You will again need a sheet of plywood or chipboard, self-tapping screws and a screwdriver, the hooks themselves and, optionally, corners for mounting the shelf.
How to make a wall-mounted key holder with your own hands: photo report
To make a wall-mounted key holder, the following materials were needed:
- Photo frame of a suitable format. The door is made from it.
- Wooden blocks 20*40 mm.
- Fiberboard.
- Hooks, hinges, door handle.
Tools: saw, jigsaw, stapler with staples, drill and screwdriver. Well, and a tape measure with a pencil. This is the first thing we did with our own hands, so there are a lot of mistakes.
That's all it took to make a wall-mounted key holder with your own hands
Making a frame
First of all, the bars were cut to fit the frame. They were connected using staples from a stapler. The result is a frame for the part that is hung on the wall. A piece of fiberboard was cut to size and also attached to the frame with staples.
Making the back of a closed key holder
There are two best solutions here. The first is to connect the bars by sawing them at 45°. It looks much better, although it is more difficult to implement. If you are not sure that you will be able to cut it smoothly, you can do it as in the photo. But it is better to fasten the bars with self-tapping screws. And this is clear. Let there not be a heavy load on the key holder, and fiberboard gives rigidity to the frame, but it is more secure to secure the bars with self-tapping screws.
If the connection is as in the photo, screws - two pieces for each joint - are screwed from above, perpendicular to the top board. To make the screw go easier, holes are pre-drilled. The diameter of the drill is 1-2 mm less than the diameter of the screw.
Installing crossbars under hooks
From the same bars we saw off two sections - according to the internal size of the box. We put them in the case and secure them on the back side with brackets. We take furniture hinges, mark their position on the body, and mark the holes for fasteners. We make holes with a drill, screw on the hinges and place a furniture magnet to fix the door closed.
Installing hooks
There is also something to be done “more correctly” here. It is better to secure the planks through the walls of the frame with the same self-tapping screws. To prevent them from moving, they can be fixed with staples, but then it is better to screw in two self-tapping screws on each side. To prevent the caps from sticking out, select a drill whose diameter is slightly larger than the diameter of the screw cap. Make a hole for the self-tapping screw (the drill is 1 mm smaller than the diameter of the screw), then make small recesses with a large diameter so that the head can be hidden.
Assembling the door and installing hinges
Next we design the door. From the same fiberboard we cut out a piece of a suitable size and fasten it with staples. We drill a through hole on one side and install the handle. On the other, we mark where the hinges need to be secured, unscrew them, attach the mating parts, and mark the place for installing the fasteners. Having made the holes, we put the hinges in place, connecting the two parts.
Almost all
As usual, a description of the best option. As you can see, there is a decent gap between the door and the body. This is inevitable when installing hinges this way. To avoid it, trace the loop around the perimeter with a sharp pencil (it’s better to scratch it with a knife blade), then use a chisel to remove a certain amount of wood - the thickness of the loop plate. Its surface should be flush with the frame. A similar operation is performed with the counterpart. A hinge installed this way will not create a gap, although more work is required.
Homemade wall key holder
In general, not bad for a first experience. But to make the wall-mounted key holder look more presentable, it is advisable to trim it. The finishing is a matter of taste, but you need to at least polish it. If you don’t have a sanding machine, you can do this with sandpaper attached to a block. To begin with, take a medium grain, then finer ones.
How to decorate a wall-mounted key holder with a door
But how to decorate further is up to your taste. Paint it, cover it with stain or varnish, glue a photo, picture, make decoupage. There are a lot of options. Several in the photo above.
Lego key holder
An old construction set just as easily turns into a convenient, practical key holder - to the delight of children and all household members. If the parts hold tight enough without glue, make keychains out of them - and you won’t even need to screw in the hooks.
DIY key holder for the hallway - photo
You don't have to limit yourself to just these ideas! Use your imagination, experiment with materials and get inspired by our selection of photographs!

