1617
When choosing facing materials, special attention is paid to their dimensions. Depending on the size of one element, a certain pattern is formed on the floor surface. The thickness of the floor tiles is important, since the ability to open the door and the maximum operating load depend on it. Manufacturers offer facing materials in different formats. You can choose 15 x 15 or 15 x 60 cm and other parameters, depending on the selected pattern and the area of the particular room.
Square tile floor
Standards for porcelain tiles
The formats for porcelain tiles are very diverse. The most popular tile sizes are 30*30, 33*33, 45*45, 50*50, 60*60 cm. If rectangular tiles are needed for cladding, then they can be easily obtained by cutting them from a large square. So from a square of 50*50 cm you can cut 25*50 cm or 12.5*50 cm, from a tile measuring 33*33 cm you can easily get 16.5*33 or 16.5*16.5 cm. If you use waterjet cutting , then porcelain tiles can even be cut into mosaics.
The most popular porcelain tile formats:
You can see the dimensions of porcelain stoneware in this video:
Calculation of the amount of adhesive
When purchasing facing material, it is recommended to immediately purchase the required amount of ready-made adhesive or dry mixture.
To calculate it, you need to take into account several factors and at the same time focus on the data specified by the manufacturer.
What affects the thickness of the adhesive layer?
First of all, the area of the tile element is taken into account:
- 50*50 mm – 3 mm glue;
- 10*10 cm – 4 mm glue;
- 150*150 mm, 100*200 mm – 6 mm;
- 20*25 cm – 8 mm;
- 30*30 cm – 10 mm of adhesive mixture.
The quality of the coating on which the tiles are mounted is of no small importance. To fix tiles on smooth walls or on a floor without defects and a large number of pores, you will need less glue than for uneven porous surfaces.
Important! Before laying, it is necessary to completely clear the floor and walls of dust and debris - they impair adhesion and increase the consumption of the installation compound.
In general, the algorithm for calculating the amount of glue looks like this:
- Take the dimensions of the purchased tiles and select the optimal layer of mortar indicated on the package.
- Find on the packaging indicators of glue consumption per 1 m2 with a layer of 1 mm.
- Multiply the layer indicator (from point No. 1) and the flow rate (from point No. 2). You will get an intermediate version of the adhesive consumption per 1 m2 of decor area.
- Calculate the total area of the facing surface.
- Multiply the resulting number of square meters with the glue consumption per 1 m2. This is the total cost of the solution.
- The final result must be multiplied by 1.1 - this is a 10% margin, which in most cases will be needed due to calculation errors and changes in surface quality.
Humidity and moisture absorption
When solving the problem of calculating glue consumption, you should take into account 2 more indicators:
- moisture absorption of the facing surface;
- humidity of the solution.
When laying tiles on the wall, it is prohibited to use semi-dry mixtures, otherwise a strong adhesion will not be obtained. If the wall is too porous and rough, it is recommended to prime it in several layers until the increased moisture absorption of the area stops.
If absorbency persists, you will have to increase the thickness of the installation layer, otherwise the tile simply will not stick.
When arranging the floor, it is allowed to prepare a drier solution, but only if the floor base does not have increased moisture absorption. Nevertheless, the solution must be sufficiently plastic and easily distributed over the surface.
In some cases, the use of a primer layer is also indicated.
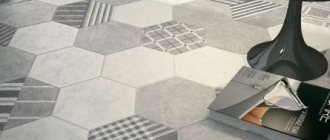
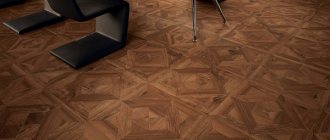
Wood imitation tiles
To get an imitation of a board, laminate or parquet that is as close as possible to the original, you need a long, elongated shape. But if the tiles are released in this format, they will be very fragile. To avoid this, when producing wood-look tiles, porcelain stoneware is used, which makes up the main part of the product. Manufacturing thin and long porcelain tiles is very expensive, so initially imitation wood tiles were produced square and had standard sizes - 30*30, 45*45.50*50. After a while, they started producing thin porcelain stoneware, but it was much shorter than the board and more like parquet.
Standard sizes of this tile:
The production of floor tiles does not stand still, so now you can buy numerous thin types that are very similar to floor boards in texture and size.
Probably even longer formats will appear on sale very soon.
Ceramic floor tiles
When choosing a floor covering material, you should choose it taking into account some nuances. The tile must have high strength indicators. Most often, strength directly depends on thickness. When purchasing finishing material for the floor, you must also take into account the thickness of the ceramic tiles with adhesive.
The thickness of the finishing material, which has dimensions of 40x40, 30x30 and 600x600, can range from 4 to 10 millimeters. It follows that the larger the tile, the greater the thickness and vice versa. It is also worth considering that thick ceramic cladding material will cost the buyer significantly more.
To calculate the thickness of ceramic tiles with glue, you just need to read the data on its packaging, where all these parameters are indicated. A millimeter is the main measurement of the adhesive to be applied, which is indicated on the packaging.
That is, you don’t really need to count on anything. But if you still want to do this, then you should consider the following:
- If the base is perfectly smooth and there are no irregularities on it, then the thickness of the glue will be 4 mm.
- For large tile sizes (600x600), 7 mm of adhesive base is added.
- If the base for the facing material has defects, then up to 9 mm of glue should be used.
Ceramic floor covering material has a wide range of shapes and sizes:
- Square tiles: 30x30 cm, 25x25 cm, 20x20 cm, 15x15 cm, 10x10 cm, 48x48 mm.
- Rectangular material: 400x300, 300x200, 300x150, 200x150, 200x100 mm.
- Triangular: 98x139, 83x118, 68x97, 58x83 mm.
- With four edges: 100x230, 85x196, 75x173 mm.
- With five edges: 200x115, 170x98, 150x86.5 mm.
- With six sides: 200 x230, 170 x196, 150 x173 mm.
- With eight sides: 200x70x100, 170x60x85 mm.
The thickness of ceramic floor tiles with adhesive should not exceed 30 mm. Therefore, if the floor is not even and smooth, then it is better to bring these parameters to acceptable levels, otherwise it will have negative consequences and such tiles will not last long. That is, money and time will be wasted. It is impossible to glue on a previously unprepared surface.
Experience shows that even specialists cannot always distribute the glue correctly and maintain the ideal parameters of its thickness. Therefore, you won’t be able to accurately guess the thickness of the glue and there’s no point in getting upset here.
Manufacturers most often try to glaze tiles for floor finishing materials. In this case, the quality of ceramic granite is greatly reduced.
Tiles thickness
- The standard thickness of floor tiles is 6.5-11 mm.
- The thinnest porcelain stoneware is 3 mm thick and is used for cladding work on ventilated facades. Clamps are used for fastening, and due to the light weight, the frame receives minimal load.
- The thickest porcelain tile is 30 mm.
- For standard porcelain stoneware, the thickness should be from 8 to 10.5 mm. Guided by SP 29.13330.2011, we choose porcelain stoneware with a thickness of no less than 8 mm, even if the load on the floor is minimal.
- Porcelain tiles of large thickness - 11 mm, 12 mm, 14 mm are used in places with high traffic. If the tile thickness is 20 mm, then it can be used instead of paving stones, and no glue is needed for installation. The main thing is a flat base.
If the installation is done correctly - on a prepared, void-free base, then the thickness of the porcelain stoneware does not matter. Even if the tile is 8.6 mm thick, it can easily cope with a load of 200 kg/cm2.
The thickness of the tile with a layer of adhesive is affected by the size of the comb and its angle of inclination during application - 7.6-16.2 mm.
If you use a comb with teeth from 3 to 4 mm, then the adhesive layer will be 1.1-1.7 mm. A 6mm tooth comb will provide a layer of 2 to 2.6mm. A 12 mm comb will give a layer of 5.2 mm.
Why isn’t there a thick layer of glue when laying?
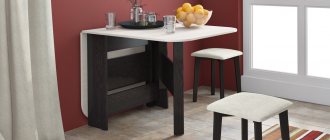
How many centimeters will the floor rise after laying porcelain tiles?
You need to know the estimated thickness of the flooring in order to correctly calculate the height of the built-in furniture, the required amount of materials for wall finishing, and the level of height difference relative to the adjacent rooms.
Diagram of a layer of porcelain stoneware laying on an infrared heated floor
If the difference in floor heights does not exceed 3 mm, porcelain stoneware slabs can be laid without first leveling the surface. Thus, slabs 8 mm thick are laid on a layer of 4 mm glue, such a coating eats up an average of 1–1.5 cm of the height of the room.
The thicker the slabs, the larger the layer of glue needed to attach them. The required layer of adhesive is approximately 40-60% of the thickness of the porcelain stoneware.
When the difference in floor heights is 3–7 mm, it is permissible to level the floor level due to the thickness of the adhesive layer. Such a coating, with a slab thickness of 8 mm, reduces the height of the room by about 2-2.5 centimeters.
If the difference in floor level is more than 7 mm, it is necessary to first screed and level it. To do this, use self-leveling mixtures or pouring concrete screed along the exposed beacons. Due to the screed, the floor level can rise by about 5 centimeters or more.
We lay out tiles of any size correctly
Now let's see how you can lay out the floor tiles so that they look like they were made specifically for your dimensions.
Let's assume that the size of your bathroom is 180x130 cm and the floor tiles are 30x30 cm.
- To calculate the approximate dimensions of the trim, you can use the following calculation (the seam size is not taken into account): (130 / 30) - 1 = 3.3 = 3 whole elements.
- The result must be multiplied by the length of the tile. We got the length without trimming. 3 * 30 = 90 cm without trimming.
- Subtract the result obtained from the length of the wall and divide it by two. (130 - 90) / 2 = 20 cm each trim.
And now a few substantive comments:
- if the bathroom is equipped with a shower stall, then the floor tiles should be distributed evenly between the walls;
- If a bathroom is to be installed, then the tiles are laid out starting from the wall to the bathroom screen. Even if it is necessary to make trimming under the bathtub itself, this will not greatly affect the beauty of the cladding - it is still not visible there;
- If the bathroom has a complex shape, then you need to focus on prominent areas. You can start tiling from the threshold, using whole fragments, and make trimming where it is not visible - under furniture, appliances, etc.;
- when installing a plasterboard box, you need to focus on the size of the tiles - this will help avoid unnecessary trimming;
- if the box is already ready and when laying out it became clear that there is no way to avoid narrow L-shaped trims along its perimeter, then you can try to shift the layout relative to the center. A small difference of 2-3 cm along opposite walls will be almost imperceptible, and trimming around the box will be very noticeable.
Selecting tile size
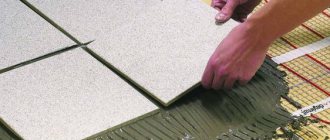
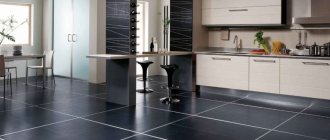
You should choose the dimensions of tiles for walls and floors not only based on appearance, but also because of how convenient it is to work with them. For example, large tiles are difficult to install. It's heavy, but that's not the main thing. A larger plane is more difficult to set in the desired position. A perfectly flat base is required under it, so that after applying an even layer of glue, you can immediately lay it almost flat, and making small adjustments is no longer a problem.
Large tiles are harder to work with, but they look good in spacious rooms
With small tiles, another problem is that there are a lot of seams. Even if there are crosses, keeping them absolutely straight without experience is problematic. Because of this, laying small tiles moves more slowly. Therefore, the most popular sizes are medium. They are easy to work with even for those who decide to lay tiles on walls or floors with their own hands for the first time. For small rooms, from an aesthetic point of view, a medium or small one is optimal, while a large one looks more organic in a spacious room.
Let's sum it up
When choosing facing materials, remember that the size of the tiles is a secondary matter. The main thing is that you like him. Therefore, first, get acquainted with the entire range, decide on the collection, and then look for the size that suits you. By the way, many collections have several types of floor tiles.
| Learning how to joint tiles |
| Proper preparation of drywall for tiles |
| How to cut ceramic tiles yourself |
| How to clean tiles yourself after renovation |