Evening shoes, comfortable sandals, stylish boots... There comes a time in any family when there are so many shoes that the question of their proper storage arises. In most cases, modern apartments are not large enough to provide a lot of storage space. A shoe rack will be a great solution. It will save space and time: now all the shoes are neatly laid out, you won’t have to look for them for a long time, and it will be much easier to care for them. A problem may arise with standard furniture, which does not always fit into small-sized housing. This can happen with a shoe rack too. But for someone who loves to make things, it won’t take much time to make it, put it in the very room where the shoe rack is begging for - in the hallway, decorate it with your own hands and fill it with your favorite shoes and boots.
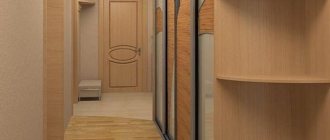
The shoe rack is perfect for small apartments.
There are many models of shoe racks with vertical, horizontal or inclined shelves. It can be a hybrid of shelves and a bench or a cabinet with sliding, folding, hinged doors or without them at all. Let's look at how to make two types of shoe racks. One of them will have drawers and a shelf. The other is folding doors with special guides, the so-called shoe pockets.
Handmade shoe rack.
One of the types of shoe racks with hinged doors.
What you need to prepare
The selected shoe racks are made of wood, plywood or MDF. But the most suitable for this type of furniture are panels made of particleboard (chipboard). This is a relatively inexpensive, lightweight, practical material.
Shoe racks made of chipboard are an excellent solution for budget-conscious housewives.
The choice of color and film pattern on furniture boards made of chipboard depends solely on your preferences, as well as on the existing interior. Fortunately, now you can find many options.
The amount of base material required to make a shoe rack depends on its size.
For the back wall of the cabinet, you can take hardboard or a 3 mm thick fiberboard sheet.
The tools you will need are available in almost every home:
- Roulette;
- Square;
- Hammer;
- Drill or screwdriver;
- Conductor;
- Special drill and bits for confirmations.
Furniture fittings and fasteners for the shoe rack option with drawers and shelves:
- Shelf supports;
Rotating mechanism for shelf holder.
Drawing with dimensions for the shelf support.
- Drawer guides;
Ball guides for drawers.
- Height-adjustable legs;
Cone-shaped adjustable legs for shoe racks.
- Corners;
Metal corner for shoe racks.
- Awnings;
- Furniture handles;
Rhinestone handles are ideal for those who love something bright and sparkly.
The small-sized handle button is convenient and practical.
- Wood glue;
One of the types of wood glue.
- Confirmations.
Confirmat is used for joining parts made of wood materials.
Be sure to prepare a drawing showing all dimensions.
An example of how to apply all the required dimensions.
Photos of shoe racks in various styles
Corridor design options in different stylistic directions.
Classical
For a classic interior, the traditional solution is furniture made from natural solid wood: beech, ash, walnut, bleached oak or wenge, which have a truly luxurious, stately appearance. These products can be complemented with a variety of forged or carved decor.
Loft
In the loft style, it is assumed to use more strict and slightly rougher structures made of wood, metal, MDF or chipboard, which have a clearly visible antique texture. Also, a hallway in this style can be complemented with a bench, a model made from pallets or a full-fledged shoe shoe with a soft leather seat.
The photo shows the interior of a loft-style hallway with a metal shoe rack combined with a hanger.
Provence
Light vintage designs with a simplified design are especially appropriate here. These can be wooden or wicker rattan shelves, decorated with patina, textile inserts, forging or carving.
Country
For rustic country, retro overshoes made of natural, rough-hewn wood in light colors or forged metal stands of simple geometric shapes are perfect. The main thing is that the furniture is as comfortable and functional as possible.
The photo shows an open-type forged iron shoebox in a country-style hallway.
Scandinavian
In Nordic design, ergonomic, comfortable, easy-to-use and roomy models with a laconic, ascetic design and strict straight lines are welcomed. In the manufacture of such structures, light wood, frosted glass are used, or combined options of metal and wood are chosen.
High tech
Metal, glass or plastic, laconic, geometrically designed and multifunctional shoe racks with chrome parts will especially harmoniously complement a high-tech corridor and create a stylish interior.
Instructions for assembling a shoe rack with your own hands
A chipboard shoe rack with drawers and a shelf is assembled in stages.
Mark and drill holes for all parts using a jig and tape measure:
- To attach the side panels, measure a distance along the edges of the bottom panel equal to 1/2 the thickness of the parts. For example, for a 16 mm chipboard you need to make two holes at a distance of 8 mm from the edge. In this case, the distance from the rear wall will be 50 and 250 mm.
- To attach the internal rack, a distance equal to the sum of one and a half thickness of chipboard and the width of the shelf should be set aside from the edge of the bottom panel. With a thickness of 16 mm and a shelf width of 310 mm: 16x1.5+310= 334 mm.
- Make holes for the shelves. To find the right place, we make a calculation: subtract the thickness of all shelves from the height of the rack and divide by their number plus one. Increase by the radius of the shelf support. We get the distance to the hole for the top shelf.
For ease of calculation, let the height of the rack be 600 mm. We are planning one shelf. Its thickness is 16 mm. Holder diameter 6 mm.
Payment procedure:
- 600-16=584
- 584/(1+1)=292
- 292+16+3=311
The hole should be drilled at a distance of 311 mm from the top panel.
- Calculate and mark holes for guides for all drawers.
- Fasten the frame parts together using confirmations. Install the roof using corners.
- Install drawer guides.
- Place the shelf supports, securing them first with glue and then with a hammer.
- Assemble boxes from previously prepared parts.
- Insert drawers into shoe rack.
- Hang the doors.
- Screw on the handles.
Where is it profitable to buy a shoe rack for the hallway - price review
Buying a shoe rack for the hallway is not difficult: it’s hard to stop choosing and finally leave the store with the purchase! Prices for shoe cabinets in catalogs depend on the quality, material, height, depth, availability of drawers and hangers. A narrow shoe rack for the hallway can be bought inexpensively, especially if you come across a promotion. But even without this, prices start at 2,500 rubles. There are more expensive options, but it’s quite possible to stay within the range of 3,000–6,000 rubles.
Let your shoes find their place in the house! If you have created your own unique shelf for shoes and boots, we will be happy to see it in the photo with your comment on the assembly.
Save time: selected articles delivered to your inbox every week
Required materials and tools
For a shoe rack with a shoe rack mechanism, you will need the following.
Shoe rack with a “galoshnitsa” type mechanism in black.
Basic materials:
- Chipboard panels 16 mm thick;
Laminated boards with a thickness of 16 mm.
- Chipboard panels 10 mm thick;
Wooden chipboard panels with a thickness of 10 mm.
- A sheet of hardboard or fiberboard - for the back wall.
Hardboard sheet for the back wall of the shoe rack.
High density fiberboard sheet.
Tools and consumables for them:
- Roulette, square;
- Hammer;
- Screwdriver;
- Awl;
- Screwdriver;
- Conductor;
- Bits for confirmations.
You need to immediately prepare furniture fittings:
- Special guides for shelves for shoes, so-called overshoes (a set of two for each door);
- Thrust bearings;
- Metal corners;
- Furniture handles;
- Self-tapping screws, confirmations, minifixes.
Preparation of parts
Having decided on a place for a shoe rack, you need to take careful measurements. Next, you need to make a drawing indicating all the dimensions. As a result, a list of necessary parts will appear: shelves, racks, cabinet doors.
It is better to order cutting of all these blanks in a specialized store or furniture workshop. This service is also good because the output is parts with already glued edges. This is important to consider when working with chipboard, since this material contains volatile compounds that, if the top layer is damaged, can be harmful to health.
The shoe rack is assembled from the following parts (their specific dimensions are determined by the drawing):
From chipboard panels 16 mm thick:
- Roof and bottom of the frame - 2 pieces;
- Side parts and internal stand – 3 pieces;
- Internal cabinet shelves – 2 pieces;
- Facades – 4 pieces.
From chipboard panels 12 mm thick:
- There are three types of shoe shelves - the sizes differ in depth, calculated based on the design of the guides, 4 pieces of each type;
From fiberboard:
- Back wall of the cabinet – 1 pc.
Important! To draw up a detailed drawing, dimensions must be drawn taking into account gaps and indentations. Also, for the cabinet to open freely, the gap at the bottom of the facade must be at least 7 mm.
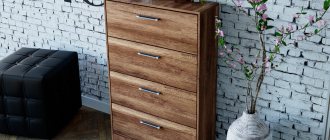
Slim shoe chest
This type of shoe rack came to us from England; the design looks like a narrow chest of drawers with an opening door. Such chests of drawers are quite convenient, as they do not take up much space from the wall, they contain many shelves, and are suitable for small apartments.
The width of such a shoe rack can vary, but most often it does not exceed 30 centimeters.
An important point when choosing a shoe rack: give preference to a shoe cabinet in which the distance between the shelves themselves varies. Thanks to this, there will be an excellent opportunity to store not only shoes and slippers, but it will also be convenient to place high boots.
The constant lack of space in the hallway pushes us to look for a functional, small shoe rack. You can see a hanger complete with a shoe rack in IKEA and a full-fledged wardrobe; this, as a rule, allows you to save money by purchasing the necessary furniture in one set.
Relatively recently, furniture manufacturers came up with a shoe dryer at the same time. Its design consists of shelves in the form of grids, which allows air to pass from all sides; the main feature is the presence of ultraviolet lamps, which effectively neutralize unpleasant odors from shoes.
Such a shoe rack must be kept plugged in all the time, which is not always convenient, and not all shoes can be dried with such a strong light.
A photo of the shoe rack in the hallway can be seen in this article. The designs were developed keeping in mind the size of the space as well as the design of the space.
Step by step assembly
- Make markings based on the drawing.
- Drill holes on all parts.
- Assemble a frame from four parts (two sides, roof, bottom), using confirmations. You can choose other options for connecting parts - for example, on corners or minifixes.
- Attach the internal parts of the frame - shelves and rack - to the sidewalls with confirmations, and to the roof and to each other - to metal corners.
- Install the back wall of the shoe rack.
- To install the overshoes on the side parts of the frame, make markings for the attachment points of the rotation axis and the stop pin. When installing shoe boots, you should be guided by the installation diagram included in the kit.
- Attach the overshoes to the sides with self-tapping screws.
- Connect the mechanisms to the shelves of the boots with self-tapping screws.
- Hang facades. You can use a simple way to attach them: first stick double-sided tape on the shoe, attach the front, press it, and only then screw it on.
- Attach the handles.
- Install the thrust bearings.
Photos of children's shoe racks
First of all, children's shoe boots should be safe, reliable, and not have sharp corners, mirror or glass elements. Such products are mainly made in bright, accent, yellow, green, pink and colorful shades.
The photo shows an interior with a children's white shoe shoe with shelves decorated with multi-colored drawings.
Children's shoe models are equipped inside with multi-colored drawers, baskets, boxes, plastic containers or shelves with rubber mats, and the outside is decorated with colorful decorative stickers, interesting prints or designs.
Decoration
A shoe rack made with your own hands will in itself bring the spirit of creativity into the hallway. Decorating can not only give it a finished look, but also turn it into a real work of art. This way, a simple cabinet will become the accent that your hallway was missing.
- By choosing interesting handles, you can change the mood and give your shoe rack a certain style;
- On the top panel you can lay out ceramic tiles in the patchwork style, or a mosaic panel;
- Facades can be easily transformed by covering them with wallpaper, fabric, mirror tiles, or painting. They can also be hand painted or stenciled;
- It is quite possible to change the appearance of a shoe rack beyond recognition using decoupage and other techniques, decorating it, for example, to look like concrete or marble;
- The trend of “aging” furniture, which is popular today, will help give it chic and antique mystery.
Only your own imagination can limit you here!
DIY decorated shoe rack in black.
Assembling a shoe rack with a seat
To make a shoe rack with a seat for the hallway with your own hands, you must follow the assembly sequence.
The seat is made separately from the overall structure. You can use any suitable filler available at home as filling. Classic foam rubber is ideal. And if you have an old unnecessary orthopedic latex pillow or other filler, the choice of padding is simplified.
Hand-made furniture always distinguishes the interior from other apartments where there are typical chests of drawers and wardrobes.
The filler is placed on a sheet of plywood. Additionally, it can be glued. For beauty, tightening can be provided. To do this, you need to punch the foam rubber evenly over the entire area with a stapler. Next, a piece of fabric must be attached to each bracket, to which the top layer of the covering will subsequently be sewn.
For the perfect design, you can sew furniture buttons onto the seat.
The upholstery is cut only after the top cover has been made and the filling has been fastened.
The shoe rack is assembled in the following order.
- First, the side posts are connected to the intermediate shelves.
- Next, transverse jumpers are installed on the fasteners.
- Afterwards, a retractable shelf is installed (if available).
- At the end, the upper soft seat is attached.
Look at a selection of photographs of shoe shelves. Here you will definitely find something for yourself.
Placement in the hallway
As soon as the idea comes to making a shoe rack with your own hands to place it in the hallway, you need to think through everything carefully. Despite the obvious advantages, this furniture can also cause inconvenience. To avoid them, it is better to foresee them in advance.
It must be taken into account that opening doors should not impede movement, and the cabinet itself should not clutter up the space. The shoe rack should be placed so that, without going far from it, you can sit down and put on your shoes. You should always have care products, a shoehorn, and other small items at hand.
It’s good if there is a “dirty” area in the hallway where the process of putting on and taking off street shoes takes place. The main routes of movement of household members do not pass through it (there are no doors to the bathroom and other rooms). Try to put a shoe closet here.
If all the nuances are taken into account at the design stage, the shoe rack will easily fit into the existing interior and will look harmonious in it.
How to make a shoe rack yourself?
It is not necessary to buy a ready-made shoe rack for the hallway, because you can make it yourself. Especially if you need atypical sizes or special content. It is enough to arm yourself with a standard set of tools - a tape measure, a level, a hammer, a drill, a drill bit and fasteners.
DIY shoe rack
First, you will need to purchase the necessary fasteners and ready-made parts: metal corners, handles, adjustable legs, drawer guides, shelf holders. Of all the materials, it is easiest to work with chipboard yourself - just take into account the thickness of the boards when making calculations.
Determine the appropriate dimensions, cut and process all edges and edges with sandpaper and special adhesive tape. Calculate where the hinges, guides, and fasteners will be located and mark it all on the boards before starting assembly. Start marking the holes from the bottom shelf, because it is solid and the main structure is attached to it.
For assembly, use self-tapping screws or confirmation screws and a drill of a suitable diameter. Step back from the edges so that the chipboard sheet does not crack during screeding. To fasten the shelves, use special metal holders that evenly distribute the load. And for all corner joints, use metal corners - they will provide rigidity and stability.
DIY rotating shoe rack
Making a round rotating stand like in stores is not as difficult as it seems. You will only need chipboard or plywood and several blanks from them: round ones for shelves and rectangular ones for cross-supports.
Mark even circles with a special large compass or using regular thread. Sand all the cuts with a sander or sandpaper and glue the edges with a special tape using an iron or hot air. Assemble crosspieces from rectangular parts using self-tapping screws and use them to connect adjacent circles to each other.
For small-diameter shelves, one central cross is sufficient; for larger ones, it is better to have several on different sides. To make the structure rotate, attach a stand with a special mechanism at the bottom, which are sold in furniture stores.
DIY shoe rack made of cardboard
For those who love hand-made things and experiments, there is an interesting idea - a shoe rack made of cardboard. But you will need thick, highly durable cardboard, such as shoebox cardboard. And along with it a furniture knife, a stapler with large staples, wide tape and wood glue or a gun. Lay out a sheet of cardboard on a flat base or on the floor and mark out rectangular sections about 30 cm high. Divide each rectangle into three parts and bend it into an equilateral triangle. Glue the edges of future boxes with tape and connect them together using wood glue into a single structure.
This shoe rack can be placed on the floor, attached to a wall or hung. This will interestingly complement Scandinavian interiors, boho, loft and eclectic styles. But keep in mind that the structure is not very stable and durable, and most importantly, it is sensitive to moisture.
DIY shoe rack made of metal profile
The metal profile is great for open shelving and combines with glass shelves. This is an interesting solution for Scandinavian and modern interiors, high-tech and loft. In addition to the profile itself, you will need a screwdriver, an angle grinder, a level, a jigsaw and a glass cutter.
The main task is to take correct measurements and cut the metal profile into fragments of the required length. Then secure the main frame guides to the wall with self-tapping screws, remembering to monitor the level and verticals. After this, assemble the rest of the frame in the same way, and place shelves made of safety tempered glass on top.
DIY shoe rack made from pallets
Furniture made from wooden boxes and pallets is in demand when decorating country houses, in rustic styles or in eco-interiors. It will take you a few hours at most to assemble the structure, but first you need to get a construction pallet of a suitable size.
After that, sand it with a machine or sandpaper, cover it with a moisture-resistant impregnation and paint. You just need to lean the pallet against the wall, and you can already insert shoes into it. But this option is only suitable for slippers, sneakers and similar things.
Using the same principle, you can assemble a structure from boxes. Divide the large ones into sections, and immediately connect the small ones together or attach them to the wall in a chaotic manner. Such modular designs, painted in bright contrasting colors, look interesting. In the tallest drawers you can screw several shelves onto special corner holders.
Advice from professionals
- When making a shoe rack with your own hands, start with detailed measurements of the room. The more carefully you do this, the more accurate the drawing will be. Agree, it will be a shame if the finished cabinet blocks a switch or an existing outlet by a couple of centimeters.
- When drawing up a drawing, take into account the types of shoes you are going to store and their quantity. This will help you correctly calculate how many shelves are needed and at what height to install them.
- Design will help simplify graphic programs for designers. They are quite easy to master. They allow you to quickly draw up a drawing and even make a 3D visualization. If you are not going to stop at a shoe rack, pay attention to this opportunity to make the furniture making process easier and faster.
- When choosing legs for a shoe rack, choose those that are height adjustable. They are easy to use. Such fittings will help level the height of the cabinet, correcting possible errors in the design or uneven floors, which are far from uncommon.
Having carefully thought through everything and studied the advice of professionals, you will certainly make the shoe rack of your dreams, practical and beautiful.
How to choose a shoe rack?
Main selection criteria:
- First of all, you need to pay attention to the height and size of the shoes intended for storage.
- The features and size of the hallway are also taken into account. In a small room it would be better to use a thin slim model or a stand-up shoe rack.
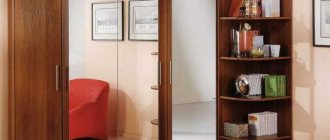
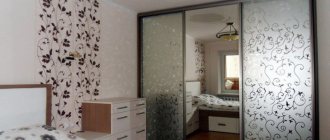
- For a large corridor, a modular design combined with a wardrobe, bench or mirror is suitable.
- In a large family, it is appropriate to use a shoe shoe rack in the form of a rack under the ceiling or, if there is free space, to install a separate shoe structure for each family member.
Photo gallery: A selection of handmade shoe racks
Expert Yulia Kovtunova (Author, content manager) Work experience: 3 years, since 2020.