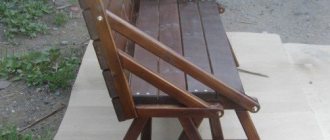
drawing of a garden bench with a back
It's the beginning of summer, it's time to get started with your garden furniture. A bench is a useful, versatile and beautiful addition to almost every type of landscape. But even such a simple product as a wooden bench is difficult to make without a drawing. In this article you will find drawings of wooden benches of the most popular models with a step-by-step assembly diagram and a link to a website with detailed instructions.
There are different options here. Mostly drawings of benches made of wood , since this is the most common material for making garden furniture. But the article also contains drawings of benches made of metal and pipes. I hope this article will be useful to every reader.
In this article, most bench plans show dimensions in inches. Therefore, you just need to multiply these figures by 2.54, this will be the size in centimeters. This means one inch 1″ (2.54 cm), and one foot 1′ (1 foot – 30.48 cm).
In the article you can see the drawings:
- benches with a table;
- wooden benches with backrest;
- flowerbed benches;
- picnic benches;
- benches around a tree;
- benches for gazebo;
- benches on the terrace;
- bench made of profile pipe;
- metal benches;
- wooden bench.
Wood bench on concrete base
Like metal, concrete has a long service life, so it can also be used in combination with wood to create an original, durable bench. Here is her drawing:
*dimensions are given in mm
To assemble such a structure, you will need a board with a section of 150x40 mm, as well as 12 concrete slabs with the following characteristics:
- thickness – 5 cm;
- length – 50 cm;
- width – 50 cm.
The stages of making a bench are as follows:
- Preparation of wooden parts. The board needs to be sawn so as to obtain the following segments:
- 5 pieces. 2 m each;
- 4 things. 65 cm each;
- 2 pcs. 17.5 cm each.
- Marking boards and preparing holes. Take a board 2 m long. Step back 10 cm and 40 cm from the end, and mark points in the middle of the board. Apply similar markings on the other side of the board. Carry out the described action for the remaining 4 boards that are intended for the seat. After this, using a drill with a diameter of 18 mm, drill holes at the indicated points.
- Marking concrete slabs and preparing holes. Also make holes in the slabs for fasteners. To do this, you first need to make a marking, stepping back 7.5 cm from the top edge, and 10 cm from the left and right ends. Draw lines, and drill holes at their intersection points using a drill designed for working with concrete surfaces.
- Preparing the back parts. Take 2 boards of 65 cm each. Place a 17.5 cm piece of board between them, having previously coated its ends with wood glue. To ensure good adhesion of the glue, the sections are clamped with clamps until the composition dries. For greater reliability, you can connect the structure using wooden dowels.
Repeat the steps described above for the second part of the back. - Back assembly. Take a two-meter board intended for the seat and, stepping back from the edge 50 cm (with a margin of a couple of millimeters), draw a vertical line. The edge of the concrete slabs will be located in this place. Attach the first part of the back to the drawn line and nail it with nails or self-tapping screws. Back off 5 cm and nail the second part of the back.
The wooden parts of the bench need to be varnished. - Installation of the frame part . To prevent distortions, start assembling the seat on both sides at the same time - alternately installing two-meter boards and concrete slabs. They need to be connected through the holes using 4 M16 threaded hoses (2 rods on each side). Their optimal length is 55 cm. To fasten the rods, you need to use nuts and washers, tightening them simultaneously on each side.
All wooden elements must be treated with an antiseptic to prevent rotting of this building material.
How to make a simple wooden bench with a backrest with your own hands
How to make a simple wooden bench with a backrest with your own hands
Bench design
The length of the seat and backrest will be 1500 mm. This furniture can comfortably accommodate three people at once. Seat height - 450 mm, back height - 900 mm. It is advisable to place the back at an angle of 18-20 degrees. The seat width is 400 mm.
Material and tools for making a garden bench from wood
- Wooden boards 1500 by 150 mm, thickness 35-40 mm. Three blanks for the seat and two for the back.
- Blanks that serve as legs and holders for the back - 900 by 150 mm, 35-40 mm thick.
- Blanks for the front legs of the bench - 360 by 150 mm, thickness 35-40 mm.
- Beams 40 by 40 mm will be used to strengthen the structure of the bench.
- Self-tapping screws.
- Electric jigsaw for cutting boards.
- Electric planer for grinding the surface of boards and processing chamfers.
- Screwdriver.
- Sandpaper.
- Varnish and primer.
Making a wooden structure
Bench drawing
Step 1. Boards for making a bench can be purchased immediately in size; if they are not available for sale, the wood will have to be cut into blanks using a jigsaw or miter saw.
After the wood is cut to the desired length, it needs to be carefully processed. The blanks for the back and seat need to be sanded. All ends of the boards also need to be processed with an electric planer, it is advisable to give them a rounded shape.
Step 2. The long rear legs of the bench, which additionally serve as a frame for the backrest, need to be set to the correct angle of inclination. To do this, you need to apply markings to two wooden blanks having a length of 900 mm.
The first to be noted is the height of the bench - 400 mm. This section of the board does not need processing. Starting from the segment, you need to make a 20-degree cut along the entire remaining length of the board, which forms the angle of inclination of the back of the bench. The cuts on the two rear legs should be the same in both height and angle. Otherwise, the bench will be skewed.
Step 3. The legs are assembled first in the design of the bench. The distance between the front and rear legs is 280 mm. The legs are connected by a beam, which is cut to cover the entire width of the bench - 500 mm. It is advisable to do a double strapping - top and bottom.
Step 4. After the two sides of the bench are assembled, you can connect them together with boards intended for sitting. The boards are screwed using self-tapping screws to the upper beams of the frame. It is desirable that gaps of equal size remain between the wooden pieces - 1-2 cm. These gaps promote air circulation and moisture removal.
Step 5. Strengthening the bench structure. In order for garden furniture to be stable and durable, it is advisable to strengthen its structure. For these purposes, you need to make the lower strapping along the legs using beams. Two pieces, 1500 mm long, are screwed to the front and rear legs of the bench. If there is not enough lumber, you can use one cross member, which is attached to the lower beams of the frame.
Step 6. Installation of the bench back. The bench is almost ready, the final touch remains - attaching two boards that serve as a backrest. It is recommended to attach the first board at a distance of 200 mm from the seat. The second is at a distance of 380 mm from the seat.
Step 7. Finish coating of garden furniture. To protect wood from environmental influences, it is advisable to use deep impregnation and varnish. Impregnation will protect the bench from moisture, mold, and pests.
06fd384237f4b2c701eb4085ad5e22db.jpe
63ee7fb772f38fdf0393b917b8f0b865.jpe
The varnish will give the furniture a beautiful and elegant look. To give the wood shine, you need to thoroughly polish the material and varnish the workpieces several times.
Classification of garden benches
In fact, this element of landscape design is represented by a huge assortment. Therefore, in order to organize wooden benches, they were divided into three main categories:
- Street. Its main content is high functionality. As for the shapes and variety of styles, this category cannot boast of a wide range.
- Garden. More often these are openwork structures that are mainly aesthetic, taking into account full compliance with the landscape design. They are the ones most often used to arrange functional spaces in the garden.
- Country houses. This group is the most diverse. The purpose of use is the arrangement of a summer cottage, regardless of its size. That is, the market today offers both small benches and huge ones for several people. As for the form, there are even more proposals.
The following type of classification divides benches into two positions:
- Stationary , which are firmly installed in a certain place.
- Mobile , which can be easily carried by hand. This is the most popular model because with its help you can equip any area of the dacha at your discretion.
Stationary type bench Source svoimirykamiinfo.ru
Another classification group is by location. There are four positions here:
- Front doors. Often these structures are made of several materials: wood, metal and concrete; today, composites are used instead of concrete. These are very beautiful products that are installed in front of the house, emphasizing the wealth of the owner.
- Dining . Usually these are small benches that are installed around a table somewhere near the barbecue area. Their main task is to create convenience in the process of eating. For their manufacture, various types of wood are used, hence the huge range of models in terms of price of products.
- Wooden benches that are installed near open reservoirs . They are made from moisture-resistant wood, which is additionally treated with protective compounds. Not the cheapest option for country furniture.
- Seasonal. Usually these are mobile elements made of durable wood.
Type of wooden dining benches Source static.wixstatic.com
It should be noted that all of the above benches are made only from wood species that can resist the negative effects of natural loads for a long time. These are oak, walnut, cherry, and coniferous trees. The production process is based not only on the manufacture of products. The raw material goes through several cycles of special processing, where it is necessary to impregnate the wood with compounds that increase resistance to the negative effects of moisture. The finished products are additionally treated with colorless varnish or special moisture-resistant paints.
Rules for caring for benches
It is clear that the main thing that wooden products need to be protected from is moisture. That is why it is recommended to purchase mobile products for your dacha. It is easier to move them to a dry place, thereby preserving them longer. Of course, there are protection options for stationary structures as well. They, for example, can be covered with waterproof polymer or rubberized film.
And yet, when buying benches, you need to pay attention to the material from which they are made. Ideally, it would be wood that absorbs water in minimal quantities. The latter causes wood to rot.
In the factory, benches are coated with protective compounds, varnishes or paints. If a piece of garden furniture was purchased on the market from a private entrepreneur, then all protective operations will have to be carried out independently. It should also be noted that garden benches made of wood will have to be periodically cleaned of old coatings and new ones applied. You need to be prepared for this.
Wooden benches require constant maintenance Source cdn.pixabay.com
Attention! If you noticed that some part of the bench began to rot, then replace it immediately. The rot will certainly spread to other elements.
The sun also has a negative effect on wood. Therefore, wooden benches should be moved to the shade in summer. For stationary models, umbrellas are installed.
The next recommendation is to periodically tighten the fasteners. During operation they will weaken, and this will reduce operational safety.
Why made of wood?
Wood is rightfully considered one of the most suitable materials for making a bench, due to its following advantages:
- Availability . At the dacha you can often find boards, beams or other remains left after repair or construction, which can be used to make a bench. In addition, wood is cheaper than metal, plastic and other materials.
- Strength . If you follow all the principles of processing and assembly, the garden bench can last for several decades. This is where wood compares favorably with polymers - plastic seats quickly wear out under weight loads and break during awkward movements.
- Convenience . It is more pleasant to sit on a wooden bench than on a metal or plastic seat, even skillfully crafted.
- Easy to process . Compared to metal and polymer elements, wood is more voluminous, so even an inexperienced craftsman will not have difficulty giving it the desired shape. Wooden elements also lend themselves well to mechanical action, so they can be easily fastened together.
- Low thermal conductivity . Wood heats up and cools slowly, so even in summer it maintains a natural average temperature, which compares favorably with metal.
Considering all the listed advantages of wood, we must not forget about its one drawback - in open areas under rain, snow and sun, it quickly becomes unusable, as it is damaged by various parasites, mold and fungi, and also begins to swell and rot. To avoid such consequences, the wood must be properly processed, and in the future, some effort must be made to care for the bench.
Options for benches made of wood without backrest
If you plan to make a wooden bench without a back, then you can experiment with both its legs and the seat. We will consider various options for such a homemade design below.
Primitive option
This is a garden bench with a height of 47 cm and a length of 140 cm. To assemble it, you need to follow the following sequence:
- Making legs. Cut a board 20 cm wide and 5 cm thick into 4 pieces (each 45 cm long). There will be 2 boards per leg. Saw off the inside corners as shown in the picture below to make the bench more stable. Next, take a beam with a cross section of 15x20 mm. We will need 2 pieces of length 41.5 cm each. Place the two legs (boards) in series, and secure the timber on top of them, as shown in the figure below, using 3.5x50 mm wood screws.
There should be two such details - Connection of supports. Take a 15x20 mm beam 1.2 m long. Connect the legs, securing the beam from below:
- Seat installation . Place two boards, each 20 cm wide and 2 cm thick, on the supports. Leave a distance of 1 cm between the boards. Assume that the free edges of the seat will protrude 10 cm on both sides. Screw the seat boards to the ends of the legs using self-tapping screws. For rigidity, tighten the seat boards from below with slats.
- Strengthening the structure . To make the bench as stable as possible, you need to screw the side strips to it at an angle - slats with a cross-section of 20x15 mm of arbitrary length. On the finished product you need to mark their outlines with a pencil, and then knock out the grooves for the slats with a hammer and chisel. After this, all that remains is to insert them and fasten them with self-tapping screws or nail them.
The finished product can be processed in the usual way or simply covered with oilcloth and nailed with a stapler. You can put foam rubber or other soft material under the oilcloth to get a bench with a soft seat.
Find out how to make a fully functional shop from scraps from the video below:
With log legs
This garden furniture looks original thanks to the legs, which are made of solid logs. The characteristics of the bench are as follows:
- length – 150 cm;
- width – 45 cm;
- height – 38 cm.
The following materials are used for its manufacture:
- 5 seat boards 1.5 m long, 9 cm wide and 4 cm thick;
- 5 logs 45 cm long for each leg;
- pins or wooden dowels for fastening structural elements.
To assemble this primitive bench, you need to act in the following sequence:
- Cut boards of equal length for the seat. If desired, round off their edges using a sander or router. Lay out the boards. Step back an equal distance from the sides and make notes. This is where the legs will be attached.
Drill holes at the designated points (not all the way through!). Coat sanded boards and logs with varnish. Wait until completely dry. - Prepare logs for legs. They should still be the same length. Measure the spacing through which the holes are made in the boards for the seat. Transfer the measurements to the first row of logs and make holes (not through holes) at the marked points. The second row of logs should have holes placed in a checkerboard pattern:
In subsequent rows, also place the holes in a checkerboard pattern, but with a mirror image, otherwise you will end up with through holes. - Connect the logs together by inserting a wooden pin into each hole, first coating them with wood glue.
- Nail the seat strip on top of the assembled legs using the same pin connection. The shop is ready.
On brick supports
To make it you need to prepare:
- wooden boards 4 cm thick;
- building brick;
- screws and screwdriver;
- several bags of cement, fine sifted sand and gravel.
If you plan to place the bench on a stone-paved and concrete surface, you need to make a cement foundation under it. If it is located on soft ground, it is enough to make a columnar foundation.
Assembly of this garden furniture is carried out in the following order:
- Mark the area for installation of brick racks and remove the top layer of soil (turf). Dig holes with a diameter of 20x20 cm and a depth of 50-60 cm to prepare the foundation. Place a layer of sand (10 cm) at the very bottom of the holes, and a layer of crushed stone (20 cm) on top. Tamp everything down well, lightly water it and leave for a day.
- Place several pieces of roofing felt on top and place a bundle of 5 reinforcing rods in the hole. Fill it all with concrete and leave it for 3-4 days. When mixing concrete, use 1 part cement, 3 parts sand and 5 parts fine gravel.
- Place a small layer of liquid concrete (1-2 cm) on the prepared foundation to create a foundation for future brick supports.
- Start laying bricks with dressing. The height of the masonry is about 50 cm, and the width is the same as the bench itself or a little less. Leave space for a seat inside the masonry on the top row.
- Prepare the bench seat by fastening several boards with self-tapping screws. The seat must be impregnated with fire retardant, left to dry completely and covered with colored paint or water-repellent varnish. Next, install it on the prepared brick supports.
Options for wooden benches with brick legs
Brickwork looks aesthetically pleasing and does not require additional finishing.
The number of brick supports can be varied depending on the length of the bench. If you plan to make a corner or shaped (semicircular, round, oval) structure, it is best to prepare a solid brick base, which should first be installed on a strip-type foundation.
Corner shop
It can be the best furniture for a small area, as it is spacious and at the same time takes up minimal space. The entire structure consists of two separate benches. Step-by-step instructions for making it are as follows:
- Preparing parts. The corner bench consists of the following parts:
- seat (2 pcs.) – length 90 cm, width 20 cm and thickness 4 cm;
- crossbar (2 pcs.) – length 72 cm, width 9 cm and thickness 4 cm;
- legs (4 pcs.) – length 45 cm, width 9 cm and thickness 4 cm.
- Assembly of benches. Assemble 2 separate benches from the boards. First you need to screw the legs on both sides of the crossbar to create an H-shaped frame. The support should be placed at a distance of 15 cm from the floor so that the frame is as rigid as possible. You need to nail the seat to the resulting frame. It is advisable that the seat protrudes 5 cm from each edge.
Do the same when assembling the second bench. - Connecting benches at an angle. Two benches need to be connected at right angles (i.e. in the shape of the letter “L”), using 1-2 stainless steel brackets.
- Finishing . Sand the connected structure with 100-grit sandpaper to remove any unevenness. At the end, all that remains is to treat the bench with an antiseptic and apply 2 layers of wood varnish to it for external work.
As a material for making a bench, you can use boards from old pallets.


