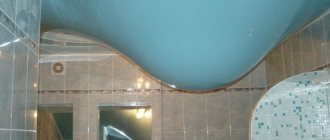
Classification of ceilings
Today, reinforced concrete floors (with or without a beam base) are most often used as the base of the ceiling, which are divided into three main types:
- Monolithic;
- Prefabricated;
- Prefabricated monolithic.
The classification of floors is not limited to these types - you can find arched or hipped structures, options made of wood, and a lot of other varieties. However, it is pointless to consider such options - they are used much less frequently, and the issue of alignment when using them is not so acute.
For the manufacture of monolithic floors, standard concrete pouring technology is used. The solution fills the formwork, inside which reinforcement is located, increasing the strength of the finished structure. The ceiling itself is initially located in the interfloor space and is poured right there.
Prefabricated structures are a slab or set of reinforced concrete slabs that are installed on beams or load-bearing walls and then fixed. Prefabricated monolithic foundations are structures based on hollow aerated concrete blocks. The connection of these blocks into a solid ceiling is achieved by pouring a layer of concrete.
Standard ceiling defects
Different types of floors have a characteristic set of advantages and disadvantages that must be used and mitigated accordingly. The leveling of ceilings depends on a large number of different factors, but the installation technology has the greatest influence on this parameter. The easiest way to deal with this is with monolithic reinforced concrete structures - such floors are positioned strictly horizontally and have no joints.
Prefabricated and prefabricated monolithic floors have a number of disadvantages. On prefabricated structures there are often differences in height, which are caused by different positions of the slabs. In addition, the slabs themselves may be placed unevenly relative to the horizontal plane. During the first construction, seams are usually masked by rustications, which disintegrate during use, and the ceiling has to be refinished.
In the case of prefabricated monolithic structures, everything is somewhat different. The individual parts of the base have a perfectly flat surface, which is covered with a layer of plaster. Damage to the ceiling occurs due to the different materials used in the manufacture of blocks, the characteristics of the installation and leveling composition. As a result, the finish becomes covered with a network of cracks that have to be removed.
The defects mentioned are only a small part of all the damage that the ceiling may have. Regardless of the type of ceiling, any ceiling requires regular maintenance, and sometimes complete repairs. All actions aimed at bringing the ceiling into proper form can be generalized into one category - leveling.
How to correct a difference in level greater than 2 cm
When the maximum ceiling difference is more than 2 cm, it is recommended to use an additional product that will help the plaster to fix better and make the coating stronger. A special mesh will allow you to attach a larger layer of plaster. There are several types of mesh, depending on how thick the layer you plan to make. The mesh is attached directly to the ceiling, either with special glue (for a lighter mesh) or using special brackets (for a metal mesh). After securing the mesh, you can apply the first layer of plaster, not exceeding 1.5 cm. Let the layer dry, apply a primer and after the surface has dried, you can apply the next layer of plaster. After you have leveled your ceiling, all that remains is to sand it and cover it with a finishing layer of putty.
Sanding the ceiling
Methods for leveling ceilings
First of all, you need to figure out how to level the ceiling - there are many solutions, so you have to choose. There are two main types of leveling methods - wet and dry. The first type involves the use of various compositions that harden some time after application. Dry ones, accordingly, do not have a liquid form, i.e. They are represented by plasterboard, suspended and tension structures.
The implementation of wet leveling methods includes the following steps:
- Cleaning the ceiling from a layer of old coating;
- Restoration or replacement of rusts;
- Elimination of all existing damage to the ceiling, such as cracks and cracks;
- Aligning the ceiling surface relative to the general horizontal plane;
- Finishing the ceiling.
To implement dry leveling, a different set of operations is required, including:
- Installation of a frame that levels out all the unevenness of the base;
- Installation of a finishing ceiling structure.
Both methods are quite popular, so they are worth considering in detail in order to know how to level ceilings.
Ceiling preparation
Before you pull out the ceiling, you need to do a good job of preparing it for repairs. The need for this stage is determined by the fact that the leveling solutions will experience a number of loads after hardening - and a properly prepared surface allows you to reduce these loads to a minimum.
If there is any covering on the ceiling, it must be completely removed. For example, whitewash should be thoroughly soaked in water and allowed to soak, and then cut off from the ceiling surface using a narrow spatula. To remove oil paint or enamel, you must first analyze the condition of the ceiling. You can simply tap a flat ceiling with a hammer and remove the paint only in those places where the plaster has begun to peel off.
If the ceiling has differences in height or deviations from the horizontal plane, then the paint will have to be removed from the entire surface of the ceiling. To cut, you will need a grinder with a metal disk. The paint will be cut off along with the plaster, and during the work it is also worth removing all noticeable unevenness in the coating. In addition, it is necessary to remove the damaged filling of the joints between the slabs by knocking it out with a hammer and chisel.
Upon completion of the work, you need to remove all construction debris, ventilate and vacuum the room. Now the ceiling can be primed using a solution suitable for finishing the ceiling. The primer layer must dry completely, which usually takes about a day. After drying, you can proceed to further leveling steps.
How to level a ceiling with putty yourself
So, we have prepared the ceiling for finishing putty. Now you need to apply putty to the ceiling and smooth it evenly over the ceiling. Tools for puttying the ceiling and adjacent walls.
Mix with a drill with an attachment to level the dry mixture. We measure out the estimated amount of water, add a certain amount of the mixture in small portions, stir until it reaches the consistency of sour cream. Leave for 10 minutes, then stir again.
To begin, practice the movements of applying a uniform layer of leveling putty: try to level the walls, and then continue applying from the wall to the ceiling and leveling the layer.
Scoop up the putty from the bucket with a narrow spatula and place it on the knife blade of a wide spatula in an even layer over the entire width. Press the spatula firmly against the joint of the slab and use a smoothing motion from the wall to the ceiling. It is recommended to start from the window. The first layer is applied no more than 1.5 mm. Plasterers, instead of a bucket and spatula, use a flat surface with a handle (falcon) or use two spatulas. The putty is placed on a plane and held in your free hand.
Advice. Apply the first layer to the surface of the slab in the direction perpendicular to the floor seam. There is no need to putty the seam. This is done with the second layer of putty. The first layer will act as beacons, then the putty will evenly cover the seam, there will be no bulge from the glued fiberglass.
After applying the layer, the residue from a wide spatula is cleaned off on the edge of the plane and the layer is smoothed, then the next portion is scooped out with a working spatula from the “falcon” and the putty is continued, the movements are practiced until they become automatic, and soon everything will start to work out. For the first leveling layer, use a rigid spatula 35-40 mm wide . This allows you to fill depressions and cracks by applying pressure from the knife to the surface of the slab.
After applying the leveling layer, check the surface. If any flaws remain, apply another layer in a perpendicular direction. Before applying the final third layer, the ceiling surface is sanded and primed. After hardening, a final layer is applied, which is also sanded and primed before painting or wallpapering. Before painting, check the smallest defects with a light directed at the ceiling, eliminate them by additional sanding, then primer.
How to level a concrete ceiling
The technology for leveling concrete ceilings consists of the following steps:
- First of all, it is necessary to repair the rust in the slabs. All joints are completely filled with polyurethane foam, which, after hardening, must be cut off, going 2-3 cm into the gap. When the foam is cut, you can begin to apply the starting leveling cement layer.
- If there are no unevenness or differences on the ceiling surface, you need to wait for the rustication to harden and start waterproofing the ceiling. After this, you can apply a layer of finishing gypsum putty, having previously reinforced the seams with a special tape. The number of layers of putty depends mainly on the experience of the master, but usually only two layers are enough. The second layer is applied after the first has completely dried.
- The hardened coating must be sanded and vacuumed to remove all dust and other contaminants. Next, the ceiling surface needs to be treated with a primer to improve adhesion in the future.
- If there are differences in altitude, leveling becomes significantly more complicated, and the amount of work increases accordingly. At this stage, it is very important to determine exactly how large the differences are - the choice of materials for leveling the ceiling directly depends on this. Wet leveling methods can only be used if the largest difference in height does not exceed 5 cm. This limitation is due to the fact that the weight of the plaster if the specified thickness is exceeded will be too large - and this is already a danger to human health.
You need to understand that using a cement-sand mixture to plaster the ceiling requires good skills. To apply such a solution to the surface of the ceiling and fix it on it, you need considerable experience, which only professional builders have.
This is why you shouldn’t do this kind of work yourself. If the height differences do not exceed 3 cm, then ordinary cement or gypsum mixtures are quite suitable - in this case, there will be no special problems in leveling the ceiling with your own hands.
Leveling the ceiling with your own hands using plaster
If the ceiling plane has gone too far to the side, or the slabs have significant unevenness, the ceiling is leveled using plaster, which is applied with a layer thickness of 2-5 cm. A layer of putty of such a thickness will not hold, and plaster has better adhesive properties.
Before work, the ceiling surface is also primed. It is advisable to use deep penetration formulations.
For example, “Betonkontakt” or similar. After drying, the ceiling becomes rough, and the plaster mixture adheres better to the base. Alignment is carried out as follows:
- a reinforcing mesh is attached to the ceiling surface;
- dilute the dry mixture with water according to the instructions indicated on the package. A construction mixer is used for mixing;
- start work from the lowest corner in the room. Apply the composition with a spatula on top of the mesh and press it in so that the plaster fills the holes. There is no need to try to immediately level the ceiling, where the height differences are 3 cm or more; apply the plaster in several layers;
- the thickness of the first layer, which is applied to the entire surface of the ceiling and left until completely dry, does not exceed 2 cm;
- the second layer of the mixture should completely cover the mesh and completely level the ceiling.
On a note! For each new layer you will need to thin out fresh plaster. Do not add dry mixture to diluted mixture!
- After drying, the second layer of plaster is rubbed with fine-grained sandpaper until smooth. If you do not sand the surface, you will have to spend more time on finishing putty.
If the slab “goes” too far to the side, and it is necessary to level the entire ceiling, use beacons that are attached on top of the mesh, aligned with the level. If everything is done correctly, then at the end of the work you will get an even and smooth plane.
Chockline is a relatively new invention that allows you to apply control markings perfectly evenly. This tool is also called a painting cord or a special water level.
Leveling begins by leveling the room and applying a zero ceiling level to the wall surfaces using a chokeline.
Secrets of working with beacons:
- the lowest point is found on the ceiling, which will become the site for installing the first beacon;
- small plaster “cakes” are thrown in increments of 30 cm, on which metal beacons are “planted”;
- when leveling along the beacons, the layer of plaster should not exceed 5 cm. The same applies to the height of the beacons;
- to control the horizontal plane, use a two-meter building level;
- After installing the beacons, a leveling gypsum or cement mortar is prepared. If gypsum is used, then each new layer is applied 20-30 minutes after the previous one, cement - after 2-3 hours;
- each layer is leveled according to the rule so that it does not extend beyond the lighthouse;
- During work, defects (pits, depressions) must be immediately eliminated. Otherwise, you will have to apply too thick a layer of plaster;
- The beacons are removed when the last layer of the mixture has been applied and dried. The recesses are sealed with the same composition.
The quality of leveling is determined by the level. If there are differences or flaws, the unevenness is eliminated with additional layers of plaster or cut off. Immediately seal the recesses where the ceiling meets the walls and in the corners. To do this, use a grater.
The last step is to apply and carefully level the control layer of the mixture.
Plastering the ceiling with your own hands.
Ceiling markings
Another stage of work is marking the horizontal plane of the ceiling. The main task at this stage is to bring the ceiling to the general level, to which all sections of the floor need to be lowered. The first step is to find the lowest angle of the ceiling. It is best to perform this operation using a laser level. This device is installed in the center of the room, leveled and rotated. On each wall you need to make one mark, from which the distance to the ceiling is then measured. The discovered lowest point is the same level at which the new ceiling will be located.
If a laser level is not available, it can be replaced with a water level. In extreme cases, even a simple transparent hose will do - the water in it will always be at the same level on both edges. Regardless of the devices used, the point of measuring the level is to transfer one mark to all other walls of the room.
To be able to visually monitor the future level of the finished ceiling, you need to drill holes around the perimeter of each wall in increments of 50 cm. Self-tapping screws are screwed into these holes, on which cords are pulled, forming the frame of the ceiling. If, during the process of tightening the laces, areas of overlap are found that are located below the expected level of the finishing structure, then it is necessary to either cut off these elevations or lower the general level of the cords.
When the contour of the ceiling is marked, you need to measure the maximum thickness of the coating layer required to fully level the structure. If the thickness is too large (over 3 cm), then it would be best to use the services of specialists. In other cases, you can level the ceiling with your own hands, using cement and gypsum compounds.
Step-by-step instructions for leveling the ceiling
Determining ceiling unevenness
The first thing to do is determine how uneven your ceiling is. To do this, you need to find the lowest corner of the room. From this corner the remaining four (or more) corners of the room are measured using a hydraulic level or, if available, a laser level. An assistant is needed for this and many subsequent operations.
We beat off lines with chocoline
Next, using a tapping cord, ceiling level lines are drawn along the walls. If the maximum discrepancy between the lowest and highest places in the ceiling does not exceed 50 mm, leveling can be done using the wet method. The term wet method refers to leveling the ceiling with plaster and putty.
Ceiling cleaning
It is necessary to clean the ceiling from old plaster, wallpaper or paint (depending on the previous coating). All putty, fungi, etc. should be carefully removed. Next, prime the coating with a deep penetration primer. For upper floors, it is advisable to do this procedure twice.
Display of beacons
Next, after the primer has dried (after 6-24 hours), the beacons are set. There are two ways to attach them: using dowels or using a putty solution. If you chose the option with a solution, then you need to apply a line of putty and use a long level to set the beacon.
Read also: Insulating the ceiling with mineral wool from the inside
When installing ceiling beacons, it is necessary to make them parallel at a distance from each other, which is 100-150 mm less than the length of the rule. After installing several beacons, you need to check whether they are at the same level. To do this, you need to pull the cord from the marks on opposite walls. Beacons do not need to be used if the difference in ceiling height is no more than 10 mm. After installing the beacons, it is necessary to prime the ceiling again or at least walk over the beacons with a primer.
Ceiling plaster and putty
If the difference is more than 20 mm, you cannot do without plaster. Plasters like Rotbant perform well on ceilings. Using spatulas, the plaster is adjusted and leveled on the ceiling, and then leveled using the beacon rule. If the layer exceeds 20 mm, it is necessary to use a metal or polymer mesh, which is attached to the ceiling using dowels or an adhesive solution.
Read also: How to insulate the ceiling in a room with your own hands.
There is no point in achieving perfect evenness of the plaster layer. This is the task of the next layer - putty. Before puttying, the ceiling must be primed and allowed to dry. If you did without plaster, then start putty is used first. Finishing putty is immediately applied to the surface leveled with plaster. The technology for puttingtying the ceiling is no different from puttingtying the walls, so we won’t describe it.
Grinding
After the finishing layer has dried, it should be sanded with a float (the dustiest job). This will remove minor irregularities and give the ceiling an aesthetic appearance. At this point, the leveling of the ceiling in the Khrushchev building can be considered complete. Further preparation of the ceiling depends on the type of coating.
Formation of beacons
As mentioned above, cement-based solutions will be used for leveling. A leveling layer of the required thickness is laid on top of a reinforcing metal mesh fixed to the ceiling surface. Reinforcement increases the strength of the structure and prevents it from collapsing even under the influence of external influences.
Beacons are formed on top of the mesh, which are cone-shaped protrusions made of cement mortar. The height of such cones should coincide with the gap between the cord and the ceiling in this area. When each beacon has hardened, you need to connect them all - the result will be convenient guides that make it easy to remove the remaining leveling compound using a rule.
Having prepared the mixture, you can begin to apply it. A wide spatula is used for work. As a rule, one coat of coating is not enough, so several passes must be made. In any case, each subsequent layer is applied only after the previous one has completely dried. It is recommended to run over the bottom layer with a notched trowel before application to improve surface adhesion.
After filling the areas between the guides, excess plaster must be removed. To do this, the rule is carried out along the guides along the fresh coating. The rule needs to be moved not only along, but also across the ceiling so that the material is distributed more evenly. The remaining solution is used to smooth out uneven areas of the ceiling.
The last stage of leveling the ceiling is applying the finishing putty. It must be applied in several layers (of course, each previous one must completely harden before applying the next one). The finished coating is sanded, primed with a suitable hydrophobic composition, after which the ceiling can be decorated with any finishing material - for example, whitewash or foam tiles.
Useful video
In the video we'll see how to properly level the walls and ceiling using finishing putty:
Ceiling putty corrects defects and is the basis for subsequent finishing. High-quality putty depends on proper surface preparation, priming, choice of materials, tools, and adherence to putty technology.
Beginners are advised to clean and prime each layer. It will turn out slowly, but efficiently. All this comes with experience, but if there is a desire to learn and understand the process itself, then putty can be done by a beginner.
Dry ceiling leveling
Dry leveling most often means a suspended plasterboard ceiling. Unlike plastering, this method is quite simple, which allows you to perform all operations yourself, even if you have no experience in carrying out such work. However, this method also has a number of rules that must be followed.
First of all, you need to prepare the base. Remnants of previous coatings are removed from the ceiling surface, rust marks are removed and sealed. The next stage of preparation is the installation of a waterproofing layer, which will prevent flooding of the apartment by neighbors from above. Waterproofing is needed even when using moisture-resistant drywall, which, despite its name, cannot withstand direct contact with water.
Where should I start?
First of all, it is important to determine for yourself what effect you want to achieve. You will be leveling the ceiling with your own hands, which means you need to carefully consider how you will do it. Consider whether you only need to slightly update the appearance of the ceiling or whether more serious intervention is required. This will determine which leveling method is best for you to choose and what materials you need to buy for this. For example, if the difference in ceiling level is more than 5 cm or if there are constant cracks at the joints of the slabs, you will need to use a more complex leveling system and purchase additional materials.
Frame marking
Next we will talk about a simple plasterboard structure, intended only to level out the shortcomings of the base floor. There are also more complex configurations, but they place serious demands on the skills of the master, and the repair costs will be disproportionately higher.
The marking is carried out in exactly the same way as in the previous case. Along the perimeter of the walls you need to draw lines that will indicate the level of the future ceiling. Marking is applied using a water level or level. The main thing is that the necessary marks are marked on each wall and exactly relative to each other.
Next, on the ceiling itself, the location of the frame parts is marked, which can be manufactured according to two basic schemes:
- Lathing with cells 60x60 cm, in which adjacent sheets are placed along one profile;
- A linear frame in which parallel guides are attached in increments of 40 cm, and the transverse parts of the frame are located only under the plasterboard joints.
Calculation of materials for the ceiling
There is no direct relationship between the type of frame and the cost of leveling the ceiling. Both types of frames are quite strong and reliable, so you should choose the option that is better suited for a particular situation.
To arrange the frame in accordance with the markings, the following quantity of materials is purchased:
- UD profiles - the total length must correspond to the total perimeter of the room, increased by 20%;
- CD profiles - these parts must have a total length that matches the number of lintels on the ceiling, increased by 20%;
- Suspensions - purchased in the quantity required for installation in increments of 60 cm.
Plasterboard sheets usually have dimensions of 2.5 x 1.2 meters. For a simple plasterboard ceiling, the calculation of the required number of sheets is carried out in accordance with the drawing, on which all structural elements should be displayed before work begins. The number of screws is also calculated simply - one sheet requires 100 fasteners. The total amount of dowel screws is equal to the sum of twice the number of hangers and the cost of fastening UD profiles in increments of 40 cm.
Frame installation
The algorithm for assembling a frame for a plasterboard ceiling includes the following steps:
- First you need to install UD profiles around the perimeter of the room at the desired level. After this, hangers are attached to the ceiling surface in accordance with the markings. After installing the CD profiles, the edges of the hangers will be bent to fix the jumpers.
- The connection of individual frame parts is carried out using a “crab” type fastening. To connect parts along the length, you can use either a similar fastening or conventional joining - the profiles simply overlap each other with an overlap of about 10 cm and are connected with self-tapping screws.
If the ceiling surface is initially flat, but not smooth enough, wooden beams can be used instead of profiles. In this case, the installation technology is increased by one stage - all wooden elements must be treated with an antiseptic and a moisture-resistant compound before installation.
Leveling with drywall
The plasterboard structure is a suspended ceiling that hides everything, even very large defects of the rough slabs. To lay sheets of building material, it is necessary to install metal profiles over the entire ceiling area. Many people wonder how to level a ceiling with plasterboard, because this is a convenient and quick way to get a surface ideal for painting or wallpapering.
The advantages of the dry leveling method are that time, financial and labor costs are significantly reduced.
The procedure for performing work when leveling the ceiling with plasterboard is as follows:
- Mark the position of the future ceiling.
- Mark the points where the hangers that hold the structure will be attached to the surface of the slabs and install them.
- Mount the metal profile in accordance with the markings.
- Install electrical wiring and other communications (if any).
- Cut sheets of drywall to the desired size and shape.
- Attach drywall to the metal profile.
If the plasterboard ceiling is subsequently going to be painted, then it is necessary to putty and clean the seams. For this, finishing putty is used. It is applied with a wide spatula in one or several layers. Each layer must be allowed to dry thoroughly before applying the next.
Plasterboard ceilings can be installed in any room. There is a building material that is resistant to high air humidity, temperature changes and mechanical damage.
Drywall installation
There are a number of rules that must be followed when attaching plasterboard sheets to the frame:
- You need to leave a small gap between the sheets and the wall (2-3 mm is enough);
- The sheets must be placed offset so that their transverse joints do not coincide;
- Self-tapping screws are screwed in every 20 cm and slightly recessed into the sheets - this will allow them to be covered with putty in the future;
- In the abutting areas, the sheets must be chamfered so that these areas are subsequently completely filled with the mixture.
To understand in detail how to install a plasterboard ceiling, it is best to read the corresponding article with a detailed description of all the steps. The same applies to puttying drywall - this work has many nuances that deserve careful study.
Leveling the ceiling with tiles
For dry leveling, not only drywall can be used. One option is plastic tiles, which allow you to hide imperfections in the base and level it. Installation of this material is carried out in the same way as in the case of plasterboard - first the ceiling is prepared, then the frame is formed, and the tiles are attached to it.
Perhaps the only difference is that the tile has a special lock, which allows you to do without putty on the finished finish. Among the advantages of this option, it is also worth noting ease of installation, complete resistance to direct contact with water and relatively low cost.
Aligning the ceiling with beacons
- Before installing the beacons, you need to prime the ceiling and then wait for it to dry, which may take several hours. Then the mixture is prepared using water and starting putty. If you wish, you can purchase ready-made mixtures for leveling the ceiling, which will make the process easier, but this cannot exactly be called a rational step, especially if you adhere to certain restrictions on repair costs (ready-made mortar is more expensive).
- Next, a path is applied to the ceiling using a putty mixture, and a beacon is applied to it. Such a path is made at a distance of 10-15 centimeters from the wall. The thickness of the beacon profile is usually 6-8 mm, and this value does not affect how the putty should be applied. The thickness of the profile determines, first of all, its rigidity, which means that the thicker the beacon is, the stiffer it will be. In addition, the thicker the beacon, the more solution you will have to add.
- When installing a beacon, you need to focus on the previously created control line. The profile used usually bends from side to side, so this feature will have to be adjusted, leveling if necessary. This is done using a building level.
- The installation of the next beacon is carried out so that between the new and the previous beacon there is a distance of 15-20 centimeters shorter than the length of the building rule used. So, if the length of the rule is 200 cm, then on average the distance between the beacons should be 180-185 cm. This condition is explained by the need for the free use of the rule for its intended purpose.
- To ensure a common plane for the position of the beacons, a thread must be pulled under the profiles in the middle of the ceiling. After installation in one common plane, they should be smeared using starting putty, this will prevent them from becoming unsteady in the future.
- Before starting to putty on the beacons, you need to let them dry, and it is better if the work is continued the next day. Don’t be surprised if you find out that the craftsmen move on to the next stage within a few hours; it is their professional experience that allows them to start work before the specified time.
- While the beacons are drying, you can start filling up potholes, cracks and floor joints.
- Now the beacons are installed, so you can move on to the next stage, which consists of throwing the starting putty onto the ceiling while periodically running it over the beacons as a rule, thereby eliminating the possibility of the solution getting out of the beacons. These actions continue until the space between the beacons is filled with putty.
Location of beacons on the ceiling
If necessary, leveling the ceiling along the beacons, the video will be the best and, in addition, a clear example of the necessary actions. You can view it below.
The next step after the beacons have dried is to putty on the beacons. As the final stage in leveling the ceiling for further painting, the application of the next, second layer of putty to the ceiling surface is considered. Only this time a finishing putty is used, and it should be applied after priming the first layer of putty. Usually, specialists apply it, so to speak, “lightly”, without the need for subsequent sanding, which allows you to achieve a smooth surface. For beginners in the repair business, this will add more work; for sanding, a special grater is used, to which, in turn, a diamond mesh or sandpaper is attached. Be sure to take care of eye and breathing protection for working in such conditions, using a respirator and special glasses.
To conclude this point, I would like to give a recommendation regarding a layer of putty, which should not be more than 50 mm. Otherwise, too thick a layer can lead to the collapse of the mixture, even if the layers are applied gradually, layer by layer. Taking this into account, monitor the thickness of the layer, and if it is exceeded, use additional reinforcement elements or a cement-sand mixture with mesh.
Perforated beacon profile
Dropped ceilings
Various options for suspended structures are not only an excellent way to level the ceiling, but also a decent finishing touch. Suspended ceilings are actively used to implement a wide variety of interiors and design solutions, which is largely due to the high decorative properties of such structures.
Among the disadvantages, the first thing worth noting is the high cost. Of course, versatility and practicality are worth it, but the cost of repairs with the installation of suspended ceilings will be very high. In addition, there is a height limitation - it is not practical to install a hanging system in rooms with low ceilings. Independent installation of these structures is quite complicated, which will increase labor or financial (if specialists are invited) costs.
Frame ceilings
We placed all the ceilings on frames into a separate group. Their essence is very similar and involves the installation of a separately leveled base made of slats, beams or metal profiles.
All frame ceilings can be divided into suspended and suspended:
- The first ones are mounted on a sheathing directly nailed to the ceiling;
- The latter are installed on a frame , extending from the base at some distance, and resting on suspension systems.
Drywall
So, let's figure out what modern engineering offers us to level the ceiling today. And we will start with the most common option - plasterboard ceilings. Along with describing the materials, let's look at the properties of frame structures.
Simple two-level plasterboard suspended ceiling
This material is very versatile and suitable for various purposes. For example, many of you probably didn’t know that it can serve as a high-quality base for tiles.
There are modifications of the product that can be used in dry, damp and even fire hazardous areas. Separately, it is worth mentioning gypsum fiber sheets, which are very durable and withstand negative influences much better, although in appearance they are not much different from plasterboard.
- The most important advantage of such cladding is the ability to level the bases with any height differences - from the smallest to the very large.
- Under such a ceiling you can hide various communications: water supply, sewerage, ventilation system pipes, electrical wiring.
- Installation does not require technical education - just a little spatial thinking skills, knowledge of basic requirements and technology, as well as the ability to hold the tool firmly in your hands.
- As already mentioned, this base is suitable for many types of finishes. The cardboard layer of the material has excellent adhesion.
- Among the disadvantages, it can be noted that, like any suspension system, such ceiling alignment takes up some space. Hence, a certain limitation is imposed on the height of the room.
To assemble the frame for drywall, special galvanized steel profiles are used, which can serve perfectly both in dry conditions and outdoors. The fastening system is very well thought out and may seem complicated only at first glance.
Here are the basic elements required to assemble the base in 95% of cases:
Guide profile
- The PNP profile is also a guide, with an end section of 27x28 mm. The length of this element may vary, but the most commonly sold options are 3 meters - this feature applies to all profiles.
Bearing profile
- PP profile – main, load-bearing, longitudinal (call it what you want). Its cross-section is 27x60 mm. It is inserted into the guide and fastened to it with special LN screws or options with a press washer - whichever is more convenient for you.
Straight suspension
- Direct suspension - this element is successfully used to strengthen and level any frames.
Connector for perpendicular connections
- Single-level connectors are also known as “crabs”. Required for installing jumpers under the seams of sheets. They are designed in such a way that they snap into the PP profile from above, and the free “ears” are bent and secured with self-tapping screws.
Profile extension
- In some rooms (with the length of all walls more than 3 meters) it is impossible to do without a PP profile extension.
Advice! Due to the fact that there are quite a lot of profile manufacturers today, we recommend that you always purchase products as a set from one company, since, despite the standardized sizes, they often differ and do not quite fit the arches to each other.
In general, such frames can also be hemmed, fixed directly to the floors, and they are perfect for various materials, such as plastic, MDF, lining.
Our conclusion. An excellent option for any decoration, especially when creating beautiful figured structures on ceilings of sufficient height. Otherwise, we advise you to stick to suspended ceilings or plaster them.
Lining, MDF and PVC panels
When considering these materials, we will not say anything about their structure, but will only talk about their properties. So, what do we get by covering the ceilings in a room with these materials?Let's start with lining, as the most noble representative of panels:
- First of all, this material is environmentally friendly and looks very beautiful. It is used mainly when creating eco-style interiors, but sometimes lining fits perfectly into modern designs, filling rooms not only with warmth and comfort, but also with the pleasant aroma of the forest.
- The material copes well with sound and heat insulation; above it, like over any other frame ceiling, you can additionally place a layer of insulation.
- The properties of the coating directly depend on the type of wood used - some not very cheap options cope well even with humidity.
- The disadvantages of wooden ceilings are as follows: in most cases, they are afraid of water, wood-boring insects, mold and fire. However, with proper processing, all these disadvantages can be minimized.
MDF also has a natural wood base. Small fibers are impregnated with an adhesive and formed by pressing in special machines.
The material does not require additional processing; it is laminated panels of standardized sizes with a classic tongue-and-groove connection. The outer film most often imitates the texture and color of some type of wood.
Assortment of MDF panels
Among the shortcomings of the materials, we will immediately highlight the fear of moisture - the panels swell, the film peels off, and low resistance to mechanical stress, although this is not so important for the ceiling. In general, we recommend using only in rooms with low humidity and no temperature changes - the best candidates are corridors, storage rooms, well-waterproofed balconies and loggias
Assortment of plastic lining
PVC panels are essentially the same as the options just discussed. The color of this material can be any.
Manufacturers quite reliably imitate many materials - wood, or even tiles. But still, the budgetary nature of the material is very noticeable and upon closer examination, any imitation will be revealed even by an inexperienced eye.
The material is impervious to moisture and can withstand a decent temperature range, but it is worth noting that when overcooled it becomes more fragile. In general, the fragility of plastic is its Achilles heel. It is not uncommon for the surface of the material to break through even with minor efforts. However, we return again to the fact that we are talking about the ceiling.
Plastic is a good choice for bathroom cladding, where existing ventilation is often insufficient. Being in such conditions, he will not be afraid of either mold or steam. At the same time, its appearance is very pleasant.
Slat ceilings
Continuing the theme of frame structures, we smoothly move on to the next participant in our review - slatted ceilings. Let us immediately clarify that we will be talking about aluminum options.
Wooden models are not much different from simple clapboard cladding, except that they have a slightly different installation method and a more original appearance.
Leveling the ceiling is the best way to hide a defect and emphasize it
Externally, such ceilings are not much different from those lined with plastic lining, but the structural differences are more than enough.
Let's start with the material itself:
- The slats are rolled from aluminum and are a thin and flexible profile that is sold in coils. This property means that the material is excellent for curved surfaces, as shown in the photo above.
Ceiling rail
- As a frame, a special profile is used under it, called a traverse, comb, tire or stringer. Its essence is that on the lower part there are contact connections into which the slats are snapped into by reciprocal grooves.
Spring suspension allows you to quickly set the level
- Along the edges the surface is framed with a guide baguette. The entire structure is supported on suspensions - straight or adjustable, with the structure lowered low.
This ceiling option cannot be called budget, but that’s understandable - non-ferrous metals are always in price. The ceiling itself looks very solid and is not afraid of changes in temperature and humidity, so feel free to purchase it for bathrooms, kitchens, or even for a canopy or gazebo on the street.
Stretch ceiling
Another solution based on the principle of masking an unsightly base is suspended ceilings. Such designs are distinguished by high decorative properties and allow you to hide any shortcomings of the base floor. There are two types of these structures - elastic and fabric, which differ in the material used to make the fabric.
It is quite difficult to install a suspended ceiling yourself due to the nature of the fabric - it is very easy to damage during the installation process. Correcting errors will worsen the appearance of the structure and the desired effect will not be achieved. To prevent such things from happening, it is best to immediately entrust the installation of suspended ceilings to professional builders.
