In small hallways or in addition to closets in bathrooms, kitchens and other living spaces, there are often wall hangers for storing various things. A wall hanger does not take up much space and can be a separate design move. Based on what parameters you choose a hanger and how to fix it on the wall yourself, read on.
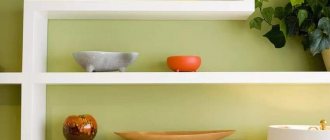
Wall-mounted devices for storing clothes
What you need to hang cabinets on walls made of different materials
The main thing you need to understand is that all construction and finishing work must be completed before hanging the cabinets, and the walls must be as level as possible.
Start of work
It is worth mentioning some rules that everyone understands, but do not always follow:
- It will not be possible to hang cabinets neatly on crooked walls . Some types of canopies allow you to level out the curvature of 1-2 centimeters, but no more. If the wall is a concave or curved lens with a difference of several centimeters, the task may be impossible. The same can be said about cases when the corner of the kitchen diverges by more than 1-2 degrees, and you need to hang cabinets on both sides of the corner. As a way out, you can use various linings for fasteners. But all these tricks negatively affect the strength and reliability of the hitch.
- When all the cabinets are already hanging, it will be problematic to hang wallpaper, lay out an apron or install wiring . You will have to re-disassemble the cabinets, which will most likely be pulled together, remove them from the awnings... This is quite energy-intensive. Therefore, do not do double work - finish all the finishing before installing the furniture.
- Correct marking is the key to successful installation . It’s no wonder that experienced kitchen installers acquire laser levels. Experience is experience, and it is better not to do marking accuracy “by eye”. Carefully measure the level, correlate it with the position of the floor, ceiling and vertical wall. This is especially important if you need to hang a row of cabinets.
What tools do you need to hang a closet?
In order to hang cabinets on the walls with your own hands, you will need a simple set of hand tools:
- Power tool. A hammer drill or drill for drilling, drills with a Pobedit tip and a drill (for drilling more than 15 cm in depth) included. A tool with a quick-release chuck and smooth speed control makes it easier to hang cabinets on the wall.
- Measuring tool. Level, plumb lines, tape measure, square and other measuring tools. Special jigs are useful for evenly marking holes along the same level and the same depth. You can make them yourself using available materials. To align the drill bits, a piece of plywood with marked holes will do. To maintain the depth, use special attachments for the drill (or marks, for example, using electrical tape).
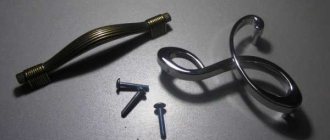
- Additional fittings, depending on the type of fastener . Cabinets can be hung on furniture canopies (various types of hinges, hidden, “ears” and R-shaped) and on special rails with adjustable canopies. The latter greatly facilitate the adjustment process.
- Hardware and fasteners, depending on the type of walls . These can be dowels, anchors, screws, “butterflies”, “snails”, hooks and other types. As well as intersectional couplers (kitchen wall cabinets are connected to each other after leveling in height and depth, forming a monolithic structure).
- Handy tool . Screwdriver, screwdriver, hammer, pliers, metal file, etc. Everything that any home craftsman has.
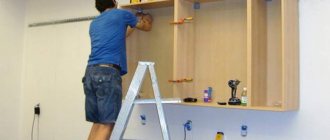
Attach furniture to the wall
IKEA is a European company and takes a responsible approach to customer safety issues.
In addition to the fact that all products are carefully tested before production begins, a fastening kit is placed in the box with the furniture.
According to European safety standards, all furniture over a meter high must be secured to the wall to prevent it from tipping over.
A few years ago, a tragedy occurred in America when children knocked over an unsecured chest of drawers. And although it was adults who violated safety regulations, IKEA has revised its standards and now includes mounting kits even for low furniture like bedside tables.
Of course, an Ikea rack or cabinet will stand like any other, but since this is a safety issue (primarily for children, who quite unexpectedly and even at a relatively adult age can decide to use shelves or drawers as a ladder), then, of course, it’s worth secure furniture (especially narrow and tall ones). As parents and simply responsible people, we attached all the tall furniture that we have in our house. Why? Because this is a very simple action, you only need to screw a couple of bolts into the wall. It takes a couple of minutes, but it increases your peace of mind by an order of magnitude.
Included with any cabinet furniture is a metal bracket, which is attached with one side to the wall and the other to the piece of furniture. The design allows you to step back from the wall (for example, if there is a pipe or a wide plinth running along the bottom
If the wall is painted, then usually no questions arise; in the case of wallpaper, it is recommended that before drilling, make a cross-shaped cut in the place where the hole will be and carefully bend the corners. If you decide to rearrange the furniture, these corners are glued and there is no trace of the hole left. Fastenings do not spoil the repair! Not so much as to neglect safety in order to preserve the walls. It is especially important to fasten large furniture like chests of drawers, cabinets or overshoes, but we don’t move them according to our mood! So only you will know about a couple of small holes.
As for the fasteners themselves, which are screwed into the wall, they are not included in the furniture set (the same for shelves, photo frames and other hanging elements), since different types of walls require different types of fastenings.
Another popular option is to use felt or wood pads to raise the edge farthest from the wall to create a slight angle. This is not noticeable to the eye, but shifts the center of gravity towards the wall. This method is not recommended by the manufacturer, but it is popular and definitely better than nothing.
In addition, it is also worth remembering that the heaviest items should be stored on the lower shelves and in the back of the drawers.
A shelf or drawer cannot be used as a step.
If you have small children and you need additional safety measures, also pay attention to the PATROL series of products - as a rule, most of these products are in stock here, on Kievskaya, 98
This is a staged video, the furniture is not IKEA, no one was hurt, but we really hope that it will convince you not to neglect safety precautions.
We have been bringing IKEA products to Crimea and Simferopol for a long time and are completely confident that they should bring only joy!
Order any and see for yourself.
All articles
If you liked or found this article useful, share it on social networks:
How to hang a cabinet on a thin or hollow wall
Typically this problem occurs when installing corner kitchens. Often one of the walls on which kitchen cabinets are hung is load-bearing, and the one adjacent to it is a thin partition with a bathtub or toilet. Usually this problem is “bypassed” at the stage of designing a kitchen set. When taking measurements, the master assesses the strength of the wall and adjusts the design project, “unloading” thin and hollow walls. There you can always place open shelves, a hood with a stove, an open bar counter, and hang a TV.
The solution is to relieve the thin wall from wall cabinets
In the case of thin, loose and hollow walls, load redistribution using embedded slats works well. Due to the fact that the cabinets themselves do not hang pointwise, but on a common plank and are pulled together, the hanging becomes more reliable and strong. But within reason.
You can also come up with some kind of additional support for wall cabinets. For example, finish a row of the kitchen with a tall pencil case standing on the floor. Wall cabinets pulled together and pulled to the side of the pencil case will receive additional support. Or use a piece of bar pipe, on which you can hang baskets and use it for its intended purpose.
The solution is to provide the cabinets with additional support
At what altitude
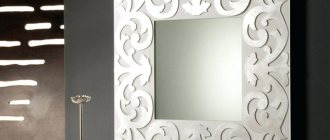
The installation height of mirrors depends on the installation location and its purpose. In the bathroom it is hung so that the middle of the mirror surface is at eye level. The height of residents may vary, but on average the center is at a height of 160-165 cm from the floor.
Bathroom mirror installation height
When hanging in the hallway or dressing room, mirrors are usually installed long and narrow. In them, a person should be displayed in full height. To do this, its upper edge should be slightly above the head - 3-5 cm. When hanging on cabinet doors, use its upper edge as a guide. If the closet is tall, the mirror is also fixed a few centimeters above the head.
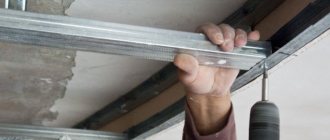
How to hang a cabinet on a plasterboard wall
Drywall is a fragile and thin material that is used to level walls and create partitions indoors. Its structure itself does not imply the attachment of other objects to it.
Prudent owners, even at the renovation stage, make special embeds inside the plasterboard walls in potential places for attaching cabinets and equipment. Due to the reinforcement of the hollow partition of such a mortgage, which is a beam or a thick board of wood, questions about how to hang a cabinet on a plasterboard wall usually no longer arise.
If drywall was used to level the walls, then underneath it, at a distance of 5-12 cm, there is a wall into which you can drill to hang cabinets. For this, long anchors and butterfly fasteners are used. The main thing is to correctly calculate the length; the fasteners must be rigid and fit into the wall by at least 5 cm.
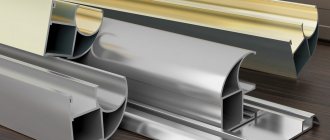
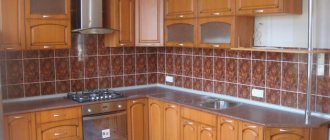
Choosing fittings for wall kitchen cabinets
Furniture manufacturers do not always include consumables for installation, so you should take into account the capabilities of standard fasteners. The following types are distinguished:
- plank is one of the most common varieties. The embedded mounting rail is installed on the wall, the far corners of the cabinet are equipped with canopies. The latter can be adjusted in two directions, so that the furniture fits against the wall without gaps;
- a furniture hinge is a Soviet steel product that is screwed to the back wall of the cabinet; it is hung on an anchor driven into the wall. The solution is practical, but it cannot be adjusted subsequently; it requires the most accurate marking of the anchor insertion zones;
- Ikea furniture mount is supplied in a set with an unassembled structure, but can be purchased separately. A metal corner with a double-sided ridge notch and a large hole is screwed into the inside of the cabinet. After marking, an anchor is driven into the center of the latter. After hanging, the head is equipped with a lock, the system is subject to adjustment;
- A hanging angle is a standard loop bent at a right angle.
A furniture hinge is one of the elements for attaching wall cabinets to the wall.
The hinge can only be fixed on a vertical wall of furniture, while the corner is screwed onto the top panel located horizontally.
How to hang a cabinet on a concrete or brick wall
First of all, you need to correctly mark the drilling locations. The wiring diagram is preliminarily specified and the markings are adjusted according to it. You need to be prepared for the fact that the drill will get very hot during operation - it needs to be cooled with water from time to time, dipping it into a container of a suitable size.
A brick wall is drilled at low speeds (about 400), in impact mode. It is important to hold the tool strictly perpendicular.
Concrete is highly durable; for it, use a pobedite drill with an extra-hard tip. Drilling is carried out at medium speeds, in shock-rotational mode. You need to be prepared for the fact that there is a risk of getting into the reinforcement and you will need a new drill (the tip of the current one may break off). In this case, the drill is replaced with a regular one to bypass the obstacle. If possible, it is better to move to the left or right.
To hang cabinets on a tiled wall, you must remove the glaze from the intended locations before drilling. Then drill with a thin drill to eliminate the possibility of cracks during further work.
How to glue a mirror with double-sided tape
Mirrors that are small in size and weight can be glued to a special 3M double-sided tape. An adhesive composition is applied to the foamed polyethylene or polyurethane on both sides. The foam base compensates for some unevenness of the base and also serves to absorb movement of the base. The thickness of the base (adhesive tape) can be from 0.8 mm to 1.6 mm, the width of the tape is 6-25 mm.
Glue quickly and securely using special 3M double-sided mounting tape
Pieces of tape are glued onto a clean, grease-free base. It is distributed evenly over the entire surface. It is not worth gluing along the perimeter; it is better to glue all the pieces vertically in a checkerboard pattern at a distance of about 10-12 cm from each other. The tape consumption depends on the mirror area; experimental data are given in the table.
How to choose
The choice depends on the layout of the room and the style of the interior. Manufacturers offer a huge selection of different options, which differ in reflective surface, shape and decor.
Varieties:
- Wall mounted. Hanging on the wall is the most popular way to place it in the hallway. Especially relevant for cramped rooms, the mirror is located along the plane of the wall and does not affect the functional space.
- Floor-standing. Suitable only for spacious hallways. Models can be double-sided and mobile. They allow you to see yourself from all sides and change the design of the room from time to time.
- Horizontal. Visually expands the wall and the space of the room as a whole. It should be taken into account that the ceiling will drop slightly. Suitable for a small hallway.
- Vertical. It visually lengthens the corridor and allows you to see yourself in full height.
- Oval. Corrects the asymmetry of a non-standard layout and visually expands a narrow room.
- Round. Adds elegance to the hallway, suitable for rooms of various sizes, layouts and styles.
- Square. A model with a clear geometric shape is recommended for hallways decorated in a minimalist style.
- Rectangular. Universal shape, suitable for any hallway.
Some believe that it can be installed in any place you like, even at the exit from the house.
The minimum recommended size of the product is 30x40 cm. In such a mirror you can see the upper part of the body to the middle of the chest. Products of this size are recommended for small or overloaded hallways with furniture.
To look full-length, you need to purchase a mirror with dimensions 60X120; this option is more suitable for spacious hallways.
However, it is worth considering that a large mirror in small rooms will look inconspicuous and inappropriate.
When choosing, pay attention to the edges of the mirror. Sharp corners and edges are dangerous, especially for small children. It is better to decorate such products with frames.
A mirror can be part of built-in furniture