Kinds
Before you begin the process of creating exterior or interior decoration of the room, you must select the appropriate finishing material option.
The main types of textured plaster include:
- Acrylic. It is based on acrylic resin. It is presented on the market in plastic containers of various sizes. Does not require dilution, as it is completely suitable for use. It is recommended to use the entire mixture at once, but if necessary, it can be stored in a closed container.
- Silicate. Liquid glass is used as a binding component. This mixture is characterized by impeccable vapor permeability, therefore it is actively used for finishing concrete. It has an increased level of resistance to mechanical stress, maintaining its original appearance for many years.
- Silicone. The main component of such plaster is a polymer resin, which creates the necessary level of protection for the walls from moisture and sudden temperature changes. It can be used indoors and outdoors, and also as a decor for stoves.
- Mineral. For its production, components such as lime and concrete are used, which can be supplemented with sand, quartz or other minerals. It is produced in powder form and requires additional dilution with water until a homogeneous mass is formed.
There are different types of decorative plaster on the modern market, each of which has its own characteristics. Among the large assortment there is both liquid and dry textured mixture. It can be volumetric, roller or structural, since the texture composition of each type is developed individually. VGT textured plaster is in great demand, which is characterized by economical consumption and a high level of efficiency.
What is textured plaster and what is it used for?
Textured mixtures are distinguished by fine-grained filler, delicate consistency, and manageability during installation. They create flat (Venetian or Moroccan, concrete-like plaster) or relief surface finishes. Most types of textured plaster do not shrink when dry.
In the decorative effect of flat coverings, a significant role is played by the color and technique of applying strokes of plaster mortar. An original Venetian is a work of art that imitates natural polished stone, silk fabric or a surface that has been worked on over time. Such decorative coatings are multi-layered. The technique of applying decorative mortar can be complex and performed by professionals, or simplified, feasible for beginners.
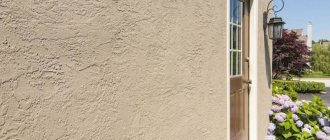
Relief plaster protects the walls of the house, partitions, ceilings from moisture penetration and other influences. Hiding some surface imperfections, the decorative coating serves as a heat-saving and noise-insulating screen. Relief decoration decorates the walls, giving their surface unique combinations of color, light and shadows. It is a powerful design tool.
A texture can be created in various ways. To create a voluminous coating, special compounds are not always needed. Textured plaster is made from ordinary putty by many craftsmen.
Types of textured plaster
Textured decorative plaster is produced in different types depending on the composition and possible effect of the final coating, so choosing the material that is optimally suited in terms of characteristics and texture will not be difficult.
By appearance
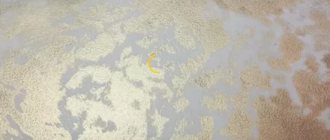
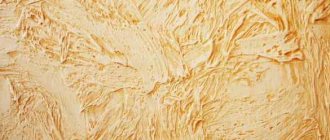
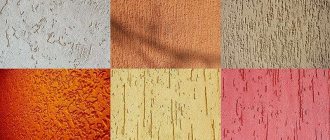
Today, textured plaster compositions are produced in different types according to their decorative qualities, which is achieved due to the inclusion of larger insoluble particles in the composition compared to the main filler. By grouting, you can obtain a coating with the effect of a surface damaged by wood-boring beetles or a voluminous, rough, granular “Fur Fur” type texture. Photo 2. Samples plastered with “Lamb” and “Bark Beetle” A mixture is also available with filler in the form of crumbs of marble, amethyst, onyx and other natural stones, often multi-colored. This material is called “Mosaic” and allows you to get an interesting pebble texture.
By composition
Depending on the binder, the plaster texture mixture is divided into 4 main types: acrylic - based on acrylic resins; mineral – cement acts as a binder; silicone - with polymer binders in the composition; silicate – based on potassium glass.
Applying textured plaster with your own hands
The work consists of 4 stages:
Preparatory. Leveling the surface with a primer and using various types of auxiliary products (antifungal compounds, etc.). If you need putty, apply it in several layers.
Base. Preparing plaster for use (be sure to read the instructions). Apply the composition over the entire wall with a wide spatula. Smoothing the plaster using a trowel to a thickness of 3 mm. Working with corners with a narrow putty knife.
Creation of invoice; Most often, a roller, trowel or stencil is used. If you use a hair roller, you can immediately create a surface with a pattern. The stamp must be periodically cleaned and moistened with water. When using a trowel, you cannot apply the texture to the depth of the base.
Final. Drying the wall. Afterwards a layer of primer is applied, then the painting stage begins.
Advantages and disadvantages
Below are the pros and cons of textured plaster.
Among the positive qualities of the material, the following positions stand out:
- This finishing material makes the treated surfaces aesthetically attractive. This design is fresh, not hackneyed and will allow you to decorate the interior in the best style directions.
- The plaster differs in its release form. You can choose the most convenient option, taking into account your own preferences and existing skills in finishing work.
- If desired, you can give the surface a different texture. Often, simple hand waves and a roller are enough to create a beautiful design.
- Finishing surfaces with textured plaster simplifies the work. There is a significant saving in time for finishing walls and ceilings. In this case, the work will take no more than 1 day without taking into account the preliminary preparation of the grounds.
- Textured plaster is durable. Due to its components, it will decorate the finished surfaces for many years.
- The components of the composition are often resistant to ultraviolet radiation. The walls will not become faded over time, and the coatings will not lose their original attractiveness.
- Textured plaster enhances the thermal insulation properties of the bases. Even with a small relief layer, it will insulate the surfaces being treated.
- In most cases, such compositions are environmentally friendly. During operation they do not emit toxic substances. This factor allows the use of mixtures for finishing the walls of residential premises.
- The mixtures are compatible with different dyes. You can change the color of the plaster as you wish.
- If desired, you can add additional components to the composition. For example, for the effect of Venetian plaster, it is possible to include mother of pearl in the mixture.
Among the disadvantages of textured plaster are the following:
- The textured finish is resistant to small mechanical loads, but can break off if subjected to significant impacts. Scratches are also possible if done on purpose (for example, pet claws).
- Caring for such a surface cannot be called easy. During operation, dust settles on the relief surface. It is more difficult to remove than from wallpaper, paint, laminate or drywall.
- Good plaster is not cheap. This is especially noticeable when performing a large volume of finishing work. The ready-made variety is more expensive than others.
- Working with textured plaster does not tolerate delays. If you extend the work process, visual joining of the areas being finished cannot be ruled out.
- When working with textured plaster, the material consumption has been increased by 1 square meter. m of processed area in comparison with other types of finishing.
- Adjusting the surface if necessary is problematic. It cannot be done unnoticed due to the difficulty of selecting the desired shade or pattern.
- If the technology for applying textured plaster is violated, the formation of cracks, swelling and peeling of the material may occur. The solution should be selected carefully based on the type of base.
Creating relief using a roller
Further methods of applying textured plaster, in fact, will differ only in the way of creating a relief on them, which is what we will focus on, but there is another method that significantly simplifies the task and allows you to complete all the work in the shortest possible time. Namely, creating a relief using a roller.
Table 2. Option one.
| Steps, photo | Description |
| The peculiarity of this method is that we will use a more liquid composition, the layer of which will be very thin in places. Therefore, the base surface needs to be prepared more carefully. |
| We will use pure fiber-free plaster composition - you can also use universal putty. You need to dilute the material to an almost liquid state - it will not be much thicker than water-based paint. The necessary color is also added there to give the mixture the right shade. Some craftsmen also add fine decorative chips, but this is not necessary - the texture will already be pronounced. Pour the prepared plaster into a painting tray and roll a roller in it, which should be completely covered with the composition - do not be afraid to overdo it. The roller itself needs to be made of fabric with long pile. This will make the surface with a deeper relief. |
| Now we begin to apply the putty with a roller to the wall. You can roll in any direction as long as you cover the entire area, but the finishing pass is always done from bottom to top. |
What are the advantages and disadvantages of this method. Let's start with the first one:
- Firstly, you no longer need to additionally paint the wall, since the plaster itself is tinted in the desired shade.
- Secondly, the speed of applying such a coating is comparable to conventional painting - to do this you do not need to be a super-master and master secret techniques. Absolutely everyone can do the job.
- Thirdly, it is not necessary to use expensive materials.
Now the cons:
- It is quite difficult to create such a texture in the corners of the room without catching adjacent walls.
- The same problem occurs when applying material under ceiling moldings.
- Requires more thorough preparation of the walls, which can be time-consuming
Let's look at another way to apply textured plaster with a roller. This method involves using a thicker mixture, possibly a fibrous one. The result is a very pronounced relief. Not everyone will like it, since the look will be quite specific.
To work, we will need a comb with a tooth height of 4 mm. We will use it to apply the material to the walls and then roll it out.
Comb fry
Table 3. Option two.
| Steps, photo | Description |
| We put plaster on the plaster and spread it over the surface of the wall. The comb will allow you to make the layer the same over the entire area, but provided that you maintain the same slope - about 15 degrees. The material does not dry out quickly, so you can safely coat 1-2 square meters. It’s no longer worth it, because if the edges of the patch dry out, you may end up with barely noticeable transitions and layers. |
| We will have a different type of roller - we will use a foam model with holes in the material. We lower it into a bucket with the mixture and apply the material with a spatula evenly over the entire area. |
| Then we quickly roll the coated section of the wall. Due to the fact that a material of some thickness has already been applied to the surface, the wall is covered with large goosebumps, as shown in the photo. Such a relief can then be painted only with brushes or a spray gun. You should roll it vertically and horizontally with a roller - this way the mixture will stick to the base much better. |
Video - Creating texture with a roller
Prices for textured rollers
Textured rollers
Tools for work
There are many ways to add texture to the applied decorative coating, so there are also a lot of tools and devices.
Basic:
- spatulas (various sizes, shapes, materials);
- graters;
- trowels with rounded corners;
- shaped rollers (for impressions) and paint rollers;
- brushes;
- masking tape;
- mixer;
- sponges;
- level;
- containers;
- rags.
Auxiliary:
- respirator;
- gloves;
- covering material;
- insurance;
- masking tape.
When working at height, do not forget about your own safety, use insurance.
Application methods and options
For different types of premises, certain options for finishing with textured plaster are provided. Each option can transform the appearance of the interior, making it truly unique and inimitable.
There are two methods of creating decor using this material:
- Creating patterns using special tools. This option is less expensive and lightweight, so it is in great demand.
- Applying the ornament using a textured roller. This technique allows you to create a clear and neat pattern with a uniform texture.
Also, in order to create a pattern on a specific surface, ready-made stamps are often used. By applying them to a plastered wall, you can get a very beautiful pattern or ornament. Immediately after finishing the process of applying the texture, it needs to create conditions for complete drying, which lasts at least 24 hours. Only after this can excess plaster be removed, primed and painted.
It must be remembered that in the process of creating such decor you should not penetrate deep into the base of the wall. After all, after the plaster has completely dried, the created decorative elements may simply fall away.
In rooms that are subject to frequent mechanical stress, it is recommended to cover textured plaster with wax or colorless varnish. This will preserve the original qualities of the material, its practicality and aesthetics.
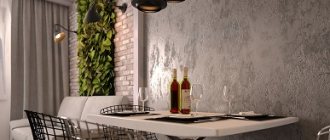
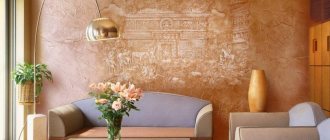
In the kitchen
In order for the kitchen to be not only cozy, but also functional, you need to be as careful as possible in the decoration of its walls and ceiling. Thanks to its excellent waterproofing and soundproofing qualities, as well as environmental friendliness and the absence of seams, textured plaster is an ideal solution for finishing this type of premises. When decorating a kitchen interior using this finishing material, you should consider the following recommendations from professional designers:
- Choose the right color palette. It should be harmoniously combined with furniture, flooring and other accessories.
- Use plaster on one wall only. An excellent option for zoning a space or focusing attention on a specific wall.
- Use for finishing the ceiling. A neat light ceiling will give the kitchen freshness and lightness.
For small kitchens it is better to use fine-grained textured plaster, and in larger rooms it is recommended to use a mixture with a large relief. A protective layer of varnish or wax will help ensure the durability and practicality of this finish.
In the children's room
Due to its many positive features, textured plaster is considered an ideal material for decorating children's rooms. Using this universal material, you can create almost any surface that will perform not only an aesthetic function, but also a practical one. Using special stencils, it is possible to apply a wide variety of designs to the walls or ceiling. Designs in the form of sea waves, clouds, geometric patterns, cartoon characters and other interesting images are in great demand in children's rooms.
It is better to give preference to options with a higher level of wear resistance. If you need to change the interior, you can simply repaint the walls and ceiling to get a completely new design. In some cases, textured plaster is used as a protective layer that is applied to the surface of children's furniture. This approach helps preserve its original qualities for many years.
In the bedroom and office
Since textured plaster is quite resistant to fading and delamination, it is actively used to decorate walls in bedrooms and offices. Its texture, color and thickness can be very different, depending on wishes and preferences. Using this mixture and special tools, you can create a unique design in your bedroom, as well as hide any unevenness or other imperfections.
When starting the process of decorating the bedroom, you need to take into account the volume of its space. In small rooms it is recommended to use light shades, while in larger rooms dark shades in the form of certain accents will be appropriate. In bedrooms with large volumes, a combination of several shades and types of textured plaster is allowed, which are harmoniously combined with each other, maintaining a cozy atmosphere.
For a north-facing bedroom, it is recommended to use beige, coffee, pink and orange tones. Rooms with good natural light are best decorated in green, blue, gray and red colors.
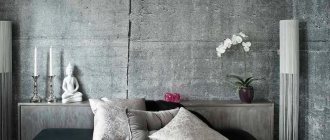
When designing a home office, you should adhere to a strict and restrained style. The design of the walls and ceilings should be combined as much as possible with furniture and other interior items. The office with antique finishes, concrete, brick and velvet looks stylish and beautiful. Each option is attractive in its own way and creates a favorable atmosphere for the work process.
In the corridor
Decorating a corridor or hallway requires a special approach. After all, it is the corridor that creates the first impression of the house, as well as its owners. It is worth noting that the walls here are subject to daily stress, which can cause dirt, scuffs and chips. Therefore, when choosing textured plaster, it is recommended to give preference to durable and most practical options.
Using this finish, you can create a unique corridor design with a clearly defined relief surface that imitates natural wood, stone or other materials. It is quite easy to care for this finish, which allows you to maintain its original appearance for many years. In addition, a stylish and neat corridor can make a good impression on guests and become a real calling card of the house.
Rules and stages of application
At the very beginning, you need to look at the options for ready-made coverage and make a choice. Then comes the purchase of the plaster itself and all the necessary tools.
The next stage is preparing the working surface . It is necessary to remove all fasteners (if any) and additional elements from it. Surface unevenness, cracks and potholes are carefully sealed using putty. Then you should remove dust from the prepared surface and apply 2 layers of primer. When choosing a composition, it is better to give preference to a deeply penetrating one, which will ensure stronger contact between the plaster and the surface. Do not forget that the floor covering, decorative items and furniture should be covered with a special protective film.
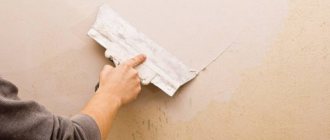
Applying textured plaster with your own hands is a simple process, the main thing is to approach the matter carefully. Basic work begins with preparing the solution, if the choice fell on a dry mixture. To begin with, it is best to carefully read the manufacturer's instructions, which are printed on the packaging itself. Following it will help you get a high-quality coating with good characteristics.
Next, using a wide spatula, the composition is transferred to the prepared surface. Maintaining uniform application is not so important; the main thing is to apply the mixture over the entire wall area.
Then you need to smooth the plaster using a special smoother. To create a high-quality and beautiful texture, the layer of material on the wall should be approximately 1.5 millimeters. You need to work especially carefully with the corners of the surface so as not to miss anything and preserve the structure. Apply and spread the plaster over the wall using narrow spatulas.
At the next stage, the texture is created. There are many tools and different techniques for this, but the simplest and most popular are special rollers, stencil stamps and trowels.
Creating texture using a roller is the easiest option . You can use a tool with long or short bristles, or you can take a closer look at curly rollers. They allow you to create a pattern on the surface in one go. In this case, the entire surface is completely in the hands of the master.
A trowel and a notched spatula allow you to create a texture that will imitate a stone surface. It also allows you to create plaster that will copy fabric or leather materials. For such effects, you need to go through the instruments in a certain or chaotic order. They can also be used to create complex designs and patterns, but this will take more time.
Stencil stamps look like rubber or polymer fabric with a clear relief pattern. They are applied to the surface, after which an imprint of the pattern remains on it. The complexity of the process lies in the fact that they constantly need to be washed, and during application it is necessary to correctly distribute the pressing force. If you press unevenly, the pattern will be deeper in one part and unclear in another.
After the texture has been created, the surface must be given time to dry. This stage depends on the type of plaster, because some dry faster, some take longer. When the surface has dried, it is covered with a layer of primer and painted. The most common way is to apply two coats of paint, with the second coat being slightly lighter than the first. If you use plaster to which dye has already been added, the painting process can be skipped. At the last stage, the finished surface is treated with varnish or wax.
Manufacturers
The textured plaster market is crowded with offers for buyers of different circles. Italian manufacturers have achieved great success in this field. Among the wide range of offers, there are several companies that have received high praise from specialists in the field of construction and renovation:
- Tamstucco is a paste-like variety based on vinyl polymer.
- VGT is a special plaster with synthesized artificial components and crushed rock materials. It is resistant to snow and rain.
- Intonachino Minerale is a mineral material based on lime and quartz sand.
- Stuccofacile is a plaster that is resistant to shrinkage and cracking, designed specifically for creating bas-reliefs.
Textured plaster types, characteristics and features
Textured decoration of walls with plaster today can be called the most common and durable type of surface finishing. This coating is nothing more than a granular mixture of heterogeneous consistency with an admixture of flax or wood fibers, gypsum, small stones, brick chips, sand and other components. Thanks to these additives, the coating acquires an interesting and original relief, which can be made in any color and add the desired effect, be it velvet, wood, stone, sand or watercolor painting.
Technology like nano Textured plaster on the wall
The features of this plaster include:
- ease of care and reliability in operation (easy to clean and lasts for many years),
- is resistant to external damage,
- suitable for bathrooms and other rooms with high humidity levels,
- good soundproofing material,
- does not change color after a long time,
- safety because it is made from slightly flammable substances
There are several types of applying textured plaster. You will need master classes on application techniques if you do not want to seek the help of a specialist.
Here are the most commonly used types of decorative plaster:
1) smooth surface with colored pigmentation,
2) relief coating with a stencil design,
3) technique of chaotic relief application
How to make the material yourself?
Today it is not difficult to make decorative plaster yourself. For example, regular putty using some additional ingredients is suitable for this.
With PVA glue
First of all, you need to take ordinary white putty, mix it with water in a special container in proportions 6: 2. After this, you need to add 0.2 liters of PVA glue and stir until completely homogeneous.
If you don’t have such glue on hand, you can replace it with a grout mixture intended for drywall in a 1:1 ratio.
With primer
The main components remain a white powder composition and a primer, the proportion should be approximately 6: 2. The mass is kneaded until the texture of thick sour cream, after which a grout mixture or pigment is added if colored plaster is needed. The solution is stirred again and applied to the walls.
With plaster
For such plaster, a gypsum variety and water are used. The proportions of the composition remain the same: 6 to 2. However, for viscosity, you will have to improve the mixture with PVA glue (0.2 l). After the first mixing, leave for a few minutes, then mix again and begin finishing work.
With baby
A marble effect can be obtained by mixing regular putty with marble chips in the following ratio: 1 part crumb to 4 parts putty. The mass is kneaded in a special container, adding water at room temperature until it reaches the consistency of thick sour cream. If you need a colored finish, you will have to paint it after the surface has dried.
Venetian
Here you will have to buy a special putty. To recreate the desired effect, it is necessary to include marble, quartz, malachite chips, lime and pigment in the composition. Do not dilute the powder mixture with hot water. The consistency should not be too thick - this will not give the desired effect.
Versailles
The recipe consists of a starting and finishing powder-based putty, acrylic paint and regular silver powder. The ratio of components is 1: 1. Serebryanka is used after the textured surface has dried.
Preparing the base
Step 1 - plaster the base.
- In order for the result to be of high quality, the base must be plastered with gypsum or cement-sand mixture. This is done along the beacons so that all the walls are strictly vertical.
- It is also important that you accurately mark the outer and inner corners of the room - they need to be reinforced with a special perforated corner, which will create additional protection from damage.
A smooth plastered base is the key to high-quality finishing
Textured plaster is the finishing coating. Its tasks do not include leveling the walls; it is not applied in very thick layers, since the material is not cheap.
Step 2 - get rid of defects.
The surface of the plaster must first be prepared. It can have such untidy sagging in the corners, and on the main plane too. All this will interfere with the application of the finish, so using a spatula, float and abrasive mesh, all this must be cleaned off. There is no need to treat the entire surface of the walls - only protruding areas.
Stuck and frozen putty on the corner
Interesting to know! Minor surface defects in the form of depressions do not need to be covered separately; we will hide them with our textured plaster.
Step 3 – covering the trim with masking tape.
If doors have not yet been installed in the room, but they will be there sooner or later, then it is necessary to install them at this stage. We also immediately install the platbands, which we cover with masking tape at the next stage so as not to stain them. Why such difficulties you ask? The thing is, if there are no trims and you plaster the wall, the relief will not allow the part to adhere tightly to the wall surface, and as a result, noticeable gaps may remain.
Taping trims with masking tape
Step 4 – priming the walls.
Now we need to thoroughly prime the walls. We will use acrylic deep penetration primer from the company Ceresit, ST-17. This is a high-quality composition that significantly reduces the absorbency of the base. If you use inexpensive primers, we recommend re-processing, but this is extra time for application and drying, so we don’t see any point in such savings.
Ceresit CT 17
Prices for deep penetration primer
Deep penetration primer
The primer is applied with a roller, which must first be squeezed out a little in the ditch so that it does not flow down the wall abundantly. We start from the bottom and move up, thoroughly saturating the entire surface of the wall without gaps. If the roller only superficially wets the wall, you need to dip it into the ground again, otherwise there will be no benefit from such treatment.
The corners of the room must be coated with a brush.
Priming the walls
Step 5 – applying adhesive primer.
At the next stage, we will again apply primer to the wall, but now it will be of a different type. An adhesive composition with quartz filler is used. It will create a strong, rough film on the surface of the walls, with which our plaster will have very good adhesion. Another name for such soil is concrete contact.
Application of adhesive primer
The material is applied with a brush, which allows for better filling of small cracks and depressions on the surface. After application, the walls are left to dry for at least a day - for more precise times, see the instructions for use on the packaging of the purchased composition.
This concludes the preparation of the foundation; in the future we will not return to it. Now let's see how a relief plaster surface is applied.
Repair of texture defects
The difficulty of repair is one of the disadvantages of textured plaster coating. If you can still manage to recreate the decorative texture, making it less noticeable, then it is impossible to choose the exact color to match the previous color. In this case, it is recommended to repaint the entire wall.
Use a rubber hammer (or a plastic handle of a spatula or chisel) to tap the wall, identifying the peeling areas. The loose material is completely removed. The exposed base is cleaned, repaired, primed, and dried. For the “patch” they take the same
To repair a defect, you need to tap the wall to identify areas with peeling coatings. Carefully remove any loose areas. If necessary, repair the base. Prime and dry. Before applying the patch, moisten the edges of the old coating with water to ensure good adhesion.
The plaster composition must be taken with the same base as the old one.
It is better to make patches in a rectangular shape. To restore the drawing, you should practice on a small area.
How to return a flat wall
If you decide to wallpaper the room or make a smooth plaster finish, the previous relief layer of the material will be a hindrance. In this case, two options are possible:
- remove the old layer of finishing,
- level the raised protrusions by applying putty.
The previous finish with a sandy bottom texture is cleaned with sandpaper, dust is removed, the surface is primed, and leveled with finishing putty.
The old relief finish is removed in several stages. The wall surface is moistened with hot water to make removal easier and less dust generated. If the finishing to be removed is laid on a paint layer, it is heated with a hairdryer, then the previous plaster material will be removed along with the paint.
To remove the relief layer, use a spatula with a hammer, a grinder or a scraper. Remains of plaster material are removed using a wire brush. The freed wall is dusted and primed. After the primer has dried, a leveling layer of putty is applied to the resulting smooth base.
Textured coverings, from the simplest to highly artistic bas-reliefs, are a worthy decoration for any interior style. Having become familiar with several methods of applying texture, those who wish can implement the ideas they see or their own with their own hands, creating a unique design for their home. The main teacher is practice.
Tips and tricks
Textured plaster is the optimal solution for finishing walls both indoors and outdoors. With its help you can create almost any texture on a particular surface.
When starting interior design, you must consider the following tips and recommendations from professional specialists:
- Apply textured plaster to a slightly rough surface so that the solution can adhere well.
- It is better to opt for ready-to-use formulations. If there is a need to make mixtures yourself, then first of all you need to carefully study the instructions on the packaging and only then begin the process of making the solution.
- During the work, use only tools, rollers and brushes specially designed for these purposes.
- After applying the plaster, it should be left for 24 hours until completely dry.
By following these simple recommendations, you can create a truly unique interior in a residential or public space based on your personal wishes and preferences.
Where and how to buy textured plaster
You can buy any of the textured plasters presented by visiting our sales office located in Serkovo, or filling out an application on the website. All types are available in large quantities. You can also arrange delivery of the material you need on our website or by phone. Delivery costs are calculated according to the tariffs of transport companies with which we cooperate. Discounts are available for large volumes. In addition to textured plaster, high-quality professional tools made in Italy, as well as related products, are on sale. When purchasing from the Stucco store, you make a choice in favor of the highest quality of your repairs.
Reviews
The use of textured plaster allows you to make the interior of your home special. This is eloquently evidenced by numerous reviews from those who have decorated their home with similar decor. Comments left on forums dedicated to construction and renovation indicate that such finishing can be done in any room. The reviews also noted the fact that with its help you can decorate even “problem” areas of the apartment.
For example, a roller mixture looks harmonious on a loggia or balcony. At the same time, being resistant to temperature changes, it does not change its properties, holds up well and does not crack. In addition, the comments indicate the possibility of painting certain types of plaster coating.
However, if you need to varnish the plaster, you will have to dilute it by half with water. Otherwise, according to the experts, the finishing surface will be damaged by a visible film.
Users note the disadvantage of ready-made mixtures is their poor color range. Sometimes fine-textured plaster seems like too expensive a coating. However, everyone agrees that you need to buy quality finishes.
Existing types
There are different types of plaster (popular types of decorative plaster). Among the textured plaster presented on the shelves of construction stores, you can find options with different binding components. Depending on the type of base ingredient, it can be:
- mineral;
- acrylic;
- silicone;
- silicate.
Mineral
- available for sale in dry form;
- simple solution preparation;
- has a cement base.
Affordable in terms of cost, but by no means a ready-made option. After purchasing the package, you need to prepare a thick and viscous solution. It is best to do this with a mixer - this way the plaster will be completely mixed with water and will be better applied to the surface. True, you need to paint it in the desired color after applying it to the wall - it will not be possible to dissolve the necessary paint in a container.
Acrylic
- based on acrylic resin;
- very plastic, has standard water resistance;
- slightly flammable.
A textured plaster that is very convenient to apply to the wall and holds any shape perfectly. The main thing is to carefully work on the base surface, level it as much as possible and prime it. Like mineral, it is also sold in dry form.
Silicone
- durable;
- suitable for any capital surface;
- demonstrates excellent adhesion;
- high price.
Yes, you have to pay for convenience. This textured plaster is perfect for any walls; it is sold in an already prepared form and, most importantly, with dye already added. All that remains for you is to simply apply it to the surface. The high cost still
scares off many, but the result of application cannot but rejoice. Take a look at the photo where silicone-based textured plaster shows itself in all its glory.
Silicate
- based on potassium glass;
- used primarily for external work.
You definitely won’t need this type if the focus of your work is solely on interior decoration. Save it in case you need to do any façade work in the future.
Textured plaster is also distinguished by the type of grains:
- finely textured - less than half a millimeter
- finely textured - up to 1 millimeter;
- medium textured - up to 2.5 millimeters;
- coarse textured - up to 5 millimeters.
The size of the grains
is of great importance, as it allows us to achieve the necessary decorative effect in each individual case.