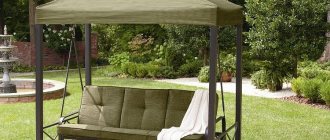
There is a wide variety of chair designs that can be purchased ready-made in a store or made with your own hands.
In stores you can choose a chair from different materials, designs and shapes. But it is much more interesting to create this furniture yourself, showing maximum imagination and putting a piece of your soul into its production. Having decided to make furniture yourself, you should give preference to a natural and environmentally friendly material – wood.
Choosing a model
There are many different options for wooden chairs. They all differ in type of design, design, and the presence of additional parts.
Table 1. Models of wooden products
| View, illustration | Description |
On a frame with rigid parts | Such structures are characterized by good wear resistance; they rarely deform even as a result of constant use. Such products are installed in dining rooms, offices and other premises. Antique-made furniture pieces are especially popular. To do this, they use various paints in cans and special design techniques. |
With fabric upholstery and soft filling | These are very comfortable chairs, they have an aesthetic appearance. Compared to the previous model, this product requires more careful care, otherwise it will quickly lose its original appearance. Such designs can be placed in any type of room: in the living room, children's room, even in the kitchen. The model involves a solid frame, and the seat, back, and armrests are upholstered with soft material. In addition, the products differ in the degree of filling. |
Table 2. Product types by design features
| View, illustration | Description |
Folding | These are very compact structures that have a folding mechanism, due to which they can be moved without any problems. Such designs will be appreciated by travelers and lovers of country holidays. |
Sliding | Such products are ergonomic and suitable for small spaces. Similar designs come with a rigid frame or with soft upholstery. |
Kentucky | This product has an unusual appearance and is easy to manufacture. The process uses hardwood and wire. This chair is ideal for a cottage or country house. |
With high support | Pieces of furniture of this type have a truly royal appearance, because they resemble a high throne. They are made of wood and then can be upholstered with soft fabric. An armchair with high support will fit perfectly into any classic-style interior. |
Rocking chair | The main feature of this product is the arched legs. Making it yourself is quite difficult, because not every beginner will be able to achieve the correct rounded shape of wooden blocks. This activity requires certain skills, but the result will be magnificent, and the rocking chair will become a favorite resting place for all family members. |
Overview of the main options
There are several main varieties, but some of them are the most common, and we will consider them below (read also the article “Do-it-yourself wooden bench: several manufacturing options”).
Soft chairs
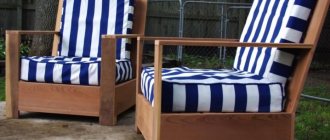
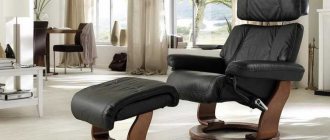
An upholstered lounge chair with wooden armrests is a very common option that has the following features:
- A huge variety of options in which a wide variety of ideas can be realized.
- Wide range of sizes, you can choose the best option for any interior. It is important to take measurements before purchasing to know how much space you have.
- Possibility of ordering products with various upholsteries. You can choose the best option for existing furniture.
- It is important to sit down and check if you are comfortable, as sometimes a design that looks great turns out to be uncomfortable.
Armrests can be the most original element in the entire design
Multifunctional designs
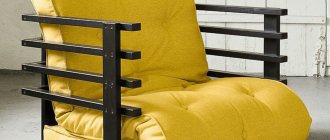
If you have a small apartment and have to receive guests from time to time, then a chair-bed with wooden armrests will be an excellent option:
- When folded, it is a convenient place to relax and watch TV.
- When unfolded, this is a full-fledged sleeping place for one person.
- Wooden armrests make the design more compact.
Advice! Pay special attention to the quality of the folding mechanism; it must be reliable in order to serve without breakdowns for many years.
Folding options - a rational solution for small apartments
Chairs
An armchair with wooden armrests is an interesting solution, relevant in the following cases:
- This type of product fits perfectly into classic settings.
- The type of upholstery is of great importance; the more expensive it looks, the better.
- The armrests can be trimmed with fabric to enhance comfort.
- The most expensive products are decorated with carvings; they are unique, because each item is made by hand.
Such designs take us back to the era of nobility
Outdoor furniture
If you want a comfortable lounge chair with wooden armrests that will sit outside, then it is important to consider the following factors:
- The structure is exposed to atmospheric influences, so its coating must be reliable.
- A wooden garden chair with armrests should not have upholstery, as the fabric deteriorates very quickly from moisture.
- The product should not be too heavy so that if necessary you can remove it indoors.
You can make a wooden chair with armrests with your own hands; below is a detailed diagram of one of these options.
Dimensions and shape of all elements of a homemade chair
The manufacturing instructions are as follows:
- First, all the elements indicated in the drawing are cut from boards or plywood.
- Next, assembly is carried out according to the diagram; the work is not very simple and requires care.
- The finished product is coated with an antiseptic solution and varnished.
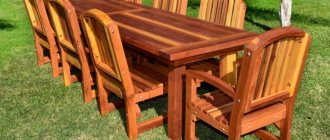
Wooden chairs with armrests for a summer residence can be made simpler, for example, a design made from pallets, as in the photo below, is an excellent option.
Assembling such a system will not be difficult even for those who have no experience in this field.
Features of working with wood
Wood has long been considered the most popular material used in the manufacture of furniture to this day. This is due to a large number of positive qualities: wood is quite easy to process, even a beginner can handle this process. To prepare products, you can use simple tools; it is not necessary to purchase high-tech equipment.
You can even cut parts with a bow saw
You can purchase lumber at an affordable price in almost a hardware store, while ready-made furniture structures made from solid wood have a fairly high cost. That is why it is recommended to make such simple products as a chair with your own hands.
The main advantages of natural wood are:
- Environmental Safety. This material is non-toxic, therefore any harm to human health is excluded.
- Wood has good strength; it rarely deforms due to impacts and other mechanical influences.
- A structure of any configuration can be made from wood. In addition, such products will harmoniously fit into any room with any interior design.
In order to buy high-quality wood, you should consider the following features of the material:
- the humidity level should be no more than 12-13%;
- there should be no cracks, other damage or traces of mold on the surface;
- there must be a minimum amount of resin.
It is necessary to choose only high-quality lumber
You should pay attention to such points when purchasing ready-to-use lumber. In some cases, it becomes necessary to dry the wood yourself, after which it will need to be treated with a special compound to protect against fungus.
Important point! It is better to purchase material taking into account the stock, because not in all cases it is possible to accurately calculate the required quantity. In addition, during the work there is a risk of damaging any part.
An equally important criterion is the type of wood. When making outdoor furniture, only varieties with the most durable texture are suitable. These include pine, rowan, larch, and oak.
Linden has good durability
If a heavy load is expected to be placed on the product, then it is better to choose linden or alder. Material of this structure is a little more difficult to process, but it will last for many years.
If the chair will be installed near any pond or swimming pool, then it is advisable to purchase fine-pored wood for manufacturing - this will avoid problems with deformation of the structure.
Prices for construction boards
Construction boards
Video - How to choose boards?
How to choose an executive chair with wooden armrests
It will not be a secret to anyone that the more options there are in furniture, the more expensive its cost. It is for this reason that many office workers, when visiting a furniture store, find it difficult to choose.
Before buying an executive chair with wooden armrests, it is recommended to observe the boss’s habits: how he prefers to sit, what is the position of his arms, legs, etc. This is important because armrests made of wood are, first of all, a hard surface , on which you cannot spread your arms for a long time. But wooden armrests have a rather advantageous advantage - they can serve as a stand for some small things - a wristwatch or even a cup of coffee.
As for the material, it is recommended to purchase a chair with laminated wood elements. Such armrests are durable, do not crack, and look very presentable.
We offer for your consideration our voluminous catalog of office chairs and chairs with wooden armrests made of natural and artificial leather. Prices for furniture in our online store are some of the most favorable in the city, and our specialists are happy to help customers place an order with accompanying delivery to anywhere in the city.
DIY garden chair
Before starting work on the manufacture of the chair, it is necessary to prepare the following materials and devices:
- cedar veneer;
- screws;
- wood glue;
- sandpaper;
- finishing varnish;
- drying oil;
- scotch;
- thick paper for patterns;
- plane;
- saw;
- milling equipment;
- hacksaw;
- drill;
- clamps;
- a simple pencil;
- measuring tape.
Prices for the range of drills
Drill
Approximate diagram of creating a chair
Preparing parts
Step one: first you need to make patterns for the design, marking the dimensions of the parts on thick cardboard. In our case, we should get the following elements:
- legs (4 pieces) – 2x25x78 centimeters and 2x7.6x53 centimeters;
- back - 2x28x91 centimeters;
- armrests - 2x12x40 centimeters (2 pieces) and 2x7.5x61 centimeters;
- connecting strip - 2x5x58 centimeters;
- additional strip (2 pieces) – 1.2x2x2.5 centimeters.
Garden chair elements
Step two: you need to cut out the parts from cardboard, and then transfer them to the wood (circle), after which you can saw the parts of the future chair. This should be done very carefully - the peculiarity of cedar boards is that they are susceptible to chipping, so cutting should only be done along the grain.
Sawing the parts
Connecting parts
Step one: before starting assembly, all parts must be thoroughly treated with an antiseptic against fungus and dried. Only then can you proceed to the next steps.
Preparing the product for processing
Step two: we adjust the finished parts to the required size and at the same stage leave markings for the holes for fasteners.
We trim the parts of the structure exactly along the intended contour
Step three: use a drill to make holes for the fasteners, and then fix the parts together.
The location of the boards affects the strength of the entire chair frame
Step four: fix the chair leg (back) at an angle of 90 degrees, and fix it on the other side in the same way. It is necessary to connect the sides of the structure.
The end parts of the planks and the opposite ends of the legs must match, which will allow you to obtain the correct location of the structure
Step five: place the supports and then secure them with clamps.
The joint should be very tight
Step six: install the backrest guide from above using screws, adjusting it to the crossbar from below. We mark the markings with a simple pencil on all the crossbars, as well as on part of the back, after which we make a hole, holding the bar.
We fix the planks one by one
Step seven: make curves by cutting the boards along the marked lines.
Installing the rail on the seat
Step Eight: The last step is to sand the entire surface of the chair using sandpaper. It is important to achieve perfectly smooth wood without burrs. Then you need to treat the product with heated drying oil and cover it with several layers of varnish.
After applying the varnish, the chair should dry for some time.
Video - Simple wooden chair
Manufacturing process
Preliminary stage - cutting out the main elements
Let's start work by cutting out the parts. To do this, we will prepare a detailed drawing, this will make it easier for us to continue making the chair.
Here are the drawings of a DIY garden chair
Prepare the parts that will later become the back legs and back. To do this, try to carry out all work based on a detailed drawing with explanations, where there are appropriate tips. After checking it, mark and cut out the necessary blanks.
Cut out the rear legs, backs, seats and armrests from wide panels.
Get them by gluing boards that need to be matched to the color and texture of the wood.
Tip: select the grooves for the keys in advance, positioning them so that they are invisible after finishing cutting the parts.
- Cut out the back legs using a cardboard stencil. Attach the template to the blank that will be used as a leg and trace it with a pencil. Connect and tighten the two blanks together with masking tape so that you can cut both at the same time. Carry out cutting with a small margin. To adjust parts to size, use a router or plane.
Rear view of garden chair
- Cut out the back. To do this, cut the workpiece so that the glue line falls exactly in the middle between the boards. Bevel the bottom end of the backrest at an angle of 12.5° to match the profile of the back legs. Round the top edge to a 9mm radius.
You can make a wicker garden hanging chair with your own hands
Having completed this work, you can begin assembling the product; for this you will need to cut out and adjust other parts in place.
We continue to work
Below are instructions for assembling and cutting the remaining elements.
Back and hind legs
- Drill holes for fasteners in advance to prevent the workpieces from cracking.
- To attach the rear legs to the backrest, use screws (50 mm) and glue.
- Connect the side ends of the backrest to the legs at an angle of 12.5°.
- Close the gaps between the parts with insert strips by making them of the appropriate profile. The ends of the planks and the opposite ends of the legs should coincide, which will mean the correct position of the backrest.
- Screw the inserts to the back with screws (l = 50 mm).
Tip: Keep in mind that the strength of the seat will depend on the arrangement of the boards, which should be placed from one leg to the other.
- Take a circular saw and cut the piece to width.
- Mark the sides of the seat, which are located at an angle.
- File the workpiece from the sides along the outer marking line. You don't have to clean the raw ends just yet.
- Select a groove at the rear end of the workpiece, tilt the bottom at an angle of 12.5°. This must be done because the seat will be located at an angle to the back. The joint will be tight, which is what we need.
- Round the front end of the seat.
- Screw the seat to the legs, sand its side edges, and adjust them flush with the back legs.
Seat
Front part of a wooden chair for a summer residence
Front legs
- Cut out the front legs by bevelling their bottom and top edges 6˚.
- Screw them to the rear ones using screws (l = 32 mm), strengthening the connection with glue.
- Make a leg - a jumper between the legs so that the garden chair receives additional reliability and stability. You need to cut it to size:
- attach the workpiece to the front legs and mark the fixing grooves. In this case, make the bottom of the groove at an angle of 12.5° to the face;
- select a depth of 9 mm from the high side of the groove;
- attach the jumper to the front ends of the legs using glue and screws (l = 32 mm).
Armrests
- Cut out wedge-shaped supports for them, bevelling their upper edges by 6°.
- Screw the supports to the front legs using glue and screws (l = 32 mm).
- Cut out the armrests, as well as the back support for them.
- Clean the ends of the parts with sandpaper.
- Cut the ends of the support at an angle of 30°, the top edge at 31.5°.
- Press the rear support piece to the back with clamps.
- Reinstall the armrests and loosen the clamps.
- Level the position of the rear support element, ensuring that the armrests are strictly horizontal.
- Tighten the clamps and screw the rear support to the backrest.
- Screw the armrests to the rear support, then to the wedge-shaped supports, and then to the front legs, using glue and screws (l = 50 mm).
The photo shows a finished wooden garden chair
Cover the recessed screw heads with wooden plugs and sand them flush. Take hot drying oil and saturate the wood with it, dry the product and varnish. You will end up with a comfortable, classic design with a beautiful texture that your family will appreciate.
DIY rocking chair
During the manufacturing process the following will be required:
- plywood sheets;
- cardboard;
- putty;
- dye;
- pencil;
- ruler;
- tape measure;
- sandpaper
- jigsaw;
- fasteners;
- drill.
Step-by-step instruction
Step one: prepare the details. The entire structure of the chair consists of two side parts, three horizontal connecting strips and 35 crossbars (needed to create the seat).
In this design, the most labor-intensive stage is the creation of the sidewalls, so it is recommended to mark them on cardboard, then cut them out, and only then transfer them to the wood.
Side parts diagram
Step two: to make the side parts you need to take multi-layer plywood 3 centimeters thick. Then you should transfer the part from the cardboard to a plywood sheet and carefully cut it out with an electric jigsaw.
It is necessary to make such parts in the amount of 2 pieces
Step three: after which the side parts must be thoroughly sanded with sandpaper and their edges trimmed using a grinder or milling equipment.
Hand router is suitable for cut processing
Step four: from plywood of the same thickness you will need to make horizontal connecting strips 120 centimeters long and 10 centimeters wide. After which they need to be sanded with sandpaper, but you should not process the edges with a router.
Cut three horizontal strips
Prices for the popular range of circular saws
A circular saw
Step five: you need to take a block of wood 5x2.5 centimeters and cut it into 35 pieces, 120 centimeters each. After which they should be sanded and the edges removed.
Planks need to be sanded
Step six: in the middle part of the outer arc of the sidewalls, at the back and near the legs, we mark the places where the horizontal strips are fixed. After which these marks should be duplicated on the other side. Then you can make holes for the fasteners.
We mark the places where the horizontal strips are attached
Step seven: we make through holes on the end parts of the sidewalls, and then we connect the frame with horizontal strips using screws.
We connect between special parts of the main frame of the chair
Step eight: next you need to take the bars that we prepared earlier and attach them one by one to the seat with self-tapping screws.
We cover the frame, thanks to which the seat is formed
Step Nine: The last step will be thorough surface treatment. To do this, you must first fill all the holes and go over the wood with sandpaper. Then the surface is coated with a primer and several layers of varnish.
Making a three-layer varnish coating
Varieties
Before you make a garden chair with your own hands, you need to decide on the design and dimensions. The further progress of work depends on this.
Moreover, I don’t recommend choosing by photo. It is better to consider the various options live, which will allow you to draw more objective conclusions.
Garden chairs can be divided into several categories:
- On legs
. This is a timeless classic. Comfortable, practical. Can be foldable. But you shouldn’t make the legs too thin or high. Well suited for verandas and pools. Today we will consider one of these options, called Adirondack, as an example for DIY assembly; - Rocking chairs
. The rocking chair can be pendulum and with runners, Viennese and spring. A great choice to enjoy the outdoors; - Hanging
. Many people choose a hanging chair. For a farmer this is not the most popular option, but for young people and girls it is an excellent choice. Original and quite comfortable. The hanging chair varies depending on the shape. It could be a basket, cocoon, hammock, ball, etc.
I think you have already decided on this.
Let's move on.
Country house chair made from pallets
You can make such a design with your own hands, spending only a few hours. During the work you will need the following:
- wooden pallets (you can buy new ones or disassemble old ones that are no longer used);
- hammer;
- nails;
- sandpaper;
- fastenings;
- primer.
Prices for wood preservatives
Impregnation for wood
Pallet chair
Step-by-step instruction
Step one: in this case we will need to take two pallets of the same size, which will then be divided into parts. Moreover, if the design involves the presence of additional decorative elements, then more pallets will be needed.
Divide the pallet into parts
Step two: the surface of the wood should be thoroughly sanded.
Sanding the surface of the pallets
Step three: first you need to connect the parts of the seat and backrest together. At this stage, you can make a small cut to get the slope of the back.
Connecting the back and seat
Step four: it is better to fix all the parts with screws, because the connection made from nails is not very reliable.
Important point! Some craftsmen prefer to secure the design parts with glue. In this case, it is better to use heat-resistant options, so that the structure does not deform even in extreme heat and does not crack in the cold.
Ready chair
Lately, you can often see homemade interior items made from pallets when visiting someone. These are structures used to transport goods. It turns out that it is not so difficult to make a sofa from pallets (pallets) with your own hands, and in terms of its quality it can be even better than what you can buy in a store.
Product modifications
A wooden chair can have a noble curved shape and inlaid details. Spectacular carpentry is in keeping with classical aesthetics and emphasizes the authentic features of the aristocratic furnishings typical of palace halls and royal apartments. If you want to install a carved “imperial throne” near your desk, choose models made from valuable types of wood:
- solid oak;
- wenge;
- briard;
- Karelian pine or birch;
- mahogany;
- amaranth;
- teak;
- mahogany;
- Paducah.
To add a touch of bohemian luxury to the decor of your personal office or living room, you can buy a wooden chair at an auction, in an antique store or in a junk shop. An alternative option is to create the antique effect yourself using special techniques. To do this, you need to take a black chair as a basis and use the technique of spraying paint on the frame with a shade of brass, copper, bronze or antique gold. As a result, you will be able to turn an ordinary object into a bright interior detail.
If you want to use comfortable wooden chairs to furnish a minimalist or urban space, you should buy a wooden chair with armrests in a simple design without decorative frills. Clear lines and laconic forms of structures are the hallmarks of such design trends as loft, minimalism and industrial style.
In accordance with these interior concepts, solid wood parts can be complemented with metal elements. The dynamic combination of cold metal and warm wood is a harmonious symbiosis of natural materials that allows you to create wooden chairs and armchairs of non-trivial shapes.
If you set out to furnish your home with original pieces of furniture , it is not at all difficult to find a worthy and very unusual option. Take a closer look at the catalogs of famous companies and designers; Something similar is sure to be widely available.
An upholstered wooden chair with an elongated semicircular seat from the iconic Danish modernist designer visually resembles a smile. It is perfect for decorating a children's room, lounge area or other living space that requires additional “seating” places. The product is equipped with three trapezoidal legs, a soft seat and back. Form-resistant foam rubber was used as filler. You can choose the upholstery to suit your taste: the range includes leather, dermantin and different types of fabric that are easy to care for.
The wooden shell chair has a slightly sloping rounded back and is perfect for organizing seating areas on the veranda, gazebo or home theater. A wooden chair, made with your own hands from an oak or poplar stump, personifies the dominance of natural motifs in the setting. The frame must be well processed with a plane in the seat area. The surface of the seat and back should be perfectly smooth. The side parts, covered with tree bark, will emphasize the grandeur of naturalness in the interior.
A curved armchair or wooden sofa made from palm wood has a rich texture and distinct natural patterns. Wide seats and high backs are features of multi-seat unique furniture, saturated with the energy of the sun.
palm wooden chair has excellent moisture resistance. It is not for nothing that these materials are used in shipbuilding. When choosing outdoor furniture, you should give preference to models made from wood of these species. Furniture made from palm and teak will retain its original appearance for decades despite intense exposure to moisture, wind and other natural collisions.
DIY wooden shell chair
To make the structure you will need the following:
- sheet of bent plywood;
- sandpaper;
- jigsaw;
- paints and varnishes;
- wood glue;
- fasteners.
Step-by-step instruction
Step one: before you begin the process of making such an unusual chair, you should prepare a drawing. You should do it yourself, relying on ready-made diagrams. It is important to correctly indicate the dimensions of the parts.
Deciding on the size of the chair
Step two: saw the parts along the marked lines. In order not to make a mistake, you can first practice on an unnecessary piece of wood, and only then move on to a plywood sheet.
Cutting diagram
Step three: then all parts should be varnished in 3-4 layers. It is better to choose high-quality paints and varnishes. In this case, you will need to first sand them with sandpaper. This is done in order to protect the structure from the negative effects of the environment.
We paint wood with varnish
Step four: you can connect the parts of the chair together using wood glue or self-tapping screws. If you choose the second option, it is important to screw the screws in as deep as possible so that they are not noticeable.
Finished design
Fabric chair on frame
Let's consider one of the most convenient options - a fabric seat on a frame, which can be moved from place to place and folded almost flat.
In order to make a sun lounger you need to prepare the following details:
- furniture bolts and nuts D8 mm;
- round slats (length – 65 cm, two 50 cm, two 60 cm);
- rectangular slats (length - 65 cm 25x60 mm);
- a piece of durable fabric 200 x50 cm;
- round needle file and fine-grained sandpaper;
- PVA glue;
- slats are best made from species that have hard wood: oak, beech, birch.
In order to make a chaise lounge, you need to use fabrics that are abrasion-resistant and have increased strength: teak mattress, tarpaulin, denim, camouflage, canvas.
The process has started
We cut the slats to the required length and carefully sand them.
We make slats of the required length and carefully sand the surface using sandpaper.
At a distance of 70 and 40 cm from the corners of the structure, we drill eight-millimeter holes, and then grind them using a round needle file. In order to be able to change the position of the backrest, at a distance of 7-10 cm we make 3-4 cutouts in frame B.
Then, stepping back from the two ends of the slats, we drill holes with a diameter of 2 cm in order to arrange the seat. Then we take round slats (lubricate the ends with PVA) and install them in the holes.
After assembling the frame, you need to sew and cut out the seat. The length of the material depends on the possibility of folding. In order to understand what cut length is needed, you need to fold the chaise longue and at the same time measure the fabric, and do not forget to make sure that the fabric is slightly stretched.
Then, we nail a piece of fabric, the edges of which have already been processed, to the round slats that are located on parts B and A.
We wrap the crossbars with the edge of the cut and secure them with small nails with thick heads. An option is possible when the cut is attached to the crossbars thanks to peculiar “loops”.
This garden chair is very good because it can be used instead of a bed - what else could there be for an afternoon rest?
How to make a wooden sun lounger with your own hands - video instructions.
Decorating wooden furniture
An equally important stage in furniture manufacturing is decor. At the same time, it is not necessary to purchase expensive accessories for such purposes, because you can even use old, unnecessary things, pillows.
You can cover the back and seat with padding polyester, and stretch decorative fabric on top. Fasten the upholstery to a wooden structure using a furniture stapler. In addition, the back is sometimes decorated with buttons, which are covered with the same fabric. You can hide the marks from the staples with decorative edging or various laces.
Example of garden furniture design
At this stage you will have to show your imagination. You can decorate the surface using paint of different colors - this will allow you to get a unique product that suits your interior specifically.
Conditions for long-term use
Wooden garden furniture requires compliance with certain parameters, which will extend its service life:
- Transportability. In most cases, wooden chairs are placed outdoors. They should be easy to carry in case of rainy weather - this will help maintain their original appearance.
- Using quality material. It is better to choose hardwood: aspen, oak, cedar, beech, walnut. The price is a little higher, but the result will exceed all expectations.
- Protection from changing weather conditions. In order to minimize the negative impact of the sun and heavy rains, it is necessary to thoroughly dry the boards and sand them even at the stage of preparing materials. Excellent protection is provided by an antiseptic, impregnation against rotting and hot drying oil, which is applied at the very end. After all layers have dried, you can coat the structure with varnish for external use.
Frequently asked questions from beginning furniture makers
Before you start making this or that design, you should familiarize yourself with the list of questions that beginners in this business often have.
How to cut parts?
When cutting longitudinal parts, it is better to use a circular saw, and for transverse parts, an electric jigsaw.
Jigsaw
Prices for popular models of jigsaws
Jigsaw
How to connect parts of the structure?
For connections that carry the main load, you will need to use euroscrews or self-tapping screws. In other cases, the parts are assembled using wooden choppers and glue.
Chopiki
Paint or varnish?
The choice of materials for processing depends on the quality of the wood itself. If the material does not have any defects, it can be treated with stain and then a layer of varnish can be applied. If stains appear on the surface, the wood must first be puttied, coated with a primer, and only then painted.
Wood varnishes come in different shades
How to reduce the consumption of paints and varnishes?
Quite often, during final finishing, the paint is quickly absorbed into the surface, which is why bald spots remain on it. This happens because natural wood has a porous structure. That is why professionals recommend pre-treating it with drying oil.
Drying oil for wood processing
Preparing for work
First you need to collect all the necessary materials:
- cedar dowels – 30 pcs.;
- screws 4.5x50 and 4.5x32 mm, preferably made of brass;
- sandpaper No. 220;
- thermostatic or polyurethane glue;
- varnish for wooden coverings;
- drying oil;
- masking tape;
- thick cardboard for cutting out stencils.
Tools you will need:
- saw, preferably a circular saw;
- plane;
- cutter;
- hacksaw;
- screwdriver or set of screwdrivers;
- drill;
- clamps;
- marking material (pencil, ruler).
Let's start with the drawing. You can find ready-made diagrams on the Internet or draw them yourself. In the second case, it is important to consider the number of parts. Thus, a garden chair consists of four legs, the front and back will be different - 20x254x787 and 20x76x533 mm, respectively, a backrest measuring 20x279x914 mm, armrests 20x127x406 mm, a back support bar 20x76x610 mm, a jumper 20x51x589 mm and two inserts 12x20x2 54 mm. The drawings will serve as instructions for assembling the structure.
