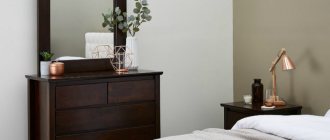
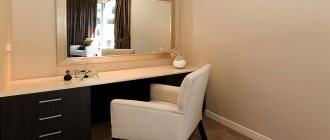
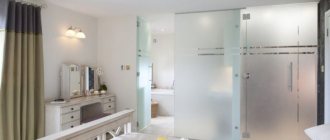
Every young girl or woman's room should have a dressing table with a mirror.
You can use it to apply makeup and tidy yourself up in the morning. You can also place cosmetics and personal hygiene items on such a piece of furniture.
The variety of bedside tables is quite large. In stores you can find all kinds of models of interesting and original designs to suit any room interior.
You can also make such a table yourself, if you decide in advance on its appearance, create a competent project, and prepare the necessary materials and tools.
Wood, chipboard or MDF?
The production of any piece of furniture, including a dressing table with a mirror, begins with the selection of consumables. You can make it yourself from:
natural wood .
It is safe, environmentally friendly, has a long service life, and is resistant to mechanical damage. Products made from natural solid wood fit harmoniously into classic interiors and become their main decoration;- laminated chipboard . This material has a wide color palette and various textures. It's easy and simple to work with. Products made from chipboard are suitable for modern styles;
- MDF or plywood . These materials have the most affordable prices. They are easy to process and have an aesthetic appearance.
Advice : if you do not have experience in making furniture with your own hands, it is better to start with materials such as chipboard or MDF. Firstly, they are reasonably priced. Secondly, they can be easily processed with hand and power tools.
What is a dressing table for?
The main purpose of furniture is to store toiletries, both men's and women's. Usually the table is placed next to the mirror, which is mounted on the glass. An alternative could be a one-piece dressing table with drawers for cosmetic and hygiene items. This is furniture for bedrooms, but some people prefer to place the table in the bathroom (if the size of the room allows it).
The main purpose of the dressing table is to store cosmetic accessories.
Scheme and drawing
To make a dressing table with a mirror with your own hands, you will need to prepare a competent drawing. You can do it yourself, using a special program on a PC, in a specialized company, or simply find a suitable option on the Internet. This drawing must indicate :
- all part sizes down to millimetres;
- list of required materials;
- fittings and guides.
With a well-drawn drawing of a piece of furniture, it will be much easier to calculate the amount of materials needed.
Drawing up a drawing
Beginners should make a dressing table with their own hands as simply as possible, using ready-made drawings with prescribed dimensions. When making a sketch yourself, the main guideline is the size restrictions:
- 75 cm in height - it is uncomfortable to sit at tables lower than this figure; taller structures lose stability.
- 27–28 cm in width, taking into account the 1–2 cm thickness of the facades - making the table deeper is not recommended; a distance of 25–26 cm to the mirror is considered optimal.
- From 45 cm in width - deviations in a larger direction are welcome (in long models, the cabinets do not interfere with seated owners), in a smaller direction - not.
Adjustments to the finished drawings are made if there is no free space in the bedroom or the manufacture of such furniture for children's rooms. The children's dressing table is made 2/3 lower, while the width and depth do not change. The exact height is selected depending on individual parameters. Designing your own models with dimensions different from the standard is not prohibited; the design simply must fit into the bedroom, be comfortable and stable.
Examples of DIY table decors, an overview of the best techniques
Tools
Keep in mind that the ease of making a dressing table directly depends on the materials chosen .
To make furniture from wood, you must have some experience in the field of furniture making.
But even a beginner in this matter can handle the assembly and detailing of products made from MDF, laminated chipboard or plywood.
Important : furniture companies offer to develop not only a clear design of a furniture product, but also detailing of all elements with trimming of all sides. You only need to correctly assemble the parts and install the furniture in the room.
To make a dressing table with a mirror with your own hands, you will need to prepare the following materials :
- lumber for furniture (wood, plywood, chipboard);
- fasteners (confirmations, self-tapping screws, furniture corners and nails);
- furniture glue;
- PVC edge (if the furniture is made of chipboard);
- accessories (handles, hinges, guides);
- paints and varnishes (for the manufacture of solid wood furniture);
- mirror.
Tools you will need :
- drill;
- screwdriver;
- jigsaw;
- sandpaper;
- drill;
- screwdrivers;
- hexagons;
- tape measure and pencil;
- building level and ruler.
How to do it with a mirror?
Making a dressing table with a mirror begins with:
Patterns for all the details from cardboard.- Cutting material according to patterns using a jigsaw.
- Sanding the end sides of all parts with sandpaper.
- Gluing PVC edges using a hair dryer.
- Drilling holes in all designated locations.
The product is assembled in the following sequence:
- The frame is assembled (we fix the tabletop, back wall, and legs with confirmats. After that, we check the product for evenness using a construction angle. If everything is in order, we tighten the confirmats).
- To increase the reliability of the structure, we strengthen the sides and legs with a furniture corner .
- Let's start assembling the boxes.
- We install the guides and insert the drawers into the previously assembled frame of the product.
- We install facades.
- We attach handles to the facades.
That's the whole simple process of making and assembling a dressing table with your own hands.
Options for making a dressing table with a mirror involve mounting it on a wall or table. The wall-mounted option is more aesthetic and practical . It is better to attach the mirror to a base made of laminated chipboard. It will act as a decorative frame. The mirror is attached to the base using plastic holders or glue. It is also possible to use double-sided tape.
Attention : it is better to purchase a ready-made mirror in a store. Since cutting it at home is quite difficult. The mirror can be of any shape. Products with unusual shapes look original.
Making a dressing table in a modern style
Hello to all DIY lovers, today we will look at how to make a beautiful and comfortable dressing table in a modern style.
The table has two drawers and also has a mirror, without which the dressing table is useless. The author used plywood as the basis for manufacturing; the legs can be made from timber or thick boards if you have the necessary cutting equipment. In general, the author used a fairly wide range of tools, machines and other machines, but for a real master it should not be difficult to create a similar project with simpler tools. If you are interested in the project, I suggest you familiarize yourself with the homemade product in more detail! Materials and tools used by the author: List of materials:
- oil, varnish, wood stain;
- plywood; — sliders for drawers; — beams or thick boards; - furniture dowels. List of tools:
- circular saw; - drill; - manual frezer; — surface planer; - Miter saw; — equipment for painting; - hand-held circular saw. Table manufacturing process:
Step one. Drawers and base
First of all, we start cutting the materials in accordance with the plan. We need to make three drawers, and we also need to cut the material for the base and table top. The author uses high-quality thick plywood as a material; a hand-held circular saw is suitable for cutting. The bottom of the drawers can be made of thin plywood
The boxes are tightened with self-tapping screws and glued together for reliability with wood glue. The author drills holes for self-tapping screws at an angle; this is easily done using a special guide for a drill.
We will have drawers on the sides, and there will be a mirror in the center. We install the drawers on sliders, the author has them with latches, you just need to press on the drawer and it slides in by itself.
Step two. Frame and legs
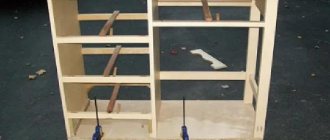
To make the frame and legs for the table, we will need beams from a beautiful type of wood, preferably from strong wood. If there are no beams, they can be cut from thick boards, but you will need at least a circular saw, the author even used a thickness planer. Before assembling the frame, carefully sand the beams if necessary. When all the parts are ready, you can assemble the frame. To do this, we drill holes and install furniture dowels. Having glued everything together, we tighten the structure with clamps and leave it to dry. After drying, the wood can be impregnated with stain or coated with oil; it would be more interesting to preserve the natural beauty of the wood.
Step three.
Painting The author carefully paints the table top with drawers using a compressor. Of course, the material must be sanded well in advance, but if high-quality plywood is used, it does not need to be sanded. As a result, the table turns out to be a beautiful snow-white color. You can do it with a brush, but the result will not be the same.
Step four.
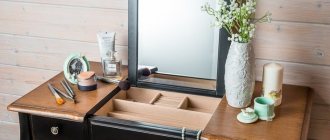
Mirror and decoration of drawers Our mirror will be secret; it is built into a shield that rises. The shield needs to be hung on hinges; the author made a recess for them with a router.
As for the mirror, cut it to size and glue it using double-sided adhesive tape.
Finally, for each drawer you need to cut out a front board; here you will need wood of a beautiful species, with a beautiful pattern. We sand the wood well and impregnate it with oil to emphasize its naturalness. Well, then we attach the boards to the boxes using hot glue and screw them from the inside with self-tapping screws.The table is ready, all that remains is to screw the top part to the frame; for this we will need special fastening loops and screws. If desired, the table can be polished, the homemade product looks great, and the table turned out to be of quite high quality. To open the drawer, you only need to press lightly on it; handles are not needed.
At this point the project can be considered successfully completed; I hope you liked the homemade product and found useful ideas for yourself. Good luck and creative inspiration if you decide to do this again, don’t forget to share your ideas and DIYs with us!
SourceBecome the author of the site, publish your own articles, descriptions of homemade products and pay for the text. Read more here.
Finishing
The assembled dressing table can be decorated in various ways. Wooden products are decorated with painting or decoupage techniques .
Also, such furniture can be painted and varnished. This will not only add aesthetics to the product, but will also extend its service life, since paints and varnishes will increase the product’s resistance to increased moisture and sudden temperature changes.
The surface of the dressing table can be made monochromatic or multi-colored. To shade the product, it can be pre-coated with stain before varnishing .
Such a piece of furniture can be decorated with any decorative elements: painting, pebbles, beads. The main thing is to choose the right style, according to the overall interior of the room.
Tip : In the bedroom, you may also find a bedside table, changing table or massage table useful.
Photo
The end result can be a decoration for any bedroom:
