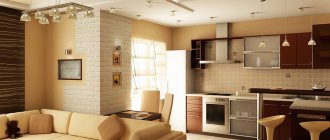
Handmade wooden lamps perfectly complement the interior, making the atmosphere of your home warmer and more comfortable. Original wooden lamps have been in quite high demand lately, becoming a familiar element not only of home furnishings - they can often be found in cafes, restaurants, museums, and other public places.
Such a thing can fit perfectly into the interior and elevate it if you choose materials that best suit the situation.
Features of the material
Natural wood, in addition to its aesthetic properties, has a number of significant advantages. Products made from it are easy to use and environmentally friendly. When heated, wood does not emit toxic substances, but on the contrary, it has a beneficial effect on people with chronic respiratory diseases, having healing properties. This effect is especially typical for coniferous species.
Wood is a material sufficiently pliable that in the skillful hands of a master it can acquire exactly the forms that he intended. Therefore, any creative design ideas come to life. Luxurious photos of exclusive wooden lamps easily convince of this.
The material is quite versatile, due to which it can be used widely, in almost any type of interior. Interesting configurations and a variety of shapes allow the item to organically fit into any style.
Lamps made of wood in the interior look solid and noble, and besides, they go well with objects made from a wide variety of materials: plastic, glass, metal.
Along with the listed advantages, wood also has disadvantages. It is highly flammable, for this reason the products should not be placed in rooms containing fireplaces, gas stoves and other sources of possible ignition.
The material is very sensitive to temperature changes and high humidity, so placing wooden lamps in the bathroom or kitchen is extremely undesirable. In addition, wood attracts small pests - termites and other insects. It is advisable to coat the products with special protective compounds that will prevent their appearance and protect the material from deformation.
When using an electrical appliance, observe a number of simple precautions:
- place the light source at a sufficiently large distance from open fire (fireplace, stove);
- remember that the optimal location for the device is considered to be rooms with normal humidity levels and room temperature;
- wooden lamps do not allow the installation of ordinary incandescent lamps in them: their heating temperature is too high, it is unsafe; use LED, halogen, fluorescent lamps.
DIY designer lamps
We offer you options for making various wooden lamps yourself, from preparing materials to step-by-step instructions.
Preparing the necessary materials
Wooden lamps can be made from a variety of raw materials: parts of wood (rhizomes, stumps, branches, driftwood), processed wood (boards, plywood sheets, veneer), etc. The final choice depends on what idea you decide to bring to life. On the other hand, it is important to properly process and prepare any material for use:
- dry the wood thoroughly;
- impregnate with special substances that increase fire resistance and protection against insects and mold;
- when choosing a material, carefully inspect it and make sure there is no rotting;
- When creating a lampshade, use original sockets and glue the parts together with epoxy resin.
What lamps to use
Wood is a flammable material, which makes it possible to use certain light sources. It is strictly forbidden to use lamps with a filament, since when lit, it emits a huge amount of heat, heating not only the socket, but also the wood.
On a note! Ideally, you need to use LED lamps and strips, most of which emit a “cool” white glow and practically do not heat the frame of the product. Today they are the safest elements from a fire point of view.
Master class: lamps made from boards
To produce such a chandelier, you can take several square bars (up to 100x100 mm). The specific dimensions depend on how large the final product should be. Besides them. a mirror will come in handy. It is recommended to start any work with a sketch of the future chandelier. Be sure to include actual dimensions.
The further process is as follows:
- Stock up on four bars of the same size.
- Form a castle on the edge of each one. On one side there should be an empty rectangular cavity, on the other there should be a convex central part that will fit into such a cavity. To do this you will need a jigsaw with a wood saw.
- Assemble the structure together, be sure to glue the parts together. Apply paint of the desired color over the frame.
- Working from above, route the cable and install the cartridge on it. Fix the last element on the inside of the frame using special brackets.
- At the top, install a mirror part that will reflect the rays of light in the desired direction.
- Build a pendant from a chain.
Master class: lampshades and lamps made of plywood
Plywood is considered one of the most convenient and easy-to-use wood materials, the processing of which does not require any special skills. A plywood lamp can be installed almost anywhere - from the terrace of a country house to different rooms of an apartment.
Take a sheet of plywood in your hands and draw a layout of the future product on it, not just indicating the desired dimensions, but also setting them actually on the sheet. The result should be a volumetric lamp, so you need to make blanks for all four sides.
Step-by-step instruction:
- Transfer the templates for all sides onto plywood of the desired thickness, indicating the actual dimensions of the future device.
- Cut out these shapes using a jigsaw. You can use a manual or automatic type tool. If the shape of the lamp is complex, then you cannot do without a laser machine.
- Sand all edges on the cut using sandpaper.
- Do the same with the materials that will be used as roofing. Observe the dimensions, do not forget to sand the edges.
- Then you need to glue all the blanks, making sure that the thin sheets are located tightly to each other and securely fastened. Place the bars to which the walls will be glued.
- Place the cartridge inside the product and secure it. Be sure to make a hole through which the wire will be routed.
- Secure the bottom and top parts. All these elements must be glued to the same corner bars.
- All that remains is to create a suspension or mount for wall mounting.
Master class: lamps and chandeliers made from branches
Branches can be found almost everywhere, so they are rightfully considered the most affordable material for creating unusual wooden lamps. Go to the nearest park or square, collect a few branches and get to work.
Important! Unlike other wooden pieces, branches do not need to be dried. The presence of moisture in them determines flexibility and the ability to create unusual shapes. Over time, they will dry out on their own, allowing the lighting fixture to retain its final shape.
The lampshade can be made in different ways: by weaving or tying thick branches using ropes. Wood can be combined with other materials, including metal frames and forged elements.
When preparing the branches, make sure there is no rot, parasites or other deformations that indicate destruction. After this, cover the surface with protective agents. Having chosen the desired design, proceed to assembly. When choosing weaving, it is absolutely not necessary to follow strict algorithms. Intertwine the branches with each other, and use wood glue to fix them.
Install a socket inside the lampshade or secure the LED strip using soft wire. If you wish, you can paint the wooden frame in the desired color.
Master class: log lamp
When making such a lighting device, you can use a log or driftwood. First you need to dry the lumber and apply a protective coating to prevent insects and mold. Create a blank of the desired shape and dimensions. Make special holes for the cartridge, secure the hangers and place the electrical wiring inside. You can install several shades or lampshades made from glass or tin cans on a log.
If you want to save yourself the hassle, then go to lighting stores and buy ready-made wooden lamps. Now you know their advantages and disadvantages, so it will not be difficult for you to verify the quality of the proposed product and ensure its correct and competent operation. When making your own devices, give free rein to your imagination, but do not forget about simple fire and electrical safety rules.
Application in various interiors
The versatility of wooden lamps allows them to be used in the design of a wide variety of rooms, regardless of style. They are most appropriate in the setting of a country house, decorated in country, Provence, and oriental styles. The combination of natural simplicity with sophistication is the most valuable quality of wood.
Original “antique” lamps made of wood are widely in demand in retro styles. They are often made in the shape of cart wheels, with candle-shaped lamps located around the circumference. This design is usually used in restaurants, bars, and hotels.
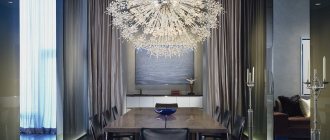
Ceiling models look great in large rooms and living rooms, bringing luxury and elegance to the interior. Spot lighting options are relevant for small rooms, especially if they have low ceilings.
Lamps of simple shapes, without any frills, are suitable for country style. They may look a little rough, but they will create a feeling of unity with nature and fit organically into the space without conflicting with other objects.
Oriental style requires the use of solid wood, welcomes clear shapes and lines, complemented by oriental motifs.
Retro is characterized by classic options or more original models, stylized as antiques.
Classic makes it possible to use stained glass; a lampshade for a lamp can be made from it; wooden structures have smooth, streamlined shapes.
High-tech allows you to create original designs by combining wood with metal, frosted glass and other materials.
How to choose a tree
To make chandeliers from wood with your own hands, any available species will do. Each type has its own characteristics:
- Pine lends itself well to processing and has a striped textured base. Since the growth circles are separated by a resin layer, it is not used for small parts. Resin prevents rotting.
- The cedar has a textured pink base, all the rings are clearly visible in the section. Due to the density of cedar wood, small decorations can be cut.
- Larch is most often used for making furniture. They are dense, stronger than pine, and are not subject to rotting. It has a brown texture when cut.
- Oak has a high density, but can split. Therefore, processing it requires a certain skill. The most valuable bog oak. It has a darker surface but is difficult to process.
Regardless of what breed you take, the main thing is that the workpiece is well dried. The material should not have grooves from parasites, signs of rot or mold.
To determine the quality of a natural material, take several pieces of wood, weigh them, and place them in a container of water. After three hours, take it out and weigh it again. The less water the element has absorbed, the more suitable it is for work.
The root areas have the greatest strength and outward originality. The roots have a uniform texture, without annual rings and bizarre shapes.
Driftwood lamp
This creative idea will not require much effort or expense to implement - use driftwood found in the forest under your feet. They are exclusive in themselves: every bend of the branch is unique. All you need to do is find a suitable specimen, clean it of bark and excess wood, then dry it thoroughly. For drying, a ventilated place away from direct sunlight is suitable.
After complete drying, you need to sand the driftwood well using sandpaper. Determine the side that will be attached to the ceiling. Using a blade, make grooves on it into which you will lay the wires. After finishing work with the wires, the holes must be carefully filled with putty, and then treated with stain and putty to match the color of the wood.
Chucks are attached to the ends of the driftwood, you can come up with different ways to attach them. When finished, treat the wood with varnish. It is necessary to lay several layers and dry each one. Choose acrylic or waterproof varnish.
- Pendant lamps - examples of installation, placement and design of light sources with your own hands (110 photos)
Table lamp: design, placement features and installation ideas
DIY chandelier - manufacturing instructions and master class on creating design models
You can also construct a table lamp or sconce in a similar way - driftwood will serve as an excellent base. This idea is easy to implement even if you do not have carpentry skills.
Branch chandelier
Gather carefully selected small branches together so that some of them are perpendicular to the ceiling. Next, you need to attach the lampshades to the ends of the branches, and carefully wrap the wires around them. Instead of branches, you can use real rhizomes if you are lucky enough to find one in the forest.
Find and implement your own ideas - wood gives you a lot of opportunities to experiment using your imagination. You will be rewarded for your creative impulses by receiving a designer product that will become an interior decoration.
Photos of wooden lamps
Incandescent lamp: design, application and connection features (85 photos)Dimmable LED lamps: detailed description of the device, selection and tips for using dimmable LED lamps
- Hanging chandeliers - an overview of popular options. Installation and connection instructions (video + photo)
Read here! Chandelier for the ceiling - how to choose and install a modern model correctly (135 photos + instructions)
Hanging chandelier
Calculate the exact cost of repairs using an online calculator
and receive a free detailed estimate for repairs
Calculate
A pendant chandelier is of a similar type, but in this case the bar itself is suspended. It looks very impressive and naturalistic, thick fastenings and chains add ambience. To make this chandelier look more modern, a lamp is mounted into the beam along its entire length. Such an object would look appropriate in an office or above a bar counter.
Photo: aleshkadesign.com
