Plastering walls is one of the stages of renovation of premises. Application of the mixture may be necessary in a new building with bare supporting structures or in older houses with uneven or dilapidated walls.
Non-professionals often have questions about what mixture to choose and how to apply it correctly; for this you need to know the characteristics of different types of materials and their scope of application. If a beginner takes on the job, then you should start with the basics, with what plaster is, what compositions there are, whether you can apply them yourself or entrust the work to professionals.
When choosing a material, it is necessary to take into account a number of features: the properties of the mixture itself, the characteristics of the base, and the method of application. The combination of these factors determines the appearance, service life and quality of leveling.
Plastering walls poses a big task - to level out the unevenness of the base wall by applying a concrete or gypsum mixture. And sometimes to give the surface a decorative look. Depending on the composition and size of the drops, it is performed in different ways.
Types of plaster
The main principle for choosing plaster is its purpose. It is necessary to consider where the work will take place: indoors or on the facade. What properties should the mixture have, and what is the base for finishing made of?
All plasters are divided into three large groups:
- simple (for leveling the surface);
- special (compositions with additives to improve individual characteristics);
- decorative (finish coatings that do not require additional processing).
Interior plastering of house walls requires that the composition be safe and smooth out perfectly. For outdoor work, a mixture that is resistant to adverse environmental factors is required.
Cement
Dry mixture of cement and sand. The ratio of components in the composition is on average 1 to 2-5, respectively. Before application, mix with water to the consistency of thick sour cream.
Cement plasters are used for interior and exterior work. To improve plasticity and adhesion, plasticizers and PVA glue are added to the composition. When working in rooms with high humidity and outdoors, add slaked lime to the solution.
Apply 3-5 layers. The maximum thickness of one is no more than 20 mm, optimally 10 mm. The total thickness of the coating can reach 100 mm, but reinforcement will be required.
The task of this composition is to level out unevenness for further finishing. Suitable for brick, concrete and wooden bases. Before application, prime the surface, then plaster the walls in three stages (spray, primer, cover).
It is applied manually and by machine, leveled with spatulas and a rule.
Plaster
The mixture is based on gypsum powder, fine filler and polymer additives. It does not tolerate moisture and temperature changes well, so it is used only for interior work. Sold as a dry mixture for preparing a solution with water.
The maximum layer thickness without reinforcement is 5 cm. Can be applied to any substrate. Suitable for creating a smooth surface for painting or wallpaper. It dries in just a few hours; the finished solution must be used within 40 minutes.
The technology for plastering walls with gypsum composition differs from cement. The mixture is applied in one layer, leveled with a rule, minor irregularities are corrected with a spatula.
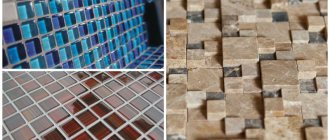
Decorative
Mixtures of decorative plaster perform two functions at once: they hide minor defects and give an aesthetic appearance. No additional finishing is needed. Pigments and insoluble granules from stone, sand, and plastic are added to such compositions.
Depending on what mixture and technique of plastering the walls is chosen, a different pattern, relief, pattern or texture is obtained.
Produced on acrylic, silicone, silicate and mineral bases. If you follow all the rules for plastering walls, it adheres well to any substrate. There are compositions for external and internal work.
Silicone
Silicone-based compounds are used for external and internal plastering of walls. The mixture remains flexible even after drying, thanks to which the surface is not afraid of sudden temperature changes and mechanical damage. It tolerates moisture well, so it is suitable for finishing bathrooms and kitchens.
The finished surface can have a “Bark beetle”, “Lamb” relief or imitate marble (Venetian). It all depends on how to plaster the walls, what tools to use and what size and shape of the solid particles in the composition.
Sgraffito
Sgraffito is not a separate type of plaster, but a method of applying it. Using this technique, you can create carved color designs. As a result, the plastered walls look like real paintings.
To create a beautiful effect, pigments are added to compositions based on different bases and the plaster is applied in several layers that differ in shade. Next, patterns, ornaments, and figures are cut out on the dried finish.
Decorating walls with sgraffito plaster requires skill and experience. A person who knows how to draw and work with the mixture can cope with this task.
Venetian
These mixtures imitate a smooth or textured marble surface. It contains a polymer binder or lime, pigments and mineral dust. Since the plaster needs to be applied in 5-6 layers, the work takes a lot of time. To obtain a marble pattern, the mixture is applied unevenly, gradually creating a play of shades.
Depending on how the plaster is applied to the wall, the intensity and depth of color, contrasts and texture of natural stone vary.
Textured
Textured plaster creates an imitation of stone, wood and leather. It can contain any binder and solid fillers of various fractions and shapes. The larger they are, the more pronounced and relief the pattern will be.
This plaster is used for interior and exterior wall decoration. For the former, the fillers are thinner, so the texture is elegant; for the latter, the fillers are large, creating a rough relief.
Materials for plastering indoor walls: gypsum, cement and lime
Purpose
According to their purpose, they are distinguished between moisture-resistant and simple. Plaster made from sand and cement is afraid of moisture, but it hardens more slowly, so it is not easier to work with. In wet rooms, compositions containing silicone or acrylic resins are used. They are less environmentally friendly, but will last longer.
It is worth considering when choosing the materials of the walls themselves. For aerated concrete partitions, a special moisture-resistant thin-layer mixture with various antiseptic additives is produced. We will tell you below how to properly plaster walls made of aerated concrete.
The technology for plastering aerated concrete walls is simple. Since the walls are smooth, but have small dimples from gas bubbles inside, the composition is applied in a thin layer. It is better to plaster walls made of aerated concrete with a wide spatula, in one layer. After drying, the walls are rubbed down and the finishing is applied. The composition for aerated concrete is mainly gypsum with the addition of various resins, so it hardens quickly - 1.5 hours.
Important! Thin-layer plaster for aerated concrete is diluted in small proportions.
If decorative plaster is chosen as a finish, then a thin layer of a special mixture is applied underneath it to the aerated concrete surface. Aerated concrete has a porous texture, so maximum adhesion is important. For brickwork, you can use any of the plasters, but first the walls must be coated with a special primer.
Durability
In terms of strength and durability, gypsum is in first place, cement is in second, and lime closes the chain. The latter is the most natural, but it begins to crumble already 2–3 years after repair. Cement will last at least 10 years, gypsum from 15 years. The higher the density of the composition, the longer the finish will last.
Manufacturer
At the construction fair you can find little-known names at low prices. You should not purchase a little-known mixture, as it may not comply with GOST. As a result, the department will crack and the work will have to be redone.
Among the well-known manufacturers, the following stand out: Knauf - Rotband, Layer from the Volma company, Forman 10, Osnovit from Gipswell, Prospectors. The composition of the mixtures differs only in various additives, and the price for 30 kg starts from 550 rubles. Cement-based mixtures cost from 250 rubles/30 kg. The universal Rotband gypsum plaster stands out among the rest. It is produced in Germany and has high quality characteristics. The price starts from 650 RUR/30 kg, but it will last longer.
Any of the listed mixtures is suitable for interior work, and the question of how to plaster aerated concrete and other walls is answered
The best way to plaster walls
Which plaster is best for leveling walls depends on a number of factors: the size of the differences in the base surface, resistance to moisture, type of finishing coating, operating conditions.
| Criterion | Cement | Plaster | Decorative |
| Amount of irregularities | Up to 100 mm | Up to 50 mm | From 8 to 17 mm |
| Moisture resistance | Yes | No | Yes |
| Finish coating | Suitable for tiles, wallpaper and painting (subject to puttying) | For wallpaper and painting (no puttying required) | No additional finishing needed |
| Operating conditions (temperature, humidity) | from -50 to +80 degrees, at any humidity | From +5 to +30 degrees Celsius, only for dry, heated rooms | From -50 to +75 degrees, tolerates humid environments well |
| Recommended application | Facade of the building, rooms with high humidity (kitchen, bathroom, industrial buildings) | Bedroom, children's room, corridor | Depending on the type of binder, you can choose a composition for external and internal work |
Important! Plastering walls in an apartment requires the mixture to be environmentally safe, so using the composition for exterior work indoors is prohibited.
Applying plaster to the wall can be done with different tools: wide and narrow spatulas, or a special machine. For decorative compositions, rollers with embossed attachments, a trowel, an applicator, and brushes are used.
Ways to level walls
It is already clear which plaster is best to choose for leveling the walls; all that remains is to determine the method of applying it to the surface.
Plaster can be applied to walls in two main ways: without beacons (by eye) and using beacons. The first method involves applying and leveling the mixture with spatulas, a rule or a trowel; it is suitable if the surface has slight differences of up to 2-3 cm. The second method is more reliable and accurate. For it, a plane of metal profiles is pre-set on the walls.
You can determine the size of the differences using a plumb line or building level, and then choose which wall plastering technology is most suitable.
Plastering the interior walls of an apartment is often done without beacons, since the differences are usually insignificant. In industrial buildings with high ceilings, it is better to use beacons.
Required tools and materials
To plaster walls you will need a large set of tools and materials:
- A hatchet or hammer with a pick (for removing old coating or protruding parts);
- Brush (for applying primer);
- Primer composition suitable for the type of base;
- Plumb line or building level (to control the plane during work);
- Square (for drawing out corners);
- Large capacity (for mixing the solution);
- Construction mixer;
- Plaster spatula and trowel (for adding mortar to areas where there is not enough of it);
- Wide and narrow spatulas;
- Guiding beacons;
- Rule and grater (to level the layer);
- Plaster corners (for reinforcing external corners).
In order for plastering walls with your own hands to be of high quality, you need to study the technology of applying the mixture. If you are a beginner and not confident in your abilities, it is better to entrust the work to professionals than to plaster the walls again. They have all the materials for plastering walls, and they know exactly what is best for plastering walls.
Preparing walls for plaster
Plastering walls with your own hands also involves preparation. Any finishing begins with preparation; the better the surface is prepared, the less chance you have of cracking or pieces of mortar falling off. Below we will look at different options for preparing walls and the features of plaster. Let's start with primer and what it is.
Padding
Preparation may include different stages, it all depends on the condition of the surface. One of the most important stages of semi-preparing is priming the walls (I devoted a separate article to this). It comes in several types, but we will need a maximum of two:
Deep impregnation primer - Liquid composition, sold in cans, yellow or white. It is often concentrated, so dilution is required in the proportion indicated on the canister. Applied with a brush or roller, it penetrates the surface and binds small particles both outside and in the depth of penetration.
Sand primer, putzgrunt, betonkontakt - Primer designed for better adhesion of smooth concrete surfaces. It contains quartz sand. Mix well before use. It is advisable to pre-prime the surface with a deep-penetrating primer. Apply with a large brush in different directions. After application, you need to wait for complete drying, preferably a day.
General preparation
We remove the old wallpaper, everything that rings does not hold well and falls off. Do I need to prime? Any surface must be primed before plastering or puttying. If your surface is well prepared, that’s a third of the success.
Removing old plaster
If you need to level old walls, then initially you need to tap it, you may need to knock off poorly adhering pieces of old mortar or knock it all down. We'll talk about how to shoot down a little lower. Then we remove as much dust as possible from the surface and prime with deep penetration soil. Wait for the primer to dry completely.
How to remove old plaster? what to beat off with? For this we need:
- Rotary hammer, with spatula attachment
- Hammer
- Respirator, gloves, headphones
- Garbage bags
Plastering walls usually occurs in several stages, one of them is preparing and dismantling the old coating. We begin to beat off the layer of solution from the places where it best comes off and falls off. If a conventional hammer drill does not cope with its task, then you will need a large, powerful hammer drill (you can rent it for the day) and things will go much faster. When everything has been cleared away, we dust the surface, either vacuum it or sweep everything off the surface. We collect the collected waste in bags and take it away. After we managed to remove the old plaster and collect all the debris, we prime the surface with deep-penetrating primer, preferably 2 times.
Preparatory stage
Preparatory work consists of surface treatment before applying the first layer of plaster. The nature of the work is determined by the type of foundation:
- Preparing the brick surface. For better adhesion, you need to fix the reinforcing mesh or make indentations in the mortar between the bricks. Next comes cleaning of dust and debris and priming.
- Preparing concrete walls. If the material is not very dense, shallow cuts are made with an ax, then treated with concrete contact.
- Foam block surfaces are coated with a deep penetration primer.
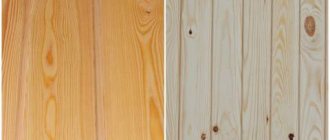
- Preparing wooden walls for plaster. It is necessary to fill the diagonal slats in increments of 5 cm so that the solution is better retained on the surface.
There should be no large protrusions, loose old coating, metal elements, dust or debris on the surface of the walls. Once the base has been prepared and the primer has dried, you can begin the process of applying plaster.
Application technology
Plastering walls begins with preparing the solution. To do this, the dry mixture is diluted with water in the proportions recommended by the manufacturer. Concrete and brick walls are moistened with water so that the plaster takes longer to set and does not lag behind the surface.
The plastering technology includes three stages. This is the sequential application of three layers of a mixture of different thicknesses and thicknesses.
Instructions for plastering walls with your own hands:
- Spray. This layer is the most liquid in consistency. It is thrown onto the surface using a trowel with little effort. Then they are slightly leveled with a falcon. The thickness of the plaster layer is 5-10 mm.
- Priming. When the first layer has set, but has not yet dried, apply the second layer. It is thicker and thinner. It is placed on the falcon and applied to the wall, then leveled with a wide spatula using sweeping movements. One portion of plaster should be enough for approximately 1 square meter. area.
- Covering. Layer thickness 2 mm. The solution should be thick. Apply to hardened soil. Its task is to level out all minor irregularities. The mixture is no longer thrown on, but spread with a spatula, pressing the sharp edge to the surface. Apply using bottom-up movements. You can move in an arc. After the mixture has set, the surface is rubbed with a trowel.
Other methods of applying plaster are also practiced. For example, in one layer, without splashing. This method is suitable for those who do not have professional skills, since only a person with experience can properly plaster walls.
Lime mixture for plastering walls
Lime plaster is good because it can be used in any room and under any conditions.
But there is also a small problem that may arise when using it. Lime is a difficult substance to use and sometimes behaves unpredictably. The binding element of the mixture is fluff lime, which also contains a filler for the solution - limestone sand or white quartz sand obtained by crushing.
The limestone used in the production of this dry mix is essentially pure calcium carbonate. It is fired at high temperatures - about 1000 °C. The burnt stone is calcium oxide, or quicklime. This is a very caustic material that is almost impossible to preserve in its original form, so it is immediately converted into calcium hydroxide, or lime paste. This is done by quenching, or, in other words, by adding water to the material.
When exposed to air, lime begins to react with carbon dioxide, and the lime paste hardens, resulting in the formation of calcium carbonate. This process is called carbonization. To protect lime paste from carbonation, it is necessary to store it in a special airtight container with a small amount of water to avoid overdrying.
Lime is widely used by masons in the masonry process, and also finds its application in the work of sculptors, and it is mixed with the necessary auxiliary substances.
As auxiliary substances, sand is added to modern lime plaster mixtures in a 3:1 ratio. This is primarily done to prevent drying out and reducing the volume of the solution.
To illustrate the resistance of lime plaster to various types of influence, we will give an example of its use in the field of art.
The lime plaster mixture used by sculptors can be modified within 5-10 days. During this time, the created work is protected from drying out too quickly and cracking. Once lime plaster has hardened, its appearance cannot be changed, and the resulting sculpture will remain in its original form for many centuries.
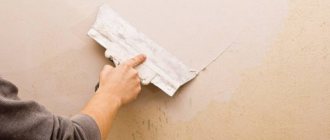
Grouting plaster
The last stage of plastering is grouting. Its task is to bring the surface to ideal smoothness. Grouting of the surface must begin when the last layer of plaster has hardened. The work is carried out in stages using different tools:
- Grout with a trowel onto the wooden surface of the set covering layer. You need to smooth out the spatula marks and bumps. Performed without pressure in a circular motion.
- Smoothing with a felt grater using sharp, straight movements.
- Smoothing with a grater with a rubber or metal strip. These tools prepare the surface for painting. Movements first vertically, then horizontally.
After grouting, the wall is cleaned of dust and coated with a primer. You can proceed to further finishing when the surface has dried well.
What is lighthouse plaster?
The process of leveling walls with beacons begins with installing profiles that will set the desired level.
Installation of beacons is carried out as follows:
- A self-tapping screw is screwed into the wall near the ceiling and floor, and their position is leveled using a plumb line. Their caps should be in the same plane.
- Measure the distance between the screws, subtract 5 cm and cut off a profile fragment equal to the obtained value.
- Draw a line between the screws with a pencil.
- Throw the plaster solution onto the line in 3-4 places with tubercles, press the profile into them so that its plane meets the heads of the screws. Remove the fasteners.
- Repeat the procedure at a distance of no more than 1 meter from the first beacon. Thus, a plane is created along all the walls of the room.
At this point, the installation of the beacons is completed, and you can begin to apply the first layer of the mixture. After the plaster has been completely applied, the beacons are removed and the areas where they were located are leveled.
Plastering walls with your own hands
You can apply plaster yourself if the differences are not very large and the layer of the mixture does not exceed 2-5 cm. Only mixtures for rough leveling and easy-to-work decorative ones should be applied. For example, decorating a wall with Venetian plaster with your own hands without experience is too reckless. Compositions that are difficult to work with are best left to professionals.
Some formulations can be prepared independently. Cement plaster consists only of cement and sand; knowing the required ratio of components, you can prepare a mixture.
How to make plaster:
- Pour cement of at least M200 grade and 3-4 times more sand (depending on the fat content of the composition needed) into a large container or concrete mixer and mix dry;
- Pour in water in small portions until the desired consistency is obtained, stirring the mixture periodically;
- To improve plasticity, you can add a little detergent (at the rate of 30-50 ml per 5 liters of water).
The finished mixture must be used within an hour. Since plastering with your own hands can take a long time, you should not prepare a lot of solution at once.
If we plaster ourselves, then we need to take care to protect the skin from the composition, as well as cover the furniture and floor in the room where the work is taking place.
Since plastering walls with your own hands without any experience is not easy, you can first watch a video of how the craftsmen do it.
Which plaster mixture for walls is better?
Having learned about what mixtures are used for plastering walls, the question may arise: which one is the most optimal for use?
Today, all dry mixtures are a high-tech product with the addition of many components, thanks to which each type of mixture has its own beneficial properties. With such diversity, when choosing mixtures, it is necessary to focus on the conditions in which the surfaces will be plastered, and where (inside or outside) the work will be carried out.
When choosing which plaster mixture is best for performing work in your premises, you need to pay attention to their main characteristics. The mixture must have sufficient setting time so that it can be mixed, applied and, if necessary, corrected. Good plaster will not crack after drying, swell, peel and deform at the edges, or crumble after hardening. The likelihood of cracks forming on the treated surface is reduced due to the fact that modern additives and plasticizers impart water-retaining properties to plaster mixtures.
Usually, those packages of dry plaster mix that are sold in hardware stores describe in detail how to use them. As a rule, it is recommended to fill such mixtures with clean water at room temperature. However, if the room temperature is low, heating the water is allowed. The mixture is then mixed using a special mixer or manually. Some types of mixtures must be kept after kneading and mixed again so that all additives are dissolved and evenly distributed. Under no circumstances should you use dirty water or water left over from washing instruments for the solution. In addition, it is also necessary to ensure the cleanliness of the tools and containers used.
Saving Tips
You can save significantly on plastering walls in an apartment only if you prepare the solution yourself and apply it yourself.
You can reduce costs a little more by using materials sparingly:
- Dilute the composition with water in small portions so that you have time to use it;
- Carefully monitor the differences in the wall; perhaps in some places it is enough to cut off the bumps and the mixture consumption will be reduced;
- Apply only two layers without covering, but this is acceptable if the differences do not exceed 1-2 cm.
Plastered walls improve the heat and sound insulation of the room, acquire a flat and smooth surface, ready for further finishing with thin coatings - wallpaper and paint. Some types of compositions also have decorative functions. You can apply the mixture in different ways, but it is important to do everything correctly, otherwise the coating will not last long.
Share in the comments your experience of applying rough and decorative plaster without any skills.
Reinforcing materials for preparing surfaces for plastering
To prevent cracks from affecting the plastered surface, it is necessary to use reinforcing materials.
In accordance with the standards of construction and finishing works, plaster must be reinforced if mixed materials are used for plastering, as well as if the layer of applied plaster is thick (when using a solution with a grain size of less than 2 mm and for surfaces that are exposed to strong wind) . However, it is important to remember that the majority of the Russian population lives in regions where temperature changes are common, so it is worth using reinforcing materials in most cases when plastering internal walls and always when treating external ones.
Reinforcing plaster materials represent the “skeleton” of a layer of plaster or putty. In the process of finishing work, they solve the following tasks:
- protect the surface from cracks that form due to temperature changes, high humidity, the use of low-quality plaster or mechanical stress;
- increase surface strength - both mechanical and impact.
Cracks can be both global and local. Global cracks occur mainly due to temperature fluctuations, shrinkage of finishing materials, etc. Such cracks appear randomly and can affect the entire surface of the walls or ceiling. Local cracks arise due to the contact and mating of dissimilar materials, as well as at joints, for example, where a door frame adjoins a wall.
When preparing a surface for plastering, materials such as nails will be needed as a basis for installing marks (small areas of mortar around the nails) and during the hanging process. They are also necessary to ensure that the wall surface is strictly vertical.