There is no need to explain how unpleasant the fact of new scratches and damage to furniture cladding can be. Restoring chips on furniture requires incredible patience and, in some ways, even a creative approach, since standard recipes and theoretical recommendations cannot always be used and successfully applied in practice. Nevertheless, removing scratches from furniture at home is quite possible; you just need to correctly assess your capabilities and select the necessary materials.
Working with toner on a chip is similar to painting
Features of repairing chips on furniture
To eliminate damage, two main methods of surface restoration are traditionally used:
- Leveling polishing is the main method by which you can remove scratches from dark furniture, polished surfaces, and any matte and semi-matte, wax and glossy coatings. The method is incredibly labor-intensive, but at the same time it is considered the most universal and accessible for do-it-yourself use of all possible;
- Sealing or replacing furniture veneer with a new coating. A fairly reliable method, especially when it comes to restoring deep and complex chips on furniture.
It is not possible to use such a restoration in all cases, but if you manage to master the techniques of veneering, then there will be no problems with restoring chips on furniture, even in theory. The bottleneck in gluing veneer is the correct selection of material, which is why most furniture makers have stocks of leftover veneer.
If home furniture requires major repairs and restoration with re-gluing of the surface even on a tiny area, then you can only buy the material from a specialist. Veneer is inexpensive, while payment for the work of a craftsman can exceed the estimate for materials by an order of magnitude. Therefore, it always makes sense to try to repair chips on furniture with your own hands. Despite the fact that at first glance the work seems incredibly difficult and overwhelming for an ordinary person.
Another method that no master usually mentions is masking and tinting damage. This method allows you to remove a scratch at the lowest cost. Perhaps, when carefully examined through a magnifying glass, the quality of the restoration will not look so high, although most owners agree that chips on the furniture should not be visible after repair, at least for a quick glance.
The process of painting lacquered furniture
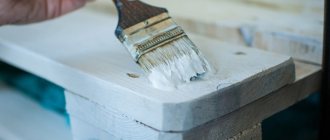
Before painting lacquered furniture, you should clean the surface of the old coating and prime it. Restoration work must be carried out with a roller to distribute the paint evenly. First, paint the internal shelves, recesses, joints and corners. Use a brush in hard-to-reach places.
Apply the product to shelves, drawers and doors away from furniture. The main surface should be painted carefully, avoiding smudges. Furniture needs to be covered in several layers. Each subsequent one is applied only after the previous one has completely dried. Finally, they start decorating.
A spray bottle will not only help to evenly distribute the paint over the surface, but also reduce its consumption. To ensure that the protective layer retains its original appearance for a long time, cover the furniture in white with acrylic paint.
How to repair chips on furniture
There are quite a lot of means and methods for removing scratches and abrasions. Conventionally, materials for restoring chips on furniture are divided into three large groups:
- Professional products for repairing furniture coverings;
- Materials for industrial surface restoration;
- Handicraft and folk remedies used for manual repair of chips at home.
For your information!
Materials for professional restoration of chips, as a rule, are polymer pastes, mastics or quick-drying adhesives in the form of markers. You can find quite successful solutions, for example, in the form of a wax pencil; some of them are quite suitable as a means for removing scratches on furniture. Provided, of course, that the coating does not have a varnish surface. The most difficult thing is to remove scratches from lacquered furniture; in this case, deep chips have to be sealed or restored with repair compounds, sanded, and only at the final stage it will be possible to select the composition of a semi-liquid polish in order to give the surface a glossy shine.
Homemade remedies can be quite effective if they are prepared based on the actual experience of a cabinet maker. For example, products made on the basis of wax and rosin are considered very effective and quite simple. Using refined sunflower oil, you can temporarily hide a scratch or disguise a chip. But to actually repair the damage, at least three or four operations will be required, and polishing in this case is not the most difficult of them.
Technology of restoration work
Determining the wear of lacquered furniture
The first step is to determine the condition of the surface you plan to restore. The first sign of worn-out and old furniture that has been in use for a long time is its visual aging. In particular, furniture may exhibit darkening in the carving area. In addition, a common sign of aging is the presence of fine mesh directly on the varnished surface.
Of course, if such changes are not significant, then they may not spoil the overall picture, but on the contrary make the furniture more valuable. However, if there is significant damage, there is a need for restoration, which can be entrusted to an experienced craftsman or done with your own hands. At the same time, you can update the furniture without harming its cultural or antique value. In extreme cases, the table can be painted, but the structure of the wood will be hidden under a layer of paint and the furniture will not have such an attractive appearance.
Choosing a material for restoring lacquered furniture
Many people think that they can renew lacquered furniture simply with a swab moistened with alcohol. Of course, an alcohol solution can dissolve the outer decorative layer and eliminate the defect. However, such a procedure may leave an indelible mark. Therefore, it is better to choose high-quality recommended materials, which include:
Shellac polish
This material allows you to beautifully highlight the elegant wood texture, giving it an original shade. Polish is one of the oldest materials for restoring lacquered furniture. In its structure, shellac polish is a special varnish that has the consistency of water. To restore wooden surfaces, it is applied in 40-60 layers. Thanks to this, it is possible to obtain a unique depth of color.
Nitrocellulose varnish
The material is used to restore large areas covered with varnish. The product is applied using a special sprayer, which distributes it over the surface at high speed. If the speed were lower, the droplets would begin to solidify individually. Therefore, it is not advisable to use conventional sprayers to apply nitrocellulose varnish, as they will leave fragments covered with bubbles. Accordingly, it is recommended to apply this material only in a specialized workshop.
How to restore chips on furniture
The choice of method and technology for surface restoration directly depends on the depth and nature of the damage. For example, in order to remove a scratch on white furniture, a specialized polishing compound is used, including titanium white, wax and drying oils. Only an experienced specialist can prepare a similar composition at home.
The resin is filled with fine wood dust
How to approach restoration correctly
First of all, you need to inspect the damaged area. If the furniture is matte or semi-matte, most often the repair process will be reduced to properly tinting the area where the chip occurred, applying a leveling compound and, after drying, leveling the surface with polishing felt.
Such a chip will require a complete replacement of the varnish
If, by misfortune, a chip appears on a polished surface, then the procedure for repairing furniture becomes somewhat more complicated:
- Firstly, it is necessary to properly trim and remove the remnants of the varnish layer and primer; the thickness of the gloss on a furniture surface can reach 1 mm. Therefore, if you simply tint the damaged areas, a clearly visible depression will still remain;
- Secondly, it is necessary to clean the edges of the chip and remove any remaining gypsum or adhesive impregnation. This is necessary so that after applying the repair composition the material does not peel off from the original varnish layer;
- Thirdly, the wooden surface will have to be re-equipped and thoroughly dried; the quality and durability of the repair depends on how firmly the polymer mass is held on the surface of the furniture.
The remaining operations to restore the damaged area are selected depending on what material and in what sequence the chip will be repaired.
How to repair a chip on chipboard furniture
Repairing a chipped area on a furniture panel made of chipboard is considered one of the simplest. Typically, such particle board is laminated or treated with a very hard melamine resin. Next, the surface is covered with paper or film with a fiber pattern applied, after which varnish is applied.
So for chipboard, the process of repairing a chip comes down to gluing the damaged area with a patch, tinting the joint line and polishing the surface with a viscose cloth and spray applied to restore shine.
How to repair scratches on wooden furniture
Restoring the surface of a furniture panel or part made from solid wood is carried out in three steps. First of all, a restorative mixture of resin or molten polymer is applied to the chip. It is clear that the area around the chip must first be sealed with paper tapes and a soap solution.
Resin can easily replace the mass lost on a chip
Using a sharp spatula, level the surface of the resin on the chip. After hardening, a veneer patch is glued on, then varnish is applied, and the surface is polished with a special wax-based abrasive paste. If everything is done correctly, the surface of the patch on the chip will be level with the main varnish surface of the furniture.
After restoration, the old varnish must be rubbed over the entire surface
Important! Upon completion of the work, the damage is polished, starting from the place of the chip and gradually increasing the area of the polished surface to the size of a furniture panel.
How to remove scratches from polished furniture
Of course, such complex and labor-intensive operations are performed only if the depth and size of the chip are too large to be treated with simple cosmetic procedures.
If the size of the damage is very small, no more than 10 mm, then you can try to mask the scratches on the furniture with a walnut. To do this, use the freshest green nut, which must be peeled and the kernel removed. The raw product contains a fairly large amount of juice, which perfectly masks any light scratches, cracks, or places where the varnish has peeled off.
An easy way to hide a chip on walnut furniture
A good addition to such repairs would be treatment with polishing paste. If the scratch is on a glossy surface, it is better to use a special alkaline paste. A similar product for removing scratches on furniture dissolves part of the varnish and, with prolonged but not too intense polishing, softens and tightens the edges of the scratch.
This method is absolutely not suitable for light furniture. Any attempt to polish a chip or scratch always leaves a dark matte stain, which is clearly visible on the white or coffee-colored surface of the furniture.
In this case, you can remove scratches on white furniture using special varnish toners. Essentially, this is a pencil, a print corrector, inside of which there is a liquid polymer, which must be carefully squeezed onto the surface of the crack, dried and processed in accordance with the instructions.
To repair scratches on beige or coffee-colored furniture, you can use wax polishes used by professional furniture makers and cabinetmakers. The material is melted in a water bath, laid out in a cotton napkin, rolled up into a knot and used to finalize the area of a chip or scratch.
Important! Under no circumstances should vegetable or animal fats be used to remove scratches and chips on the surface of furniture. You can try to restore a crack or scratch using drying oil paints, but this requires very good knowledge of technology and the ability to handle this kind of material.
How to remove scratches from leather furniture
The main difficulty in working with leather-lined furniture is that for restoration you cannot use traditional materials and methods used for wood, chipboard and MDF panels. It is possible to restore the surface, remove scratches and repair chips only with the help of special lanolin creams and dyes.
If you don’t have a specialized composition on hand, you can use paint cream to restore the surface of leather jackets and even shoes. You just need to choose the right color. Many foreign, for example, German, manufacturers of leather and furniture care products describe in detail in the instructions exactly how and in what sequence a scratch or chip can be repaired.
Folk remedies usually use food grade glycerin or petroleum jelly. Both products soften the surface well, so after treatment, the damaged area on leather upholstery will need to be additionally polished with a dry cotton cloth.
How to remove scratches on MDF furniture
To repair and restore chips and deep scratches on MDF panels, we recommend specialized wax pencils. Typically, such material is sold in sets of several dozen pieces. One standard set can contain more than 40 shades and colors for the most commonly used furniture textures.
Wax allows you to repair a chip in minutes
The wax pencil is heated with a burner and applied directly to the chip site. Once the patch material has cooled, trim off the excess using a sharp blade. If the damaged area is on the front surface of the furniture, then the patch on the chip must be additionally polished using an electric vibration machine and felt.
Tools for furniture restoration
In order to put old furniture in order with your own hands, you need special tools. You should know that the restorer needs not only ordinary carpentry tools, but also turning, plumbing and drilling equipment. An experienced restorer always has a convenient workshop where all the necessary conditions for repairs are created. Also, don’t forget about measuring tools. This can be a tape measure, a carpenter's gauge, a compass, a bore gauge, a surface thicknesser, as well as metal and wooden squares.
For high-quality restoration of any wooden surfaces, you need to purchase a special abrasive wheel. It will be necessary for processing and grinding surfaces. Thanks to this tool, you can effectively remove paintwork and smooth out the edges of the furniture being treated. In addition, it is advisable to get an abrasive wheel for processing metal surfaces. For example, it will be needed when you need to cut or remove old handles.
Using planing tools, you can prepare the necessary piece for furniture if the previous one has become unusable. If you are going to do a thorough restoration, then you will need to drill and process all the gaps in the wood. Then you can’t do without a brace, a hand and electric drill, drills and a countersink. In addition, you will need a hacksaw, a bow saw, knives, and saws for opening veneer.
To clean all the required surfaces, it is advisable to have a set of flat and semicircular chisels and carpentry chisels. In addition to all of the above, you will also need various auxiliary tools: wrenches, files, hammers, screwdrivers, rasps, a protractor, a nail puller and an electric drill.
In order to secure all the surfaces being processed, wedges, rope devices, and clamps will definitely come in handy. To securely fix the restored elements, you should install a vice for chopping and cutting metal, and also purchase metalworking hammers and metal shears.
Useful tips
Oddly enough, amateur attempts to repair chips or restore more serious damage to furniture sometimes cause more damage than simply tinting or painting a furniture touch.
For example, you should not use water-based dyes to fill scratches, cracks and swelling of furniture veneer. Do not use iodine, strongly brewed tea, an aqueous solution of potassium permanganate, watercolors, gouache, or car varnishes. As an exception, you can temporarily mask scratches on furniture with walnut.
All of the above can hide the damaged area for a while, but, as a rule, it causes swelling of the decorative coating due to swelling of the wooden base of the furniture.
The largest chips and even breaks, which often happen on armrests or the ends of doors, cabinets, especially kitchen furniture, can be treated by applying a repair varnish layer to the entire front surface. In this way, it is possible to preserve the mirror of the lacquered surface, and this is the most important thing in the restoration of wooden furniture. If you repair chips and the entire panel of furniture with “solid” varnish, then the damaged area may not be visible even with the most careful examination.
Furniture restoration
It should be immediately recalled that only high-quality furniture can be restored. If it is Chinese chipboard, then it will not be restored, but rather thrown away. We need to restore something that has served for a very long time and is capable of pleasing its owners for many years to come. If the furniture is made with high quality, there is no need to “bury” it. If possible, be sure to extend her life.
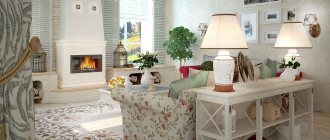
If you have restored old furniture, then it will definitely improve your home. For example, a country house with such furniture has always been considered the standard of classics, where a leisurely and measured life is led. Remember that an antique chair or table, wardrobe or chest of drawers will always require only respectful treatment. Such furniture needs space even in a small room; it will be very cramped. Give old furniture more space and new life.
As a rule, restoration can be of three levels of complexity, and we will consider them in order.
Selection of paint and additional materials
Painting lacquered furniture should be done with high-quality materials intended for wood. To process metal products, you need to purchase paint for metal products.
Additional materials for painting furniture.
The material for painting must be durable and stable:
- to exposure to moisture and dirt;
- to wear and abrasion;
- to mechanical stress;
- to low temperatures;
- to chemicals.
The base, stripped of obsolete varnish, can be coated with any paint depending on the owner’s preferences. If desired, you can get a semi-matte, matte, glossy or completely transparent finish. To make furniture white, you will need translucent paint. If you choose a matte option, the products will look outdated.
Paints for working with wood that you can choose from:
- acrylic - a water-based solution designed for working with wood, plywood, MDF, veneer, laminate;
- varnish - it is used to renew old coatings;
- enamel with a metallic effect - this paint is used to cover fittings and is also applied to wood to get a new shade.
If the surface to be treated is located in rooms with high temperatures or interacts with hot objects, then you should choose a paint that has a fire-retardant effect. The wood is first coated with a primer.
In addition to paint, you need to purchase auxiliary tools and materials:
- brush, roller – for applying paints and varnishes;
- spray gun - for processing large areas;
- emery sheet or sander - for sanding;
- scraper or metal brush - to remove old varnish;
- construction hair dryer - will be needed if you plan to heat an outdated coating;
- primer, varnish, putty, detergent, antiseptic, varnish thinner, and, if necessary, insect repellent.
Choosing a wash
The remover is used to remove old varnish. The chemical composition of the remover softens the outdated varnish coating and allows it to be completely removed.
When choosing a remover, it is important to consider its concentration. The horizontal surface is treated with a liquid remover, the vertical surface is treated with a substance in the form of a paste or gel. To treat large areas, use the product in powder form.
Remover-gel for removing old varnish.
Washing technology
Work with the wash is carried out in the fresh air using personal protective equipment. The remover is evenly applied to the furniture surface using a brush. In areas with severe damage, work with special care.
After applying the product, the furniture must be wrapped in polyethylene and left for the remover to take effect. The instructions for the product should indicate how long to wait. After this, remove the film and remove the varnish layer with a non-sharp spatula.
Use water to remove varnish and remover residues. Further roughing with sandpaper is carried out after the surface has dried. Then take fine-grained sandpaper and sand until the roughness is eliminated.
Pay attention to: How to remove paint from furniture at home: recommendations for beginners
Coloring stages
The dyeing process consists of several stages. Before applying new paint, be sure to remove the old coating from the furniture using abrasive materials. This is a fabric or paper surface covered with abrasive grains. Such products are produced in the form of ribbons, stripes, circles.
Surface preparation
The basic preparatory stage is the removal of outdated coating. Chemical, thermal and mechanical methods are suitable for this.
Professionals remove old varnish using a heat method using a hair dryer. All actions are performed in protective clothing, gloves and goggles. Use a hairdryer to cover a small area, heat it well, and use a spatula to scrape off the coating.
With the mechanical method, do the following:
- take out all the boxes;
- remove the fittings and then wash them with soapy water;
- furniture is wiped with detergent to remove dirt and degrease;
- remove the varnish with a scraper, coarse sandpaper or a wire brush;
- sand with a grinder or fine-grained sandpaper.
A mechanical method for removing varnish from furniture using a hairdryer.
The chemical method involves using a solvent, which must be applied to the furniture, then it must be wrapped in film and left for 3 hours. Then you need to remove the varnish with a spatula.
Putty damage
Before applying putty, you must carefully inspect the furniture, disassembling it into as many parts as possible. After this, it will be possible to process all places and replace failed or outdated fittings.
First, sanding is carried out, dust is removed with a dry cloth, then treated with an antiseptic to prevent the development of fungus. And only after that the detected defects are repaired with transparent putty. The product is applied in a thin layer and carefully leveled. Wait until the putty dries and, if necessary, apply another layer. The final stage is sanding the putty areas.
Degreasing
The degreasing procedure extends the life of restored furniture, promotes better adhesion of paint to the surface being treated, and allows for even application of paints and varnishes.
Degreasing is carried out using detergent diluted in water. The product is wiped with the resulting solution, after which the product is washed off. Wait until completely dry.
If the surface has been puttied, then degreasing is carried out with alcohol. You can get rid of dirt and stains using table vinegar.
Painting process
Before painting, the furniture is treated with a transparent primer, covering not only the puttied areas, but the entire surface.
Furniture painting process.
Remove or seal with paper tape the fittings and elements that should not be exposed to paint. Each element is processed separately using a roller. If you use a brush, the paint may apply unevenly and drips may occur. Shelves and drawers are painted with special care and dried separately, after which they are installed in place.
Pay attention to: Transforming an old cabinet into a new one with your own hands
After drying, staining is repeated to consolidate the result. The dried elements are collected.
Proper drying
Water-based paint takes a long time to dry, so to dry furniture you need to choose a place where objects will not interfere. It takes 12 to 24 hours for the applied layer of solution to dry completely, and the paint material can be a source of harmful fumes. In this regard, the room in which furniture is processed is unsuitable for habitation. Children and animals should not enter such a room, even for a short time.
Drying should be carried out at a temperature of +20…+23ºС. At a lower temperature, the product will take longer to dry.