Modern apartments are often small in size and require a careful and creative approach to arrangement. There is no point in cluttering rooms with furniture thoughtlessly, depriving the space of precious free meters. If you have to squeeze between the furniture, then the room becomes uncomfortable and untidy, the clutter is oppressive and oppressive. This is especially true for a children's room: here the child needs space and personal space, comfort and coziness. Therefore, if there is not enough space in the room, an excellent solution for saving space is a window-sill table in the nursery: a modern idea that has already been reflected in many apartments and houses.
A table instead of a window sill is an original solution that allows you to organize a full-fledged place for studying even in a small children's room
The combination of a window sill and a table significantly saves space, makes the room modern and original and allows you to use the space as intelligently as possible, without clutter. Plus it's easy to implement!
Pros and cons of a window sill table in a children's room
A window sill-tabletop in a children's room is a very modern and rather non-standard solution. Not in every home you will find such a solution, because many are still accustomed to the fact that a table is a table, it has four legs and a tabletop, it can be placed anywhere in the room and, if desired, moved to another corner. But a desk combined with a window sill is quite new and unusual.
The main advantage of a window-sill table is that it saves space, which is usually empty in this part of the room.
But this idea has a number of advantages:
- This solution allows you to significantly save space. This is very important if the apartment is small and the children’s room is small.
- It looks creative and stylish. You want your beloved child’s room to be stylish, modern and beautiful? This is an excellent solution to highlight a stylish and modern design.
- A desk near the window is the only correct location. The light from the window falls on a book or notebook so that reading, writing, studying even for several hours will not harm the eyes.
- The window sill table can be made wide and spacious; it will be convenient not only to study, but also to create, draw, dream, and play!
- This is beneficial: you can even create a structure with your own hands, but buying a ready-made full-fledged table is much more expensive.
As for the minuses, there is only one: the monolithic design. If you change your mind, the child grows up, and you want to change the size of the table, or move - this will be problematic. But if you plan to create a table once for years, then this is a great solution!
Natural light is an important advantage, allowing you to sit at your desk during the day without wasting electricity or damaging children’s vision.
The idea of combining a desk with a window sill should appeal to owners of small apartments or families with several school-age children
Types of structures
A table by the window in a nursery can only be a tabletop, built into the wall or combined with the plane of the window sill. This is the simplest option. The next most popular model is with floor cabinets and drawers, which is very practical and comfortable, because all the little things you need for studying are always at hand and in perfect order.
Various bedside tables and drawers make the work area more comfortable
The third option is complemented by a superstructure in the form of open shelves or cabinets with doors, where you can store a thousand different things - from toys to books. Storage sections are located on one or both sides of the window, filling the space up to the ceiling or to the height of the window opening.
Shelves on the right and left up to the ceiling
The beauty of this project is that it doesn't have to be installed right away. The upper tier can be purchased later if this is not immediately possible.
Types of designs
A modern window sill-tabletop in a children's room or teenager's room can have different dimensions and design. In general, types of structures can be divided into three categories: from a window, from a cabinet or from a wall. This means that the window-sill table can be placed either against the wall or against the window. There are also mixed options.
The design of the tabletop near the window depends on the overall interior of the room and personal preferences.
From the window
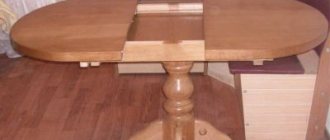
In fact, this is a table in the form of a window sill, in the literal sense of this expression. In this case, the window sill itself is dismantled, and in its place a wider and deeper one is installed, made of a more durable material (plastic is used quite rarely and is not the best option for a desk).
The photo shows an example of integrating a window sill into a fairly wide desk
Look at the options for a window-sill table in a modern children's room in numerous photos: you will see that this is always an excellent solution. It can be small and light, or more massive, with drawers. It is appropriate to build in additional shelves in the window slopes to make maximum use of the space.
If desired, the window sill can be expanded to cover the entire wall and cabinets can be added under it, resulting in a full-fledged desk.
Don’t forget about lighting, because in the dark the window will be closed with a curtain, and the child will be busy with homework or creativity. It is better to use a table lamp or mount the lighting fixture on the wall or slope to the left.
With wardrobe
For a small room it is appropriate to mix and match furniture. A cabinet is a great item to incorporate a child’s desk into.
A desk-window sill, equipped with bedside tables or shelves, will become a convenient place for studying
What does it look like? This is a large, full-fledged closet with various compartments: a large closed one for clothes, open shelves for books and toys. And as one of the compartments there will be a workspace: a built-in small table with empty space below (for comfortable sitting). It's very comfortable and looks original!
Symmetrical arrangement of cabinets in a children's room with a desk instead of a window sill
This cabinet-table can be made to order. This is an excellent option, since you can choose the height of the table to suit the height and individual characteristics of the child, as well as take into account the dimensions of the room and the specific place where the structure will stand. Such a cabinet can also be a corner one.
And others
A built-in desk can extend from the wall or have a mixed design: extend from the window and continue in breadth, occupying part of the wall. If two children live in a room, this is an excellent option: this way you can make a large table without taking up much space and saving it significantly.
A table-window sill in a room for two children is the optimal solution for organizing space
By the way, such a table can be retractable or folding. This is not difficult to implement from a technical point of view, and the space savings are simply colossal! In addition, this way the child will be taught to always clear the table after working on it, and this is a useful skill for the future.
Tabletop window sill options and models
The choice of countertop depends on the size of the room and the distribution of functional areas. It can be from wall to wall, corner or occupying a place strictly under the window. In the latter case, thick curtains are hung on each side or identical narrow cabinets are installed.
If the room is small, you can install a folding tabletop. Such transformers are suitable for insulated balconies and loggias where a workplace is equipped.
Fabric curtains will take up too much space. Therefore, the window above such a table must be covered with blinds or roller blinds.
Monolithic countertop
This option is suitable for any interior. To use every inch of space under the window, create a wall-to-wall countertop. The child will have a long table on which a computer, all notebooks and books will fit.
If there is some space between the window and the wall, use that too. Hang shelves here. In such an interior, curtains are not needed - a roller blind will be enough to protect from the sun.
If space allows, install a monolithic countertop from wall to wall. A teenager needs a large work surface in the room.
Window sill with retractable table top
For a small child's room, installing a tabletop with a retractable surface is an excellent solution. Its lower part easily rolls under the window sill, and there is more space in the room.
And when a child needs to study, he doesn’t have to think about where to place his books and notebooks. It will be enough to simply pull out the shelf.
Window sill with folding table
This window sill is another type of transformer.
A folding table does not clutter up the space, and the child has a comfortable place to study.
Furniture can be made from wood, MDF or chipboard, since glass or stone are unlikely to be suitable for this project. A folding wooden table will fit into any interior.
Table with cabinets
Make the most of all the space around the window. If the tabletop is monolithic, then drawers can be placed under it. Even if they are small, you can hide a lot of little things in them.
Be sure to use part of the wall between the window and the corner. A cabinet with open shelves or doors will fit here. Additional storage systems are always needed in the nursery.
Use all the space around the window rationally - install cabinets on the right and left. Storage systems are always needed in a nursery.
Materials for manufacturing window sill tables
What are window sill tables made of? Essentially made from the same materials as regular desks for a child's room. The most popular are natural wood, chipboard and other strong, durable and inexpensive materials.
Each of the materials used has its own advantages and disadvantages
Natural wood
The only downside is that it is an expensive option. The rest is only positives. Natural wood cannot be compared with anything in terms of quality and durability. Taking into account the fact that the table is always near the window and in the sun, it must be of high quality so as not to “fade” under the sun’s rays. So natural wood with a good finish is ideal.
It is necessary to make holes in the tabletop for air circulation
Besides, it's so beautiful! No synthetic material can compare with the texture and shade of natural wood.
Wood is environmentally friendly and safe for children. The wood is strong and wear-resistant, the table will last a long time and will be passed on to a new generation. Overall, a great option!
Chipboard
Chipboard is a mega-popular material for making furniture. Because this material is much cheaper than natural wood, but it is quite lightweight, practical, strong and reliable. Chipboard tables have a beautiful finish and look exactly like furniture made from real wood.
A table top made of chipboard can be covered with a durable film to imitate stone or wood
A chipboard table can be bright, not necessarily a wood shade. For example, for a bright room you can choose a yellow, pink or bright blue table, it will be beautiful. And the child will like it! Or vice versa - a white table for a bright and delicate children's room.
A compact version of a window sill table in a modern style
And others
In addition to natural wood and chipboard, plastic and polymer materials are used to make desks and window sills. This is a cheaper material, but it does not have the same quality and durability as furniture made from wood and chipboard. When choosing plastic furniture, you should remember that some types of plastic are toxic and harmful to children, so you should only buy from a good manufacturer.
PVC countertops are inexpensive materials. Despite this, the design lasts quite a long time and creates a single composition with the slopes of the plastic window
In addition to chipboard, MDF board is used. It is heavier, but at the same time very strong and durable, and thanks to the beautiful coating the table will be bright and modern. MDF is stronger than chipboard, this material is more durable, and such furniture can also be disassembled and reassembled (re-screwing screws), which cannot be said about furniture made from chipboard. But the price of MDF is much higher.
MDF-based countertops have an unlimited number of color and texture options
Design and colors
When choosing furnishings for a nursery, you should take into account many things: the gender of the children, their taste preferences, interests and hobbies. Designers recommend abandoning dark and depressing shades that narrow the space. From the child’s favorite flowers, the most cheerful and positive ones are chosen, setting the mood for a fruitful pastime.
Design ideas for boys
Future men try to imitate their older relatives and choose “masculine” colors: blue, woody shades, white, silver, green, purple, black. But it would be a mistake to leave the nursery decor without truly bright colors. They can be used for individual elements of the work area by the window - chairs, curtains, floor decoration, walls, etc.
Workplace for a future athlete
It’s good when there is something in the interior that reminds you of the child’s main hobby.
Design ideas for girls
Girlish colors are very diverse: the whole pastel range, as well as pink, red, white, metallic and many others. When choosing colors, it is worth remembering that the nursery environment should set the mood for work and not distract from the educational process. Therefore, it is worth abandoning the dominance of too bright colors, giving preference to subdued shades. In this case, the interior can be easily changed with the help of new bright accessories.
Bright and very cozy
Design for two children
To design a work area for two children, you will first have to come to a compromise. In such situations, designers recommend starting from the opposite. When too much controversy arises when choosing a color scheme, you should exclude those shades that both equally dislike. The best solution will be somewhere in the middle. Of the remaining colors, preference is given to the calmest one.
Discreet work area design for two boys
In finishing it is necessary to maintain symmetry. It is not only aesthetically pleasing, but also functional. There is no reason to argue about whose workplace is on the right and whose is on the left.
The most successful layout options for two:
- Corner layout. The work area covers the area near the window and the adjacent wall. Children will have to sit sideways to each other. This solution is most suitable for small rooms with a short wall with a window opening, when the beds in the remaining space are installed in the form of a bunk structure.
- The tabletop is shaped like the letter “P”. This is a great layout for large rooms, where work desks are located along opposite walls, and there is an area for joint creativity near the window.
- If space allows, then you can place two tables next to the wall near the window, leaving a free passage between them. In this case, the children will sit with their backs to the front door.
Photos of a children's interior with a table-window sill
Numerous photographs of ready-made solutions will make your choice easier, inspire and help you make a decision. See how designers decorate children's rooms using window sill tables in a variety of solutions: in small and large rooms, in bright and delicate designs. These examples will help you find your original version!
Table flowing into the sill of a bay window in a stylish teenage boy's room
A wooden tabletop is a universal solution that will fit into any interior style.
The most durable table will be made of hard wood, such as oak.
The width of the tabletop is selected based on individual preferences and the availability of free space
The design of the window above the workplace is selected depending on the overall interior. Practical roller blinds are a good choice
Remember that the main thing is not the high cost, but the safety of the material, the simplicity and functionality of the design, and convenience for the child. And by using your imagination, you can create a unique interior solution, and even the smallest children’s room will be comfortable, cozy and uniquely beautiful!
Design of a window sill-tabletop in the interior
The tabletop should fit harmoniously into the interior, be combined with all the other furniture, and not look like a wide board hastily nailed to the wall.
For classic children's rooms, tabletops made of wood or imitating it are suitable. Even in a small room they can be dark - in the light of the window they will not seem large.
Glass countertops are installed in small spaces when they want to make the room as airy as possible. Metal structures are suitable for interiors in a modern style. The stone fits well into rooms in classic, Provence and shabby chic styles.
Installing a countertop instead of a window sill allows you to save space and plan your space wisely. This is an ideal option for a nursery, because the child’s feet are always warm (near the radiator), and daylight falls on the notebooks and keyboard. Use the space in your teenager's room wisely!
Window sill table in a children's room: 50 photos
Window
-37 votes
+
Vote for!
—
Vote against!
Any repair work in the house requires material costs for the owner. Buying the necessary material and paying for the installation and work of a specialist is not always and not everyone can afford. In such cases, some types of work can be done independently. If a person has minimal skills, then he will be able to create a window sill with his own hands.
Table of contents:
- Types of window sills and why they are needed in the house
- DIY wooden window sill
- DIY concrete window sill
- The process of preparing concrete mortar for a window sill
- The final stages of work on a concrete window sill
- Features of a plastic window sill
- Installation of a plastic window sill
- Standard sizes of window sills and their advantages
Types of window sills and why they are needed in the house
Almost no window is complete without installing a window sill, which ensures safe drainage of accumulated condensation on the window during the cold season. The purpose of the window sill is not only purely protective, but also aesthetic. The main functions of the surface can be divided into three groups:
- protective;
- aesthetic;
- decorative
The decorative function of the window sill provides a gradual transition from the space inside and the walls themselves to the opening in the window. In addition, window sills are often used as shelves for indoor plants.
With the help of modern design solutions, different types of surfaces near the window are used as: a kitchen countertop, a bench for sitting, and simply as a shelf.
Window sills come in different types, since the materials for their production are very diverse:
- wooden;
- from natural stone;
- from artificial stone;
- Chipboard and MDF window sills;
- PVC, etc.
Varieties of window sills are also classified according to their composition. If the product consists of one component (wood, stone), then such window sills are called monomaterial. When the composition contains two or more components, such window sills are usually called composite.
The traditional material for the production of surfaces for windows is wood. To preserve the quality of the material for many years, the wood is treated with special oils, varnishes, and waxes. The most commonly used wood for window sills is pine. To save money, glued laminated timber is often used, which has good performance in production.
Natural materials are always expensive and not everyone can afford them on their family budget. But without taking into account the disadvantage of expensive cost, window sills made of natural stone are absolutely environmentally friendly and have a fairly good presentable appearance.
Often natural stone for the production of window sills is replaced with artificial material, which allows the product to be created at an affordable price. Window sills made of artificial stone look no worse than the original ones. In addition, the advantage of acrylic stone is considered to be complete resistance to moisture and various bacteria.
Window sills made from wood materials such as chipboard and MDF are characterized by excellent strength and moisture resistance. They are often coated with varnish, which adds shine to the product.
PVC window sills are famous for their good performance characteristics. This material is resistant to sunlight and moisture. In addition, PVC does not require special care. Thanks to the surface, which has no pores, microbes and bacteria do not accumulate on PVC.
DIY wooden window sill
Before you start work, you need to choose materials and methods for making a window sill with your own hands. Since wood materials are very popular, we will consider one of the options for making window sill boards from wood. As the craftsmen write, making a window sill structure yourself is not that difficult, the main thing is to strictly follow the work instructions and have basic skills in using tools. How to make and install a wooden window sill with your own hands will be discussed in more detail below in the article.
When choosing a board for work, you need to pay attention to the presence of knots and various defects. The selected wood must be well dried, and in no case should it be saturated with moisture. After all, the quality and suitability of the future window sill will depend on the chosen material. If the process does not use a whole board, but its pieces are joined by gluing. If you are making a window sill board for a kitchen window, experts recommend using a solid board, since the humidity in this room is always high.
| Classification of wooden window sills | |
| 1. According to the form | Straight and arched |
| 2. By size | Narrow, wide, large |
| 3. By color and texture | Light, dark, colored |
| 4. By manufacturing method | Made from solid wood or glued parts |
| 5. According to the surface treatment method | Milled, bridged, glued |
The starting point in working on a window sill with your own hands is considered to be a standard action - accurate measurements of the future design. It is recommended to make a detailed drawing for yourself, on which you carefully write down all the size data.
Next, using wood planes, we give the board the desired shapes. During processing, it is necessary to maintain exact proportions: the protrusion of the window sill should be approximately 6-8 cm, and the length should be 10-15 cm greater than the width of the opening.
In order to neutralize the void during the installation of the window sill, felt is attached to the bottom of the board. This material must be treated with an antiseptic solution. Next, the finished structure is inserted into the window frame and secured with screws or nails. To bring the window sill board to its ideal appearance, it is opened with varnish, this will protect the condition of the wood from external factors.
DIY concrete window sill
Such a material, like concrete, is considered an excellent, breathable material for making a window sill in the house with your own hands. The good performance qualities of this material make it easy to decorate structures made from it. It is easy to paint, finish and sand, making concrete a leader in window sill production. We will describe in detail below how to make a window sill with your own hands and what installation rules you need to follow.
The organic appearance of the future structure directly depends on the first stage - working on the drawings. In order for all stages of installing a window sill to be completed successfully with your own hands, it is necessary to take measurements on the following points:
- width of slopes;
- base length;
- distance between slopes;
- width of projections and overhang;
- window sill depth;
- length and thickness of the window sill.
During the work process, we will need the following necessary tools to install the window sill with our own hands:
- fasteners;
- Bulgarian;
- jigsaw;
- putty knife;
- construction vacuum cleaner;
- roulette;
- level;
- grinding machine and attachments for it, etc.
To produce a future window device, you will need a concrete solution, which is prepared from: M 500 cement, sand, a polymer-based plasticizer, pigment to create marble chips and decorative material. It is important to add all the ingredients gradually so that the solution does not turn out liquid.
You can create a shape for the future window sill using one of two methods. The first method involves preparing the window sill board separately in advance. The second method is to cast the structure in place. The second option is considered more convenient, as it allows you to create formwork much faster.
The process of preparing concrete mortar for a window sill
When working on a concrete window sill, the most important process is the preparation of the solution, on which the integrity and quality of the structure directly depends. If the consistency of the material does not meet the standard (it is too thick or vice versa), cracks will form on the surface during drying. For excellent adhesion of all components, a plasticizer is added to the solution. With its help, the concrete slurry will become flexible, which speeds up the work.
Sand and cement must be added to the solution in a 2:1 ratio. It is customary to add 50 grams of plasticizer for every kilogram of dry workpiece. The next step is to add pigment. His choice varies depending on the owner’s desire to get a specific color. Water is also added to the solution in an amount of 200 ml per kilogram of mixture. There is no need to prepare the solution in advance; it is prepared immediately before the tide of the window sill is cast.
The final stages of work on a concrete window sill
The penultimate stage in working on a concrete window sill is grinding the surface. It is carried out after the solution has completely dried. Using rough discs, it is necessary to remove all unevenness and roughness of the top. Then use grinding discs of 50 and 100 grit.
Finally, by polishing the surface is given the appearance of natural stone and a protective coating is applied.
Features of a plastic window sill
PVC products are also very popular in the construction industry. Plastic window sills are manufactured in production using a separate system, which includes several stages.
Various additives are combined with PVC powder, after which the mass becomes homogeneous using the homogenization method. Next, the plastic is calibrated and receives its true shape. During the process it is cooled and cut.
The features of a plastic window sill are due to the following characteristics:
1. PVC structures are durable and wear-resistant.
2. They look quite warm and presentable.
3. Another advantage of this material is the fact that plastic does not require additional processing.
Installation of a plastic window sill
Installation of a plastic window sill consists of several processes that require attentiveness, accuracy and endurance from the master. The structure can be installed using three methods.
1. Using foam. Using foam and a gun, the plastic plate is attached to the base under the window sill. If foam gets on the outer surface, it must be wiped off immediately, as it tends to dry quickly. If it so happens that the foam has dried, it can be removed using a special solvent.
2. Using staples. Metal brackets are fixed to the installation surface, onto which the window sill itself is placed. The disadvantage of this installation is its minimal strength.
3. Using brackets. This method is recommended for installing large and wide window sills. L-shaped plates (brackets) are firmly fixed under the window and reliably fix the window sill structure itself.
To successfully carry out all installation work, you must follow all do-it-yourself installation rules.
Standard sizes of window sills and their advantages
The main dimensions of plastic window sills vary: from 4 to 6 meters in length and from 10 cm to 1 m in width. The thickness of plastic products for this purpose is usually 2 cm.
For wooden window sills, the following figures are considered standard: width - from 15 cm to 1 m; length from 70 cm to 3 m. Wooden materials differ in their length, as they are veneered and jointed.
Following the detailed instructions, creating and installing a window sill with your own hands, as it turned out, is not at all difficult. What it will be like and from what material it will be up to each owner to decide individually. In your choice, be guided by the known advantages of each product.
PVC window sills can last faithfully for up to 25 years due to their durable surface. In addition, this material, in comparison with stone or wood, has a fairly low price.
Wooden window sills should be combined with wooden windows, so the entire window structure will look harmonious and expensive. Wood can last for many years only if it is properly treated with protective agents (varnishes, oils).
When producing a concrete window sill, do not forget to monitor the quality of the solution. And yet, if everything is done correctly, then this type of product will not be inferior in its beauty to window sills made of natural stone.
If you have any questions during the work, you can learn more about installing a wooden window sill by watching this video:
No. 1. Basic requirements for a window sill
The window sill performs several functions at once:
- decorative. Thanks to the use of modern materials, a window sill can become an interesting decoration of a room. Moreover, it allows you to organically connect the window, slopes, walls and the radiator located under the window, and, of course, serves as an additional place for placing flowers, accessories or storing necessary small items. There should not be a lot of them on the windowsill, so as not to clutter it and not block the path of light coming through the window. The window sill can become a work surface or dining table in the smallest kitchens;
- protection from cold . A window sill installed in accordance with all the rules is a barrier to cold street air and prevents heat leakage to the outside;
- correct heat distribution in the room. Even the protrusion of the window sill beyond the surface of the wall matters. Thanks to it, the flow of warm air from the battery does not immediately rise upward, but is directed into the room. However, you should also not make the window sill too wide, otherwise you can completely isolate the window and adjacent sections of the walls from warm air and cause condensation to appear on the glass and slopes.
In order to ensure proper circulation of warm air and not make it difficult to move around the window sill, the latter should protrude beyond the level of the walls by no more than 5-6 cm , and when calculating, it is worth taking into account the future finishing, if it does not already exist. The window sill should not cover the radiator more than halfway, otherwise it will be necessary to ensure there are holes to facilitate air convection. As for the length, the window sill can protrude beyond the edges of the slopes by 1-8 cm, but no more.
When choosing a window sill, you should remember that it must meet certain requirements in order to last more or less a long time and cope with all the loads placed on it. So, the window sill must have the following performance characteristics :
- durability , since heavy flower pots or people can sit on the product. If heavy loads are expected, choose stone or wooden window sills more than 2 cm thick;
- resistance to mechanical stress , sunlight and detergents;
- moisture resistance, if the window sill is selected for the kitchen, bathroom, swimming pool and other rooms with high humidity.