What crafts can you make?
The cones have a unique and beautiful, complex shape; they come in different sizes, which allows you to make a variety of figurines and home decorations from them. Products made from this natural material retain the aroma of a coniferous forest for a long time, and you can use them to create a cozy corner of nature in your room.
Examples of crafts:
- wall decorations will fit perfectly into your home interior;
- New Year's toys will delight family members for the winter holiday;
- You can also make fantasy figurines of animals and small birds.
Below is a step-by-step guide for making these DIY crafts.
New Year's wreaths made of pine cones
A wreath of pine cones can decorate not only entrance doors. You can simply hang it on the wall in your room or even outside. This wreath will look good anywhere. You can read how to create a base for a wreath in the article “10 ways to make a base for a wreath with your own hands.”
Christmas trees and decorations
Decorating the Christmas tree for the New Year is a good old tradition. On the eve of the winter holiday, you and your children can make and decorate Christmas trees of various shapes and sizes with your own hands.
Little Christmas tree
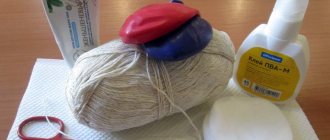
To make a small Christmas tree you will need the following materials:
- a large spruce or pine cone;
- paints or nail polishes, green and silver shades;
- small beads or seed beads, about 30 pieces;
- transparent glue;
- cotton wool and cardboard.
From thick cardboard we cut out a circle twice the diameter of the workpiece.
Glue the future Christmas tree into the center of the circle. We paint the entire workpiece green. We cover the tips of the “legs” with silver paint to create the effect of sparkling frost. We decorate the Christmas tree with multi-colored beads, which we glue to the legs with transparent glue. Lubricate the cardboard base with glue and place cotton wool snow under the Christmas tree. Miniature Christmas trees can also be decorated with small bows made from ribbons or plasticine, from which you can mold a star onto the top. Such a Christmas tree can be planted in a miniature pot, or you can make a box from colored cardboard and paint it with paints or felt-tip pens.
Table Christmas tree
In order to make a tabletop Christmas tree you will need the following materials:
- cones of different sizes and shapes;
- Super glue;
- cardboard or foam for the base;
- multi-colored paints, varnishes and decorations.
For a medium-sized Christmas tree you will need a cone - a base.
It can be rolled and glued from cardboard and tightly stuffed with paper, or you can make such a cone out of foam plastic. To ensure stability of the structure, the base for the Christmas tree can be glued to a cardboard or plywood circle larger in diameter than the lower part of the cone. When the base for the Christmas tree is ready, you can start gluing the parts onto it in circles, from bottom to top. At the bottom of the craft, you can place larger parts; towards the top, their size can be gradually reduced. After the product has completely dried, it is decorated with cotton wool, coated with silver varnish, and beads or garlands are hung. You can glue multi-colored wool balls to the paws.
An interesting version of the Christmas tree will turn out if, instead of a whole row of cones, you glue walnuts in shells, previously coated with golden paint, to the base.
Christmas wreath
To make a beautiful winter wreath, you need to choose a base to which the parts will be attached. You can use foam or thick cardboard as a frame.
Craft materials:
- round pine and elongated spruce cones;
- floral wire;
- white or silver paint or varnish;
- Super glue;
- red plasticine or beads of the same shade.
Before attaching the parts to the base, they need to be painted. To create a “snowy” effect, neat strokes of white or silver paint are made on the tips of the scales. The parts are wrapped with thin wire (long ones can be wrapped in two places), and then the ends of the wire are stuck into the base. Long blanks are placed in a circle, and round ones can be attached upright in the form of roses.
Bright red berries stick singly or in clusters between the legs. If beads are used, they can be pre-strung on a thread and wrapped around the wreath with a bright ribbon.
Sparkling garland
An original garland made from natural materials will decorate the room for the New Year holiday; the product can be easily made to any required size.
For decoration you will need:
- opened clean buds;
- a strong long ribbon and short thin ribbons or laces to match it;
- wood varnish;
- glitter or finely chopped tinsel or foil (you can chop colorful rain);
- hooks - self-tapping screws;
- tools: knife, pliers.
Using a sharp knife, cut off the “tails” of the fruit and screw in the screws; if you can’t do it by hand, you should use pliers. Dip each piece completely into varnish, wait until the excess drips off, and then sprinkle with glitter or tinsel. Allow the pieces to dry thoroughly by hanging them on the hooks. Make holes in the strong tape in the places where the decorations will hang. You can tie a small bow made of beautiful braid or cord to the hook.
Garlands of pine cones
Garlands of fir and pine cones will help you decorate a fireplace, window or mirror. You just need to fasten the cones on a rope, decorate everything with tinsel and the New Year's garland is ready.
Simple crafts
As a rule, when making various animals or figurines, the cone acts as the body or base of the product. The figurine acquires a recognizable shape if parts from other pliable materials are attached to the base: plasticine, polymer clay or salt dough. Acorns and feathers may be suitable as additional attributes; you can also use cardboard or fabric to decorate the craft.
Hedgehog
Craft materials:
- cones, preferably round in shape, the more “disheveled” the detail, the more “prickly” the hedgehog will be;
- plasticine, you can make a whole family of hedgehogs from plasticine of brown, beige, yellow or even orange, gray is also suitable, for the tip of the nose you will need a little black plasticine;
- You can purchase doll eyes in advance at a craft store, or stock up on black beads.
To create a muzzle, you first need to roll the ball, and then pull it out on one side, bending the nose up.
You need to stick a black plasticine ball on the tip of the nose, and attach prepared eyes to the muzzle. The muzzle is molded to the sharp end of the workpiece. The paws are formed from four 2 cm long sausages, the sausages are folded over and a foot is formed. You can sculpt cute round ears for a hedgehog and attach them on the border between the body and the muzzle, and place red round berries from plasticine on top of the “needles” or glue beads. To make the hedgehog smile, you can draw an arc under the nose with a pencil, pressing on the plasticine.
Squirrel
You will get a beautiful squirrel if you manage to select three bumps of different sizes: one large one for the body, elongated and “fluffy” for the tail, and a small round one for the muzzle.
To make this craft you will need materials:
- natural materials of specified sizes;
- red and black plasticine;
- super glue (if you don’t have it, you can fasten the parts together with plasticine);
- beads for eyes.
The squirrel's orange muzzle is made in the same way as for a hedgehog. You need to attach sharp ears to the top of your head, on the tips of which you can place little black balls, it will look like tassels. The head is glued to the body with glue or to a piece of plasticine. The tail is attached in the same way. The squirrel's front and hind legs are formed from four small sausages.
The tail can also be sculpted from plasticine. To form a round head, you can cut off wide parts from two cones and then glue them together. If the front legs are made longer, then a hazelnut can be secured between them. A fluffy tail for a squirrel can be made from two or three thread pompoms sewn together.
Fawn
The main characteristic feature of a deer is its antlers. To make crafts, you can pick up small branched twigs in the forest or take twigs from grapes.
Craft materials:
- a fir cone or two, spruce produces elongated fruits, from which the body and neck of the fawn will be made; if no suitable fruits are found, then the neck can be made from a shortened toothpick;
- acorn;
- a little black plasticine for the nose and eyes;
- 2 branches for horns and 4 straight branches for legs (can be replaced with toothpicks);
- Super glue.
A small bump-neck is glued perpendicularly to the blunt end of a large long piece, also with a blunt end.
An acorn is glued to the neck. The fawn's head is decorated with horns made of twigs, round black eyes and a nose made of plasticine are attached. Legs - twigs or toothpicks - are glued to the body. To stabilize the figurine, you can attach balls to the ends of the black plasticine legs to create paws. If there is no blank for the neck, then a toothpick is broken and glued to the body, and an acorn - the head - is glued to it. The neck can also be sculpted from brown plasticine. A beautiful figure will be obtained if the fawn’s head is thrown back a little and the antlers do not stick straight up, but slightly back. You can attach a short tail made of a twig or black plasticine to the body.
New Year's pendants from pine cones
You can decorate chandeliers, chairs with a New Year's pendant made of pine cones (read more in the article “New Year's decor - how to decorate chairs with your own hands”), mirrors and just walls. You can create a pendant from single cones, or you can make a large ball of cones. As a base, you can take a foam ball (sold in craft stores), or you can make it yourself. For a master class on making a base ball, read the article “Making the base for a flower ball.”
Complex crafts
Complex products made from cones will look original. A basket, bouquet or candlestick can be a wonderful decorative gift.
Basket
Building a basket consists of three main stages: creating the sides, tying the bottom to them and making a handle. The product requires 55-60 cones: 8-10 large pieces for the bottom of the basket, about 40 medium ones for the sides, the rest of the small fruits will go to the handle.
Materials and tools:
- open cones;
- metal wire;
- fishing line;
- artificial greenery and flowers;
- wire cutters;
- pliers;
- scissors.
First, the sides of the basket are formed. The first bottom row of 12 pieces is held together with wire for strength. Each cone should be wrapped once and then the adjacent one should be attached to it. When all the parts are strung, fasten the ends of the wire to form a circle. The next row of the side is tied with fishing line, which is also tied to the bottom row, and already consists of 13 parts, if it is necessary for the basket to expand upward. The third circle of 14 blanks is also tied with fishing line.
Having turned the resulting side upside down, large fruits are tied to it with a fishing line at an angle of 450 to gradually fill the bottom. The largest cone is placed in the center of the bottom. It is better to try on each piece before tying it to understand how it will look.
The parts for the handle are fastened with wire, the length and shape of which depends on the imagination of the craftsman. When forming the handle, you need to leave free ends of the wire on both sides to attach the part to the basket.
The resulting product can be decorated with artificial green leaves, vines and flowers that will hide the wire and fishing line.
Bouquet with sparkles
Flowers made from natural material look unique and original; the beautiful shape of the cone resembles a rose.
To make a whole bouquet you will need the following items:
- open cones, preferably small and round, maybe pine;
- paints of different colors, you can use a silver or gold shade, you will also need green paint for the stems;
- straight branches for making stems;
- green paper for leaves;
- glitter;
- hot glue gun.
First you need to choose a vase for the future bouquet; branches for the stems are cut according to its size. Next, the branches are painted green and future flowers are painted in any shades that suit the interior. In order for the parts to be completely painted, it is better to dip them completely into a container of paint. While the paint has not dried, the flowers are lightly sprinkled with glitter. Instead of colored paints, you can use clear wood varnish, to which glitter also sticks well.
The dried parts of the bouquet are glued together. One at a time, two large green sheets of colored paper are glued to the branches. You can tie a bow of festive braid under each flower.
Candlestick
An original candlestick made of pine cones will add romance to a dinner for two, and if the product is painted with shiny colors, it will become a festive decoration for New Year's Eve.
Materials:
- cardboard, preferably thick;
- cones;
- walnut halves;
- spray can with golden paint;
- beads of golden or mother-of-pearl and blue color;
- wire;
- glue moment and glue gun;
- scissors;
- compass.
Mark the center of the future candlestick on the cardboard, draw a circle with a diameter of 20 cm with a compass, and in it there is another circle with a diameter of 10 cm. Cut the blank with scissors. Glue the fruits in a circle with the sharp ends facing outward; it is better to use a glue gun. Glue halves of walnut shells between them in the outer circle.
After placing the product on a newspaper, cover it with golden spray paint and leave until completely dry. Using glue, beads are glued onto the workpiece; their number, shade and location depend on the imagination of the craftsman. You can also glue beads onto the shells; they can be of smaller sizes that match the overall tone.
Bend the wire into a circle with a diameter of 10 cm, wrap the frame with beads. Place the resulting decoration in the center of the candlestick and glue it. A candle in a glass is placed in the resulting candlestick. To add a New Year's touch, you can place an electric Christmas tree garland on the product.
Color combinations
Yes, and you shouldn’t forget about color combinations, so that your composition of pine cones does not look like a cheap handicraft. I don’t know my way around the color wheel myself, but I refer to the useful sign below as a guide:
Well, a few combinations of the cones themselves.
I think that with the decor that we prepared today, the holiday will become especially beautiful and elegant! Did you like the ideas? Share them with your friends and subscribe to other articles.
Preparing pine cones for crafts, useful tips
In order for products made from natural coniferous fruits to be of high quality and preserved for a long time, there are several methods for preparing natural material before work.
- To prevent the closed cones from opening when drying, they need to be freshly dipped into a liquid solution of wood glue, held with tweezers, and left on the oilcloth for 10 minutes, then turned over. The material will dry completely in three days.
- Opened fruits can be “closed” again by holding them in water.
- To give the workpiece an unusual shape, it can be welded. When cooked, it softens and can be bent. Having given the desired shape, the part should be tied or secured with adhesive tape. After drying, the resulting product must be dipped in liquid glue.
- A beautiful light woody color is obtained by soaking the buds in bleach and water (1:1 ratio). After bleaching, rinse the workpieces and dry thoroughly.
- Before painting, coniferous blanks should be soaked for 30 minutes in warm water with dishwashing detergent. This will get rid of dirt, and the paint or varnish will lay down in an even layer.
The creative process allows you to express the individuality of the master. High-quality products retain their original appearance for a long time and decorate the interior, creating a cozy atmosphere. Working with such natural material as pine cones is distinguished by a huge number of options for their design. Coniferous fruits from pine, spruce, fir or larch come in completely different sizes and shapes, which allows you to create unique compositions from them.
Products can be supplemented with various elements, such as acorns, coconut shells or halves of walnut shells, branches, cinnamon sticks, coffee beans, hazelnuts, dried flowers and leaves, decorative stones, feathers.
Video description
About decorating ideas using pine cones in the following video:
Home decor
Decor made from pine cones for the home does not fit into every style, but it will add coziness to many modern trends. Outside of the winter holidays, your home interior can be diversified with interesting designer items:
- Candlestick. Use a glass or small glass vase. The candle is placed in the center, along the edges there are several cones without any decoration. Simple, stylish and all-season.
Grace in simplicity Source 1.bp.blogspot
- Decorative jar. Choose a jar of unusual shape and fill it with pine cones, painted in the color palette of the room - white, black, gray. A container of a more original shape (for example, a vintage candy bowl with a lid) can be filled with pine cones painted in an acid color. Option: the jar is filled to a third with pine cones, a skein of garland is placed on top, which is powered by a battery hidden at the bottom.
For owners of glass containers Source i.pinimg
- If you are lucky enough to get a particularly large specimen of a cone (for example, from a Coulter pine), no additional decor is required. Designers prefer to use such specimens in their natural form - natural motifs are now in trend.
- Frame. Small cones of cypress or larch can be used to frame a photograph or a child’s drawing, and hang the finished composition on a ribbon. The craft is left in its natural form, or painted in a suitable color - it will be cute and original.
Particularly large specimens Source media.angieslist
- Decor in a pot. The pot is filled with moss (or, for example, straw). Cones are laid out in rows on top and secured with glue for reliability. The structure can be given any shape - spherical, elongated, cone-shaped.
Simple and elegant Source xn--80afdb0cbapl
Candlesticks made of pine cones
One of the New Year's attributes has always been candles. You can combine candles and cones in one original product - a candlestick. There are a lot of options, choose the one you like. The cones can be painted white, gold or silver. Add some New Year's tinsel and a beautiful candlestick will decorate your room on New Year's Eve.
New Year's decor from pine cones: chic ideas
With the New Year holidays approaching, I want to decorate my apartment in a special way, but at no extra cost. Having a few ideal ideas in your head, you can create real masterpieces without ruining the family budget.
To create beautiful decorative elements for New Year's compositions, you can use natural materials taken from nature. The most suitable ones will be cones in all their diversity.
Candlestick. Decorated with pine cones, pine branches, cinnamon sticks and bright berries it will look great on a holiday table.
A Christmas wreath made only from pine cones pre-painted white is also gorgeous. Nothing more is needed!
The cones themselves will look great on the Christmas tree, just attach a canvas bow and loop. However, decorated with bright pompoms they look simply amazing.
If you can make New Year's toys from pine cones, then garlands, of course. Spruce, pine cones, large and small - all will be good.
You will be surprised, but even with some effort you can make a Christmas tree from pine cones collected in the forest. You just can’t do it without solid support.
Snowflake pendants, crafts that turn into cute animal toys - everything will decorate your home for the holiday.
Have you tried decorating a sconce or chandelier with pine cones? Look how great it can be!
If the cones are bleached, the decorations will take on an even more fabulous and festive look.
The cones will become an integral element for decorating a Christmas wreath made from twigs.
Imagine and turn your thoughts into reality. Use pine cone scales to create original decorations. Make a basket out of pine cones and fill it. Or place the cones themselves in stylized baskets.
Even the most ordinary jar will sparkle in a new way if you decorate it with pine cones. It will turn out to be just a super candlestick!
The simplest combinations and manipulations with pine cones allow you to create unusual New Year's toys for the holiday.
If desired, you can create more complex compositions. Take ideas from our selection and get to work!
Don't forget to involve your child in decorating your home. Go with him to the forest for pine cones, look at the illustrations, choose the ones you like and start creating. The child will be happy to help with this. You will see how delighted your guests will be with your collaboration.
Simple natural garland of pine cones
A natural, simple garland of pine cones will look great without gilding, sparkles or bright colors. This natural decor is especially suitable for interiors decorated in eco, Scandinavian, country or loft style. Minimum materials and effort! This garland can be made in literally ten to twenty minutes, depending on the length. All you need is pine cones, string, a ruler and glue. The authors also used masking tape, on which they marked the distance between the cones.
Colored garlands of pine cones
The pine cones can be painted any color using spray paint from a can. We recommend that you first apply a layer of white paint, then for a bright, rich color 1-2 layers of colored paint will be enough, otherwise, to achieve the desired shade you may need to apply 4-5 layers of spray paint.
Once the paint is completely dry, apply hot glue under the top row of scales at the base of the pine cone. Then stretch the rope in this place and glue the pine cone. At equal distances, glue the remaining cones in the same way.