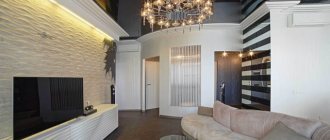
The hallway is the hallmark of the apartment. When designing it, it is worth using high-quality materials and modern technologies.
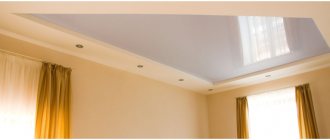
Stretch ceilings in the hallway allow you to create an attractive appearance and install the necessary lighting.
In such a design, the room will become a real highlight of the entire apartment, emphasizing the status of its owners.
Features of the room
The hallway is the first room a person enters on the way to a house or apartment.
When creating a suspended ceiling design for a hallway, you need to pay attention to the following features of the room:
- small dimensions;
- neutrality of the style used;
- complexity of the ceiling configuration, the presence of corners and turns.
These features encourage the installation of a stretch ceiling. It is this design that will allow you to create the necessary interior in a modern style.
The advantages of plasterboard suspended ceilings for the hallway: they are obvious
Someone might argue, what difference does it make, and why is a suspended plasterboard ceiling for a hallway a higher priority?
A plasterboard ceiling will not take away almost anything from the height of the mentioned room.
Even a small hallway (in the world - a corridor) can become optically higher and wider - it all depends on the proper installation of the ceiling, and a plasterboard ceiling is a prime example of this.
Advantages:
- Simple ceiling design compared to other types of suspended ceilings;
- Under the suspended ceiling you can hide electrical wiring for various communications;
- Low price for the drywall itself;
- Inexpensive components;
- Easy installation;
- Possibility of painting in absolutely any color, including the possibility of computer paint selection;
- Possibility of installing lamps of various types and designs;
- The cost of a suspended plasterboard ceiling is much cheaper than, say, the same perfectly smooth concrete ceiling;
- Cleanliness of the work performed: if the ceiling is leveled with plaster or putty, then in the end it will be dirty not only in your apartment, but also in the entrance, which will not give you a rating among your neighbors;
- Wet plaster will require considerable time, compared to drywall, due to the numerous layers, and therefore their drying;
- Possibility of installing a multi-level ceiling.
As you can see, the advantages that plasterboard ceilings have over many other types of ceiling finishing are more than enough.
Glossy surface
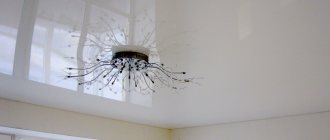
Glossy stretch ceilings in the hallway are installed in a limited space.
Polyethylene film up to 2 meters wide is used. It is important to consider some features:- it is advisable to use light colors without relief or images;
- you should choose the right lighting with the effect of scattering rays;
- It is allowed to create contrast by combining light colors with red or black.
Recommendations from the designer
- Lamps for the hallway - tips for choosing, lighting calculations and a review of the most interesting ceiling structures (85 photos)
- Sliding wardrobe in the hallway - built-in models, modern design and features of using built-in wardrobes (120 photos and videos)
Table in the hallway: 110 photos of examples of beautiful design and tips for choosing the optimal table size
It is necessary to achieve a reflective effect from a glossy canvas. For this purpose, high-quality materials from trusted manufacturers are used.
Suspended plasterboard ceilings: do it yourself
A suspended ceiling allows you to radically change the design of your apartment.
To understand what you want to do in the hallway, you should look at photo and video materials of the appropriate nature, where you can easily find those beautiful ceilings that you will like. Look for interesting ideas here: .
The suspended ceiling does not have a complex design, but, nevertheless, without knowing for sure how to properly install a suspended ceiling made of plasterboard, you should not undertake its installation without first familiarizing yourself with the relevant materials covering this topic in detail.
So, step by step:
- First of all, you need to prepare high-quality components. Practice shows that the best option is Knauf products. To be consistent, it is advisable to use drywall from the same company.
For an overview of the types of gypsum board sheets from this manufacturer, see here:.
- For high-quality marking, a hydraulic level is highly recommended. If there is a laser level, then, of course, preference is given to the latter. You can, of course, use a regular bubble level, but then marking the perimeter of the room will slow down significantly.
- Using a hydraulic level, we mark the corners, and then connect them using a cord. The process is called beating. We make markings based on the lowest angle.
- We retreat 5-8cm, depending on whether we are planning built-in lamps or not.
- Now we attach the guide profiles to the walls. To do this, the profiles are applied to the wall with the bottom part according to the existing markings. Using a marker or pencil, we mark future drilling locations in the wall through the perforation holes.
- The profile is fixed to the wall with impact dowels.
- Next, the axes of the main profiles are marked. Profiles, as a rule, are located transversely. The pitch of the profiles is about 40 cm.
- With this step of the main profiles, the need for load-bearing ones arises only at the transverse joints. Their step is 2.5 m. The pitch of the suspensions will thus be 50cm. The first row will be located at a distance of 25 cm from the wall.
- The suspension mount is marked with a marker. The suspension is applied to the ceiling and markings are made for the anchors. For one suspension you need at least two of them.
- We attach the hangers. We pre-glue the sealing tape.
- Next, the main profiles are installed. Fastenings should begin from the corners of the room. The process is controlled by a two-meter level.
- At the places where the profiles join, we install so-called crabs, securing them with self-tapping screws.
- The supporting profiles are cut, and then we attach them to the crabs, again, fixing them with self-tapping screws.
- We sew on drywall.
- We seal the seams using putty. In addition, of course, the gaps between the wall and the ceiling should be sealed. We also putty the recesses in the places where the screws are screwed in. You can use a special tape.
- We putty the sheets of drywall.
See the nuances of the process in our next article:.
- Let's paint.
It is best to use 9.5mm thick plasterboard sheets, which will not sag if the hallway is small.
Matte coating
In textile design, a matte stretch ceiling is used in the hallway. This material reaches a width of up to 5 meters. It has its own differences:
- allows you to create a ceiling in a classic style;
- it reflects light well and distributes it evenly throughout the room;
- provides the opportunity to paint the surface in the desired color, or apply an appropriate design.
This coating is characterized by increased strength and durability.
Lighting
The electrical wiring diagram for lamps and switches is developed before the start of repairs. To prevent the hallway from looking gloomy, there should be a sufficient number of lighting fixtures.
It is important to remember that many materials, for example PVC, are afraid of high temperatures. Therefore, only lamps that do not heat up during operation can be used in such designs.
Spotlights are an excellent option for suspended ceilings. They have low voltage and therefore are connected to the network via a transformer. A suspended structure will allow you to hide all the equipment.
More information about choosing lighting fixtures is described in the video.
Narrow room
It is advisable to make a stretch ceiling in a narrow hallway in the form of a structure with several levels. This solution will provide some advantages:
- will allow you to divide the room into different zones;
- will hide engineering communications;
- will create an original design using various lighting elements.
This design will visually change the height of the ceiling and visually expand the room. It will add the correct geometry to the room and improve the aesthetic design of the room.
Recommendations from the designer
- Mirror in the hallway - 85 photos of the best modern ideas for use in hallway interior design
Built-in wardrobe in the hallway - 100 photos of examples of modern design and placement ideas
- Decorating the hallway with stone - interesting ideas, current combinations and new options for using decorative stone (95 photos)
Engineering solutions
Complex solutions include suspended structures. For rooms with high ceilings and large areas, plasterboard construction, slatted systems or suspended ceilings will be very effective. When your hallway height is 250 cm or higher, and the corridor area exceeds 10-12 m2, tension, slatted structures and plasterboard ceilings look very good.
Such systems allow you to achieve a high level of design in the hallway. Due to the frame of the suspension system, it becomes possible to saturate the hallway space with additional lighting sources. Decorative elements in this case are lamps and multi-level ceilings.
Plasterboard ceilings are always fashionable, stylish and beautiful. Structures made from these materials are durable and easy to maintain. Slat ceilings have similar properties and characteristics. Plasterboard structures, like slatted ceilings, have high aesthetics.
Note: it is important to use moisture-resistant plasterboard for finishing ceilings in a city apartment, which can withstand unauthorized flooding.
A wide palette of colors, varied textures of finishing materials and installation methods allow you to create original types of finishes using suspended ceiling structures. The same applies to plastic ceilings and tension structures, although the latter are considered superfluous for corridors.
Just a note: it is recommended to use closed slatted and plastic ceilings. Such surfaces are very convenient for cleaning and cleaning.
Backlight
Often there is no natural light in the hallway. In this regard, illumination of suspended ceilings in the hallway is of exceptional importance.
When producing it, you must adhere to the following rules:
- it is important to use energy-saving LED lamps with a power of up to 35 W;
- when the stretch ceiling is heated to a temperature of +70°C, they deform; this is important to take into account when choosing lamps;
- It is not recommended to install chandeliers with shades pointing upward.
Spotlights installed in the ceiling are well suited. They do not heat up and allow you to create various combinations with diffused light.
The use of faceted crystal lamps will create a festive atmosphere in the room and emphasize the luxury of the apartment’s interior.
Color solutions
The color of the ceiling in the corridor is selected in accordance with the overall interior design. A competent choice of shade will correct the shortcomings of the room. Experts recommend:
- Choose cool tones to optically expand and stretch the room.
- Use warm shades to create a cozy, inviting atmosphere.
- Use materials of several textures and colors at once to create an unusual design.
- Do not apply large drawings to the ceiling in a small corridor. Visually they will make it much lower.
To prevent the ceiling from looking overloaded, there should not be too many details and color accents. Otherwise, the atmosphere in the room will be oppressive.
Choice of colors
The color of the stretch ceiling in the hallway affects the overall composition. Possible design options to consider:
- the combination of white gloss and white walls will visually expand the interior space;
- when installing a ceiling with several levels, a dark center with light edges goes well;
- interior lighting looks great with a translucent ceiling;
- black gloss will add mystery to the design of the room.
The choice of canvas is made before installation of the structure. For proper design, it is necessary to calculate the placement of lighting elements in advance.
We looked at various design options for a stretch ceiling. White stretch ceilings in the hallway allow you to visually expand the room and create a neutral atmosphere. They smooth out the violation of the geometric proportions of the room and add home comfort to it.
Multi-level ceilings
The multi-level design of plasterboard ceilings in the hallway looks very impressive. Various ornaments, stucco molding, gypsum slabs, and complex waves flowing from one level to another are allowed here.
When drawing up a design project, a huge number of different ways to design multi-level ceilings are offered:
- Neon lights . It looks especially luxurious on such complex structures. Using lighting, you can create the appearance of a ceiling floating in the air; you get the feeling that the lower levels are not attached to the others and are simply frozen at a height.
- Texture . The combination of various contrasting textures - gloss with a matte surface, smooth and grainy textures - helps to achieve a stunning effect.
- Details . To decorate the ceiling, various small fragments are even cut out - leaves, birds or animals, etc. The use of such decor turns an ordinary hallway into a work of art.
- Styles . Multi-level ceilings can reflect any style of the hall. Vintage ceilings are especially popular now. Even in a photo gallery, this option catches the eye.
The ceiling covering in the hallway can become a real masterpiece, provided that you have a good imagination and a competent design project. A well-executed idea will give you a great mood and a comfortable atmosphere from the first minutes of being in the apartment.
Gallery of multi-level ceilings:
Photo of suspended ceilings in the hallway
Read here! Shoe rack in the hallway: varieties, selection criteria and features of using an interior element (95 photos)
Please repost
1+
