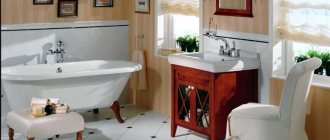
Furniture and interior items
-34 votes + Upvote!
- Vote against! All modern kitchen sets include wall cabinets. They save space and have good capacity. Located at eye level, such cabinets are very convenient to use and are always filled with a large number of things, creating a serious load on the hanging mechanisms. Therefore, it is very important to make reliable and high-quality fastening of the cabinet to the wall.
Contents:
- Selecting the height of the cabinet
- Existing cabinet hanging mechanisms
- Mounting strip
- Furniture hinges
- Design of the rear wall of the wall cabinet
- How to Attach a Cabinet to a Wall Using a Mounting Strip
- Preparatory work
- Tools
- How to fix a cabinet to the wall - step-by-step instructions
Selecting the height of the cabinet
Before you start attaching wall cabinets to the wall, you need to choose the right height for hanging them. It is determined based on the main criterion - the height of the kitchen owner. On average, the distance is approximately 50-60 cm from the countertop to the bottom of the wall cabinets. According to GOST, this value is 45 cm.
In the case when it is necessary to place wall cabinets above a refrigerator or above a high oven, then the height of these items determines the required level of hanging of the cabinets.
Existing cabinet hanging mechanisms
The use of modern fastening fittings greatly simplifies the work associated with hanging kitchen cabinets. It allows you to eliminate minor errors in marking and increases the strength of the entire structure. In this case, very little effort is required, and all the work can be done independently, without anyone’s help. To attach the cabinet to the wall, a specially prepared rail and a device called a hinge are mainly used.
The hinge is equipped with a hook, which is attached from the inside to the side wall of the cabinet and remains invisible from the outside.
Mounting strip
The first way is to hang it on a mounting plate.
Advantages of this method:
- all the work can easily be done by one person, since there is no need to support the cabinet when marking is done. This greatly simplifies the task and also allows you to hang cabinets with high precision;
- Thanks to special adjusting screws, the location of the cabinets can be changed, making them higher or lower, as well as moving them closer to the wall or away from it. This mechanism allows you to almost accurately level the cabinet, which is quite difficult, and when using conventional hinges, not always impossible;
- the rail for hanging the cabinet has specially made notches, with which you can easily adjust its length;
- all necessary installation can be carried out even when the kitchen apron is already attached;
- there is no need to use a curb for alignment;
- It’s quite easy to not only install it on the rail, but also dismantle it. Basically, hanging kitchen cabinets in this way takes no more than 1.5 hours.
Flaws:
- First of all, the high cost of the entire kit, which includes a mounting rail and hangers. But this is not such a serious problem, given that a lot of time is saved as a result;
- Another disadvantage of this method is that due to the loose fit of the cabinet to the wall, a small gap is noticeable in the upper part.
Furniture hinges
The second method is more accessible, but will take longer, and additional help will be required. It will use hinges and fasteners.
First, the upper limit is determined and a horizontal line is drawn along the length of all cabinets that need to be hung.
Then the level determines the accuracy of its outline (there are cases when, due to an uneven floor, the result is distorted).
The first point is marked on the resulting line, a hole is made using a hammer drill or drill, and fasteners are installed. Then the cabinet is taken and temporarily suspended in order to determine the location of the next fastener with absolute accuracy. In this case, you should not be guided only by the drawn line, but you should also check the evenness of the cabinet itself with a level.
The entire further process is carried out in the same way. When all the cabinets are attached and their location is checked by level, you can begin to connect them with furniture screws. The final stage of work is the installation of a connecting decorative cornice, which is screwed to the upper base using screws.
Now all that remains is to hang the facades, install the shelves, see if the doors are working properly, and if necessary, correct the inaccuracies using the adjusting screws. This whole process requires concentration and good attention, as well as an astute assistant, without whose help it is quite difficult to correctly calculate the required distance for fasteners.
Design of the rear wall of the wall cabinet
The progress of the hanging work will directly depend on the design of the rear wall of the wall cabinets.
In the first case, the back wall is nailed and has no recesses. Therefore, when hung on a mounting plate, the top part will not fit tightly, and the cabinet will end up with a slope. To avoid this, an indentation must be provided at the bottom of the cabinet that corresponds to the width of the mounting strip. To do this, you can nail a thin strip or calculate the height of its hanging so that it “fits” onto the kitchen apron. In the latter case, fastening should be done with the kitchen apron already installed.
In the second case, the back wall is attached with a recess.
This design of wall cabinets is more convenient, as it allows you to hang them not only overlapping on the kitchen apron, but also end-to-end. But when installing cabinets without overlap, it is important that the apron is positioned perfectly evenly, since even a slight distortion will immediately catch the eye.
How to Attach a Cabinet to a Wall Using a Mounting Strip
Preparatory work
- It is desirable that the walls are smoothly aligned;
- if the work is carried out in a corner kitchen, then the angle formed by the walls should be exactly 90 degrees;
- all work on electrical installation, placement of sockets for hoods, terminals of overhead lamps must be completed;
- You should also immediately prepare the wall on which the cabinets will be hung. It needs to be painted or covered with wallpaper and the kitchen apron must be fixed in advance. Since it will be extremely difficult to do all this with installed cabinets.
Tools
To properly hang kitchen cabinets, you need to have the following tools on hand:
- drill - can be electric or manual. It is needed for drilling holes for fasteners. If you have to work on a load-bearing wall, you will need a hammer drill or drill with this function;
- level;
- roulette;
- screwdriver;
- hammer;
- clamps are an auxiliary tool that will be required if you want to connect the boxes together to create the effect of a solid structure of the entire structure;
- if the installation will be carried out on anchors, then an appropriate size wrench will be needed;
- Well, it goes without saying that you will need to prepare the required number of fasteners. To secure the hangers to the cabinets, screws are required (as a rule, manufacturers supply wall cabinets with them). To secure the hanging rail to the wall, you will need screws and dowels. If desired, you can buy special ties to fasten the cabinets together.
How to fix a cabinet to the wall - step-by-step instructions
First of all, using the adjusting screws, you need to fix the hooks in the middle position. After which they are fastened from the inside on the side walls so that the hook looks outward by only 2-3 millimeters and can freely cling to the fastening bar. Now you can start marking the wall. In this case, you should be guided by the basic rules:
- if the location of wall cabinets depends on large kitchen appliances or tall objects, then they must be put in place during marking;
- when hanging on a mounting rail, you need to know in advance whether the cabinets will be installed overlapping the kitchen apron, or close to it;
- the mounting strip should be located 3-4 cm below the top edge of the section. To correctly calculate this distance, you need to attach the strip to the back wall of the cabinet, in the same way as it will be mounted on the wall. Then it will become clearly visible how many centimeters will need to be taken into account when applying the final markings.
Taking into account all these recommendations, using a level, draw two lines starting from the corner of the kitchen.
Of these, one line shows the top edge of the hanging rail, and the second indicates the top of the cabinets. Tip: in order to determine the horizontal position of the cabinets, it is best to use a level rather than measure the distance from the ceiling or floor, as errors may subsequently occur. Even if you are sure that the ceiling or floor is quite level, you should not take the risk, otherwise you will have to redo the whole job again. The upper edge of the bar is pressed against the prepared marking line (lower) and the required number of marks are made for the holes for fastenings.
If the walls are strong and have good load-bearing capacity, then it is quite possible to divide the slats into small pieces of 15 cm, and install each of them exactly in those places where the awnings will be located. But if there is even the slightest doubt about the strength of the walls, you should not divide the rail, but, on the contrary, fix it more firmly with a larger number of fasteners.
Next, using a drill of a certain diameter, a small hole is carefully made in the wall for installing the slats. Below are some basic recommendations:
- You can often encounter a problem when, at the very beginning of drilling, the drill seems to jump. To eliminate this discomfort, small notches are made at the drilling sites. They are made by hitting a punch with a hammer or, in its absence, hitting a strong nail;
- If the wall crumbles when drilling, then first you should make a hole with a slightly smaller diameter, and then widen it with a drill of the required size. Thus, it turns out much neater;
- To measure the drilling depth, take a prepared dowel, apply it to the drill and remember exactly the required distance. If the hole has already been made and it is time to hammer a dowel into it, then you need to make sure that the depth is sufficient. A hole that is too deep will make work awkward;
- It is quite difficult to drill a hole in a concrete wall, even using a drill with a Pobedit tip. Therefore, in the absence of a puncher, you will need a couple of gentle blows with a hammer on the punch;
- During work, special attention should be paid to places where electrical wiring passes.
Then the dowels are carefully driven into the holes, and the mounting rail is installed on the fasteners. Cabinets are attached to it using a hinge. Their position is regulated by screws equipped with hinged mechanisms.
To create the effect of a full-wall cabinet, you will need to tightly connect them to each other. To do this, they need to be fixed in pairs with clamps, starting from the corner cabinet. In order not to spoil their surface, you should place a wooden wedge between the cabinet and the clamp.
Next, a hole is drilled between the connected cabinets for the intersection screed. When through drilling on laminated chipboards, chips often form.
To prevent this problem, you will need to use one of the following two methods:
- in the places where the drill comes out, you need to press down firmly on the wooden block (the tighter the better);
- First, a thinner through hole is drilled, and then, using a drill of the required diameter, it is expanded on both sides.
Tools required for installation
Below is an instrumental set that you can hardly do without:
- marker;
- roulette;
- drill (+ glass drill and wall drill);
- building level.
First, it is recommended to mark out the bathroom area. This is done using a tape measure, a building level and an ordinary marker. After this, you can proceed to drilling holes.
It is extremely important to use a glass drill bit. But even in this case, we start only at a low speed, gradually increasing. We put almost no pressure on the drill. After the drill hits the wall, you will feel it.
There may be several options for further action. If the walls in the house are brick, everything is extremely simple - insert a drill with a Pobedit tip and go!
If the walls are made of reinforced concrete, you cannot do without a hammer drill. To avoid damaging the tile, it is recommended to drill a hole in the tile itself that is larger in diameter. That is, it is necessary to ensure that the drill on the concrete does not transmit impacts to the tiles. This can only be avoided if the drill does not touch the tile in principle.
Installation of choppers and strips for fastening cabinets
The chopsticks are driven into a regular wall using a hammer. However, there is tile in the bathroom. In addition to the hammer, it is recommended to use a wooden block on which the blows will be made.
You must act extremely carefully. Also, do not forget that in order to effectively distribute the load, an additional bar will be installed between the fastening elements.
In the vast majority of cases, it is made of metal. To avoid scratching the surface of the tile during installation, wrap it in mounting tape.
Share on social media networks:
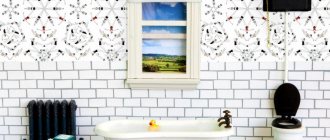
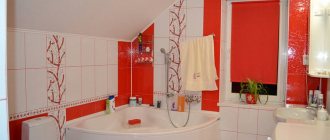
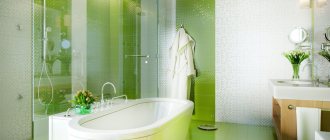
The role of the bathroom in a modern apartment cannot be overestimated. In the morning we gain vigor and strength in it, and in the evening we relax, relieve stress and fatigue after a hard day. To fully enjoy the comfort of your bathroom, you need to carefully consider its interior. You can’t do without a good, practical and high-quality cabinet, and a shelf for bathroom accessories wouldn’t hurt. But many apartment owners may have a question about how to hang a cabinet in the bathroom on tiles, because such work requires a special tool, and special fasteners for the cabinet are needed. Today we will tell you how to hang a shelf on the wall in the bathroom so that it is reliable and beautiful.
Ways to reduce cost
Sometimes there are situations when there is not enough money to purchase truly high-quality furniture, but a purchase must be made. In this case, you can try to limit yourself to choosing a set of dubious quality and furniture varnish.
To extend the life of the product, simply cover it with two layers of paint and varnish products. Pay special attention to the lower ends, which are in constant contact with the floor, and the facades. If the edges are not treated, it is better to cover them with plastic before impregnating them with varnish. This can be done by contacting any furniture manufacturer.
However, this method is not a panacea. Remember that such a surface does not withstand mechanical stress very well, so you need to use such cabinets with extreme caution.
Varnishing inexpensive furniture will extend its service life
The optimal solution, of course, would be inexpensive bathroom furniture made from moisture-resistant materials. A detailed consideration of the features of each of them will greatly facilitate the choice of product.
Polymers
Plastic furniture sets are a pretty reasonable purchase for the bathroom. This substance is not at all afraid of moisture and small temperature changes. The range of such products pleases with a variety of shades and shapes. In addition, these products today have a very affordable price.
Plastic furniture is not afraid of moisture and looks attractive
However, such cheap bathroom furniture also has disadvantages. These usually include brittleness and significant ductility due to the influence of too high temperatures. These structures cannot withstand significant loads and mechanical stress.
Chipboards
Another not very expensive, but suitable material for the bathroom. The main thing is to choose furniture made from sheets of waterproof chipboard or MDF. The second option will be more preferable, since such a sheet has a high density and is more hygienic. Moreover, it is better to choose painted products, since a layer of acrylic dye and varnish will provide better hydrophobicity than a polymer film. However, such headsets are slightly higher in price than those made from chipboard, although they will last a little longer.
Sets made of chipboard and MDF are quite spacious and practical
A common disadvantage will be the possibility of swelling of furniture made from these materials due to possible mechanical damage to the coating or the appearance of microcracks.
Glass
Large glass furniture is expensive, but purchasing several shelves from this material is available to everyone. Glass is not afraid of moisture and temperature changes; its surface prevents mold from growing on it. In addition, such furniture looks very aesthetically pleasing and can add lightness to the interior. In a bathroom of any size and stylistic direction, glass always looks appropriate and goes well with other materials.
Glass shelves will complement any interior style
If we talk about the disadvantages of such shelves, usually these products require careful handling and careful maintenance to maintain their original aesthetic appearance.
Cabinet creation process
First of all, choose the material for the future cabinet and take the necessary measurements.
Important! It is best to create a drawing to determine the exact amount of material needed and the method of fastening.
General recommendations:
- With all the abundance of material, wood remains the most popular. We recommend using natural materials for the relaxation room.
- To effectively use every corner of the room, you can make a cabinet for the bath.
- Carry out the work on making the cabinet in a room that is located near the bathroom, so that you can go in at any time and make the necessary adjustments.
Assembly
The process of creating a cabinet is quite simple:
- Make future shelves and walls from the boards.
- Mark the mounting locations for the shelves on the side walls.
- If you plan to add lighting inside, then make holes in the side board to connect the furniture to electricity.
- Fasten all the parts using a furniture corner and self-tapping screws. A more professional connection involves the use of minifix and rafix.
- Install cabinet doors on hinges. We recommend using chrome hinges.
Important! If the design involves mirrored doors, then use more massive hinges for reliability. For mirrored doors, take care of the hinge closers so as not to damage the mirror when closing.
Installing a cabinet in the bathroom
Once the cabinet is assembled, all that remains is to determine how to install it. In the case of a classic pencil case, there should be no difficulties: place it in a predetermined place.
Important! If you have installed legs on furniture, then make sure that they are equipped with adjustment mechanisms. This will help to install the cabinet securely, even if the floor in the room is uneven.
For a wall cabinet, you need to act differently, since you first need to decide on the fastening option. You can hang the cabinet in the bathroom using a mounting strip or using regular furniture hinges.
Attaching the cabinet to the mounting plate
This mounting option will facilitate the cabinet installation process and eliminate minor errors in markings. In addition, it is quite simple and does not take much time and effort.
Important! The disadvantage of this method is the high price of the mounting kit.
The mounting plate kit includes:
- Special rail.
- Hanging hook. The part is attached to the back wall of the furniture and remains unnoticed.
Step-by-step instruction:
- Make markings and mark the places where the cabinet is attached to the wall. Mark the top level of the cabinet on both sides and draw a line.
- From the drawn line, measure down the distance to the canopy hook.
- Draw a second line. This will be the mounting location for the mounting strip.
- Secure the strip with dowels.
- Hang the cabinet and adjust it vertically using awnings.
Fastening with furniture hinges
This method of hanging a bathroom cabinet is cheaper than the previous one, but it will take more time and require an assistant. For fastening, hooks are used that are mounted in the wall and furniture hinges that will be attached to the back wall of the cabinet.
Step-by-step instruction:
- Determine the top boundaries of the cabinet and draw a horizontal line.
- Check the accuracy of the markings using a building level.
- Attach furniture hinges to the back wall of the cabinet.
- Measure the distance to the furniture hinges and mark the indicators on the wall.
- Drill one hole with a hammer drill and attach a hanging hook in it.
- Hang the cabinet from the hook and determine the exact location of the other fasteners.
Important! Remember that you will not have the opportunity to adjust the position of the mount in the future.
- Drill a second hole for the hook.
- Attach a hanging hook and hang the cabinet on furniture hinges.
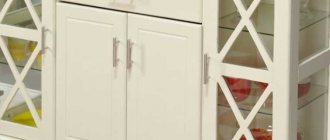
Types of bathroom cabinets
Set of various bathroom cabinets
- Cabinet-pencil case. A distinctive feature of this type of cabinets is their rectangular shape and small width, which is well suited for bathrooms with a lack of space;
- Corner cupboard. Installing a corner in the bathroom allows you to save free space by using the corner space, which is usually ineffective with standard furniture;
- A hanging cabinet is usually installed in the bathroom if the floor space is occupied by other interior items, for example, household appliances or plumbing fixtures. Such furniture is usually mounted on the wall in any convenient place, even above the bathroom. The hanging cabinet can be either corner or in the form of a pencil case;
- Mirror cabinet - saves space by combining two important items for the bathroom - a mirror and a cabinet. It can be a pencil case with a full-length mirror, a corner cabinet or a hanging cabinet.
How to hang a bathroom shelf on tiles?
If the walls in the bathroom are covered with tiles, then for the work you will need a drill or hammer drill and a special drill for tiles. We will look at the technology of the process using the example of installing a shelf in a bathroom.
Important! Bathroom furniture has different types of fastenings and is made of different materials. Most often, shelves are made of plastic, glass, less often of wood, MDF, chipboard.
Preparation
Before starting the main work, it is necessary to first carry out preparatory activities. Proceed as follows:
- Unpack the shelf to determine mounting options. In some cases, it is easier to mark the holes through the fasteners, and sometimes it makes sense to assemble the shelf and then make precise markings to drill into the wall.
- Find out the material used to make the wall under the tiles. If it is a plaster box or brick, then you can do without a hammer drill, but if it is concrete, a hammer drill is needed.
Tools
Prepare the necessary tools:
- Drill.
- Tile drill. You can use a drill with a pobedit tip.
- Tape measure and level for marking.
- Dowels, screws for fastening. Often they come complete with a shelf.
Important! To hang a shelf in the bathroom without damaging the tiles, follow these simple rules:
- Do not attempt to drill a fastener hole in the tile joints.
- Before drilling the tile, make a small chip so that the drill does not slip, otherwise the hole may turn out to be large.
Step-by-step instruction:
- Mark the drilling location using a tape measure and level. In some cases, you can simply attach the shelf to the wall.
- Make a small chip on the tile with a metal dowel under the drill.
- Turn on the drill and drill through the tile without hitting it. Periodically remove the drill and cool it in water. You can use a spray bottle to cool the drill.
- If there is concrete under the tile, then after you pass the tile, turn on the hammer drill.
- Attach the dowel to the drill and check the depth of the hole. Enlarge the hole if necessary.
- Drive the dowel into the wall using a hammer and screw the screw through the shelf mount.
Important! There are special Irvin tile-concrete drills on sale that do the job perfectly even at low speeds.
Furniture on the wall
Installing furniture in the bathroom requires that it be attached to the wall. If the wall is concrete or brick, then there will be no particular difficulties. What if it is made of asbestos cement or covered with sheet material? In this case there are nuances
Properly installed wall-mounted modules have many advantages both in operation and in the overall design of the bathroom. This room is often smaller than we would like, and console furniture looks more compact. Since the floor underneath remains open, moisture and dirt do not accumulate there. For some, the absence of supports provides more opportunities for designers to be creative. However, attaching wall-mounted modules is a more complex process than installing furniture on legs, since the entire load will fall on the wall. It was not just the mass of the element. The deeper the furniture (depth refers to the distance from the wall to the front of the module), the greater the leverage of the force acting on the fastener. A flat mirror or a shallow mirror cabinet and a cabinet with a sink 40-50 cm deep (and this is what they often are) with the same mass have a different effect on the wall. Therefore, it is better if the fasteners are included with the furniture. However, it may not be there, or it may not match the type of walls in your apartment.
For fasteners, the most important thing is the amount of force that can tear them out of the wall. Its calculation is an engineering task that requires special knowledge. So, in the most general case, for a wall cabinet, the total force acting on all fastening elements is calculated as the product of the mass of the cabinet with its contents and its depth, divided by its two heights. In other cases, the calculation formula is even more complicated. Let's give an example: a hanging module for a meter wide sink can have a mass of about 30 kg, a meter-long sink made of cast marble can weigh 20-25 kg. As a result, the cabinet with sink will weigh more than 50 kg. You also need to take into account that you will lean on it, and the load on the entire wall in this case will be greater. Add here a mirror, perhaps with a cabinet, and if the space of the room allows, then a columnar cabinet. Total about 100kg and several support points. All this must be taken into account when calculating.
|
|
|
1. When choosing fastening elements for the Victoria Nord kit, you should take into account the total load on the wall, which in this case will be significant. 2. Such an underframe in tandem with a double cast sink can only be attached to a solid wall, and after fastening, the seam between the wall and the sink must be carefully sealed with sealant. 3. Attached to the wall and properly secured, a wall-mounted base with an overhead sink visually expands the space and makes the interior light and open.
|
|
4. The “Seville” furniture set for a spacious bathroom should be attached to the main wall using dowels and self-tapping screws or special threaded hooks designed for hanging furniture.
If the wall is concrete or brick and lined with tiles or other material of small thickness, then everything is relatively simple. Armed with a drill or hammer drill (for concrete), you need to drill holes according to the markings, drive dowels into them and screw screws or threaded hooks into them, intended for hanging furniture. The self-tapping screw (hook), entering the dowel, expands (unclamps) it, the dowel fits tightly into the wall and is held in place mainly by friction. The furniture must not only be hung, but also pulled to the wall, and in the case of attaching the base under the sink, seal the seam between the sink and the wall with sealant. Typically, modules are hung on special, adjustable furniture canopies (of various types), which, after installation, allow the furniture to be adjusted left-right and up-down by a few millimeters.
Some manufacturers install awnings that are designed not for screws or hooks, but for tires (mounting strips). This method of fastening is used for hanging kitchen elements, and in the bathroom most often for installing large cabinets and under-tables. An alternative option for mounting on metal anchors. It is more reliable than the “screw + dowel”, and it is better to use it for large-sized modules. The anchor is inserted into the hole made, and then when the screw is tightened, the petals of the split sleeve move apart and are pressed against the wall of the hole; the shoulders expand and clamp it in the hole.
4 tips for installing bathroom furniture
1. Any furniture, both wall and floor, should be attached to the wall.
2. When choosing fastening elements, it is necessary to take into account the material from which the walls are made. 3. Sheathing made of plasterboard, asbestos cement and other sheet materials must be reinforced and special fasteners must be used. 4. Having calculated that the fastenings will support wall-mounted furniture, do not forget to add here the considerable weight of the contents of the cabinets, as well as the loads that may arise when resting on the sink and underframe during operation. For walls sheathed with sheet materials, such as plasterboard, or for asbestos-cement partitions, additional reinforcement and special multifunctional fastenings are required - butterfly dowels, the hangers of which spread out like the wings of a butterfly when the screw is screwed in. When using plasterboard sheathing, tighten the screw until the hangers are compressed almost to the point of a washer. It turns out that part of the wall is clamped on both sides from the outside by a cap, and from the inside by a compressed anchor dowel (these hangers). Another type of fastener is a metal anchor called a “Molly”, which has three or four folding segments. Its use makes it possible to increase the uniformity of load distribution over a large base area. Such anchors are usually made with a diameter of 8 to 14 mm and placed on sheets with a thickness of 6 to 38 mm. Molly style vankers can accept screws and hooks of different shapes.
Tongue-and-groove gypsum blocks or gypsum partitions crumble badly, so they require fastening through them using a bolt, nut and a large flat washer. When using foam blocks, it is better to use reinforcing mortgages and secure them with a special anchor bolt of white plastic spirals. First, a hole is drilled, then an anchor is driven in, and then a screw or self-tapping screw.
Strengthening required
If you are covering the walls with plasterboard, then under it you should provide embedded elements (can be made of sheet steel, profile or bar) in the place where the screws or anchors will be screwed in, and further strengthen (strengthen) these places.
For example, attach vertical slats to the main wall and install mounting elements for canopies in them. Thus, the furniture will be supported not by drywall, but by a solid wall. The result will be reliable and aesthetically pleasing. The editors thank you for your help in preparing the material.
Alternative options
In addition to standard methods, you can use other ideas on how to hang a bathroom cabinet on tiles.
Idea 1
If you feel sorry for drilling tiles, then there are alternative options: “liquid nails”, sealant, special suction cups. These options have both their pros and cons:
- Suction cups can be used for small, light, mesh, generally “non-risky” shelves.
- “Liquid nails” are more reliable (1 drop of glue can hold the weight of 50 kg) than sealant, but it is very difficult to remove glue from tiles.
- The suction cup can also be glued with superglue for reliability, but later, if you want to remove the suction cup, it will be quite difficult to scrape off the glue.
Important! To use glue, sealant or suction cups, first degrease the surface of the tile, dry it and warm it up a little. It is advisable to sand the gluing area with a little fine sandpaper.
Idea 2
You can use non-flat hooks for small shelves if you embed them in the seams. Proceed this way:
- Make a workpiece in the shape of the letter T from 1 mm thick stainless steel. The length of the upper “crossbar” and legs should be approximately 25-30 mm, and the width should be 5 mm.
- Insert the bar into the horizontal seam and bend the leg down.
- The seam must first be cleared with a piece of a hacksaw.
- After installing the workpiece, treat the seam with grout.
- After the grout has dried, bend the end upward with a hook.
Important! The advantage of this method: if necessary, the hook can be removed and the seam can be rubbed again, without leaving any traces. Disadvantage: the hook can only support 5 kg.
How to attach a cabinet to drywall
Drywall hides an uneven wall so easily and quickly.
There is no need to spend a lot of time and money on materials. The work goes quickly and you can do it yourself. But how to hang a cabinet on drywall correctly. After all, drywall is not very durable and breaks easily. Despite this, you can hang both a cabinet and a shelf. You just need to know how to do it correctly. Installing a light hanging shelf should not be in doubt; the drywall will definitely support it without damage. You should be careful with a heavy, for example, kitchen cabinet. When choosing a mount, you should plan the load on it with reserve. If the installation work is performed incorrectly, the sheets will break. First, cracks may appear, or the fasteners will break out of the base. Based on weight, attachments can be divided into three groups:
- Light - 2–4 kilograms.
- Heavy furniture - weighing more than 4 kg.
What is this article about?
General rules
Making a wardrobe with your own hands provides many advantages. So, this is not only a significant saving on the family budget, but also an opportunity for imagination and experimentation. In order for the finished product to be comfortable and practical, at the design stage you should be guided by the following tips:
- The number of compartments inside the cabinet must match the number of doors. But this rule does not apply to wide doors, behind which you can install 2 compartments with shelves at once.
- It is convenient to store laundry in cells with a height of 35-40 cm, books - 20-35 cm.
- The optimal opening for long clothes is 150-160 cm, for short ones – up to 100 cm.
- Large items, suitcases, and travel bags are best placed on the top shelf. The height of the opening must be at least 45 cm.
- According to generally accepted standards, the depth of the wardrobe is 60 cm, which is exactly the size of the factory model. If the wardrobe is made independently, it is better to make it at least 65 cm. The fact is that the door mechanism “eats” 10 cm, so only 50 cm remains for clothes with hangers.
- If you plan to install a volumetric handle on the box, then it needs to be recessed a little so that the protruding part does not touch the doors. An excellent alternative to such handles would be the finger grooves on the front panel of the drawer.
- When making drawers with your own hands, it is better to use ball-bearing full extension guides. They are distinguished by their durability, strength and convenience.
- Large cells larger than 80 cm must be reinforced with a partition, otherwise they will bend under the weight of things.
- Rods for clothes longer than 100 cm are also recommended to be additionally reinforced with a vertical rod, the lower end of which rests on the floor, and the upper end on the top shelf. Thanks to this, you don’t have to worry about the heavy weight of your clothes.
- It is better to install the lighting in the cabinet in the remote roof canopy, and not inside the structure, otherwise the light will only fall on the top shelf.
When making a wardrobe with your own hands, we must not forget that the arrangement of things in it must have a certain sequence. For example, on top are placed the most unnecessary things that need to be taken out least often - hats, bags. In the middle are those that are used most often - outerwear. Below are boxes with shoes, bags, backpacks.
Arrangement of the hallway and bedroom
The internal design of the wardrobe directly depends on what exactly is planned to be stored in it. This means that when designing a piece of furniture for the hallway, bedroom or living room, you need to clearly know what things will be located there.
Most often, the dimensions of the hallway do not allow for a wardrobe with a depth of more than 40 cm.
Taking into account the fact that about 10 cm is spent on the sliding system, there is very little space left for placing outerwear - jackets, coats, raincoats. And standard hangers simply don’t fit in such a narrow closet. End rods, which are mounted instead of standard ones, will help make the internal structure more functional. They come in both retractable and stationary types. It is unlikely that they will be able to fit the entire outer wardrobe of the family into them, but the basic things can be done.
To store shoes, wire niches are installed where you can place 2-3 pairs of shoes or boots. The rest will have to be stored in boxes. Small pull-out elements will help make the closet convenient, where you can put brushes for shoes and clothes, creams, spare keys, and other small items.
The closet in the hallway is a place where umbrellas, packages, and bags are stored, so you need to take care of the required number of hooks where you can hang everything you need. Using a mirror on the door will not only visually expand the room, but also allow you to see yourself in full size before leaving the house.
A wardrobe for a bedroom is a place to store casual, work clothes, and bed linen. Therefore, before you start making furniture with your own hands, you need to carefully consider all the options for filling it. The most popular are:
- Baskets. They can be made of metal, plastic and are universal for storing things. They can hold both socks and shirts.
- Pantograph. This is a clothes rail equipped with a handle and a mechanism for lowering it down. This option is suitable for those who want to use the upper space as efficiently as possible.
- Iron holder and built-in ironing board.
- Hangers for ties, belts, trousers.
- Drawers for underwear.
- Mounts for storing shoes.
As for built-in wardrobes, many people prefer to make niches for TVs and computers in them. This allows you to unload the room and free up more space.
Choosing material
What should the shelves be made of so that they are strong, durable, and the wardrobe itself lasts a long time? Let's consider the advantages and disadvantages of popular materials:
- Solid wood. The naturalness of this material is beyond doubt; it is excellent when you need to make a shelf durable and rich. A bookcase or dressing room with long shelves, made of wood, will last a long time and will not bend under the weight. Such furniture is famous for its strength and durability. The disadvantage of the solution may be that the finished product weighs too much, as well as the high price compared to budget options.
- Dial array. Unlike solid wood, the price for such niches is much lower, but the benefits are the same. The material consists of blocks of wood glued together and coated with varnish.
- Joiner's board. The material is a frame made of wood, covered with plywood on both sides. Perfect for heavy items, such as books.
- MDF, chipboard. The most common materials available to a wide range of consumers. Used for making shelves in cabinet furniture, suitable for DIY installation. They consist of tiny pieces of wood, pressed and glued together. The standard thickness of the shelves is 16-18 mm, but if you plan to use them to store heavy items, it is recommended to opt for thicker slabs up to 25 mm.
- Glass. This material is used less often than others in the manufacture of shelves in wardrobes. Although it has its advantages: they look light, but are quite durable. Glass can be used to make cells in open areas of the closet in the living room.
- Metal. An excellent solution for making shoe storage racks and baskets from metal rods. You can find the necessary accessories in online stores, and then do the installation yourself.
Selection of materials
You can find a huge number of different materials on the market today, but not all of them are suitable for assembling bathroom furniture. The most important point for this room is, of course, moisture resistance. The material must not only be resistant to constantly humid air, but also impervious to direct contact with water. Thus, the main things bathroom furniture is made from are wood with appropriate impregnation, plastic and glass.
Plastic is easy to process, but it is fragile, quite soft and not always aesthetically pleasing. It should be used not for the frame of the structure, but for auxiliary elements. Glass is also very fragile and heavy. In addition, fixing glass is also relatively more difficult than other materials. It is better to use it for shelves or doors.
The wood that can be used for the frame and all structural parts can be in the following form:
- ordinary board (pine, birch, etc.) This is cheaper, but raw boards take longer to process, they are heavier and blanks of the required width are not always available
- plywood. With proper sanding, impregnation and varnishing, this material is well suited for any furniture, including in the bathroom. The only negative is that initially plywood always has its own woody color, and painting it is additional work.
- laminated chipboard (LDSP) with moisture-resistant seams. Optimal material for price and variety of colors. It is a little inferior to plywood in terms of rigidity, but with the correct design this does not matter
The tabletop deserves special attention. The materials for its manufacture are boards, chipboards, plastic or stone. This is the most functional element, so it must be provided with reliable fastening and have high strength.
You select the thickness of the materials based on your drawing. It is necessary to take into account that for the supporting frame of an organizer or cabinet it is better to choose plywood from 15 mm, laminated chipboard – from 20 mm. On the contrary, it is better to make shelves, doors and drawers from thin sheets (5-10 mm) to reduce the weight of the structure.
You can cut the blanks yourself or order them from a workshop. To prepare yourself, you will need a jigsaw. When working with laminated chipboard, it is better to glue the laminating layer with tape and run a cutter along the cutting line. Then it will be possible to avoid its splitting.
Mounting options
Attaching shelves with your own hands is an important element in making a wardrobe. The strength of the structure depends on how securely they are fastened.
Installation is not very difficult and does not require special skills. The main thing is to make the calculations correctly and arm yourself with a set of tools. When marking, it is important to strictly observe horizontal levels, otherwise the weight on the shelf will be incorrectly distributed, placing an increased load on one of the fasteners. As a result, such an oversight will lead to breakage of the part.
- Furniture corner. The simplest, strongest type of fastener that does not require additional holes in the panels. There are 2 types of corners - plastic, metal. But they have a drawback: such fasteners are too noticeable.
- Euroscrew. It is screwed into the end of the shelf with the previously made hole. Like the screw tie, the Euroscrew heads are visible on the front side of the panel. Most often, products with a diameter of 7 mm and a length of 50-70 mm are used. To install them, drill 2 holes, into the end of the shelf and into the face of the part. The disadvantages include the fact that such furniture cannot be assembled and disassembled more than 3 times, since the fastenings are destroyed. Also on the sides of the furniture you can see the caps or plugs of the Euroscrews.
- Eccentric coupler. One of the most popular and reliable types of fasteners. The advantage is obvious: furniture with an eccentric tie can be assembled and disassembled many times without fear of consequences. How fastening occurs: an eccentric rod is screwed into the face of a part to which another part is attached at the end; in turn, the eccentric itself is screwed into it through the end of the other shelf, and then the eccentric turns the rod into itself.
DIY bathroom furniture: Action
So, the result of our design research should be a file that lists every single detail. Approximately this (calculation of materials was made for all furniture: for the bathroom and hallway):
Now we need to find a company that will take some money from you, look at the detailing file and in return give you all your panels - in the right sizes, cut and edged. They will cut your firewood from slabs of certain sizes. If they have this material in their warehouse program, you can without hesitation get as many square meters as you need. Otherwise, you will be forced to buy and pay for the slabs, and not for the number of square meters you need.
When designing bathroom furniture with your own hands, to achieve a good economic effect, you should approach at least 80% filling of sheets of slab material. I will demonstrate using the example of cutting cards that I made myself in the Cutting program (they were later used for cutting):
The cutting takes into account the details for the bathroom cabinet and hangers for the hallway. I quickly compensated for the ineffective filling of sheets of material. This is how the initially unplanned ottoman was born. And the sheet filling efficiency was more than 90%.
The plywood, veneer, cutting and edging were done by TransLok. All this cost $500. I had to go to the factory because I wanted to do a few custom things: I needed finishing cuts for the vanity and miter saws on several hanger pieces.
So, all the firewood fit perfectly into the car, was delivered and lifted into the apartment (excellent work, I must say).
Installation step by step
It’s not difficult to make cells for things with your own hands, the main thing is to properly prepare the necessary materials and parts for installation. List of tools that will be required for work:
- drill and drill bits of the required diameter;
- screwdriver;
- jigsaw for cutting materials (if necessary);
- iron for gluing edges;
- stationery knife;
- level;
- square;
- iron ruler (it is not recommended to use Chinese-made rulers, they may contain errors);
- a simple pencil;
- MDF sheets for shelves;
- edge for finishing MDF;
- fasteners.
After the frame of the wardrobe has been assembled and the internal markings have been carried out, you can proceed directly to installing the shelves. Using a test square, make sure that the side walls of the cabinet are at right angles to the rear wall of the structure. You can cut the required shelf size yourself using a hand or electric saw. After cutting, an unsightly edge is formed; it can be hidden with adhesive tape; to do this, you need to attach it to the edge and iron it with a hot iron. The finished shelf is placed on a pre-selected type of fastener.