Good day, dear like-minded people! The most practical and useful thing is a mug. In this article today we will look at what kind of mug crafts you can make with your own hands, what material it can be used for, and for what purposes. I think everyone knows what this thing is, so it’s straight to the point.
The photo of the mug craft shows that the work is not dusty, it won’t take much time, and there will be a lot of joy! If you have children in your family, don’t be lazy, be sure to get together and do this work together.
After all, such activities will not only develop fine motor skills, but will also bring you much closer to your heir, which means the trust between you will increase, and you will spend useful time together.
First, let’s find out what you can use to make a craft mug. As statistics say, there are enough options! This item is made from cardboard, clay, wood or porcelain.
You choose the most suitable one for yourself; for example, for a child aged 3 years, the best option would be a cardboard mug.
Clay mug
Pottery is one of the environmentally friendly types; according to legend, it is earthenware that can absorb bad energy, so before you start your work, get in a good mood, and begin your craft with pure and good thoughts.
On a note! Before you start working with clay, it must be cleaned of all impurities and stones so that the quality of the craft does not deteriorate.
Air bubbles should be removed by long kneading, to make the composition much stronger, add a little gypsum or lime to it. Having combined all the ingredients, it is recommended to leave the mixture for a week to “rest”.
DIY wooden mug
Do you want to make an original gift for a wedding or birthday? Or a thing that would be pleasant to use and pick up, then we suggest making a wooden mug with your own hands, which will really look unusual; it will definitely be pleasant to drink any drink from such a mug.
DIY wooden mug
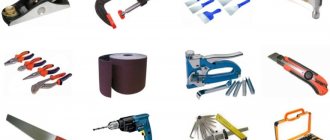
What you will need to make a wooden mug:
- Thick tree branch;
- Saw (electric or manual);
- Hammer and chisel;
- Drill;
- Wood glue (PVA);
- Sandpaper;
- Polyurethane varnish.
How to make a wooden mug, step by step instructions:
DIY wooden mug
Step 1
The first thing you need to do is find a branch suitable for the mug, I often see similar ones when trees are pruned on the street, and there I chose a piece of the branch of the required thickness. You will also need even thinner branches for the handle.
DIY wooden mug
Trim the branch to the desired mug height. Remove the bark from this section of branch, I used a flat head screwdriver to remove most of the bark.
DIY wooden mug
Step 2
Now we need to divide the log into four sections, for this I used a chisel and a hammer, using them I carefully split the log.
DIY wooden mug
DIY wooden mug
Step 3
For each of the 4 parts of the mug, measure 19 mm from the bottom, make a cut in this part but so that the wall thickness remains about 9 mm on the sides. The saw makes a straight cut on a rounded object, so you need to be careful not to cut too far on the sides. Using a chisel, knock out the inner piece of wood from the top, it should break off before the cut, then continue to cut and knock out the excess from the inside of the parts of the mug until you reach the desired thickness of the walls of the mug and so that they are rounded.
DIY wooden mug
Step 4
Using sandpaper, clean the inside of the mug without touching the side splits where they should stick together.
Now, using wood glue, glue the two parts together using masking tape and leave to dry for a day. Then lubricate the side and bottom walls with glue and now glue everything together, securing it with masking tape, electrical tape or an elastic band.
When gluing, gaps may remain in some places; they can be covered with tyrsa (small wood shavings) mixed in glue. Leave the glue to dry for a day.
DIY wooden mug
Step 5
After the glue has dried, thoroughly sand everything on all sides; the bottom and top of the wooden mug should be rounded with sandpaper so that there are no sharp edges.
I sanded the bottom inside the mug using a homemade disk made of wood mounted on a metal rod and I glued sandpaper to this disk.
DIY wooden mug
Step 6
Let's now start creating a handle for our wooden mug; to do this, take one thicker stick, one thinner one, remove the bark from them, cut it to the required length, you should get two thin sticks and one thick longer one.
DIY wooden mug
Drill through holes with a drill with a diameter the size of the thinnest sticks in the wall of the mug (in the upper and lower parts of it, one above the other) and in the thick handle also through and at the same distance and insert thin sticks into the holes, applying plenty of wood glue to the tips so as not to There were gaps left in the mug.
Step 7
All that was left was the finishing touches for our wooden mug; for this I used polyurethane (this is a type of synthetic varnish that is used to coat and treat wooden items). Several layers were required to make it completely waterproof.
DIY wooden mug
DIY wooden mug
Since the wooden mug was a wedding gift, I printed out a heart template with initials and the wedding date and using a Dremel with an engraving attachment, I cut out an engraving along the contours of the template, similar to what lovers do on tree trunks with a knife. Then I painted these engraving outlines with black paint and varnished them.
DIY wooden mug
This is what a finished wooden mug made by yourself looks like, I hope you like it as much as I do.
Take home:000
Similar homemade products:
- DIY tool box made of plywood
- DIY 3-piece wooden puzzle
- USB flash drive housing from a branch
- DIY paper flowers
- How to make a ring from wood and epoxy resin
- DIY battery-powered mini mixer
- Grinder disc for wood processing
- DIY power bank baton
- Beautiful DIY wooden flash drive
Tags:wood, mug, dishes
Making a mug from clay
- Form a little clay into a snake. You will need 3 of these sausages.
- Press the snakes together. Then level it with your palm (dip your hand in water), this will wake up the bottom of the mug.
- We also lift the walls with ropes and level them.
- We attach the handle and give the desired shape to the product.
- Drying (lasts one day).
- Burning (more than 8 hours)
Not every home has a special stove; you can simply burn our masterpiece in a fire. It is better to do this by covering the mug with a log, and the procedure itself should last strictly according to the instructions. Pottery is durable, so everyone will like the gift.
Easter flying mug
The bright holiday of Easter can be decorated with such a cute mug with yellow chicks in a nest with eggs. The nest can be woven from thin twigs, sisal or jute.
Plastic eggs and hatched chicks look cute on their own:
Artificial flowers will make your Easter composition more lush and elegant:
Handicraft masterpieces cover in their master class how to make an Easter floating bowl:
DelkiRu talks about another type of Easter composition in his master class:
Making a mug from cardboard
- Cut out 2 rectangles (the difference in size and height is 10 centimeters) and a semicircle for the handle.
- On a larger sheet, bend the sides 2.5 centimeters
- Glue both fragments together, don’t forget about the handle
- Decorate as desired and to taste
- For the effect of reality, cut a string with a label from real tea and glue it to the cup.
- To prevent everything from falling apart along the way, leave it to dry for 30 minutes.
Making a mug with a bunny
Choose a plot, remember your school modeling skills from plasticine, use plastic (polymer clay) to sculpt elements of a three-dimensional applique - a bunny in a clearing.
If you will be decorating directly on the mug, attach the elements step by step with glue, following the instructions. After all the elements are in place, use acrylic paints to complete the necessary details - eyes, twigs, flowers, and do all other small drawings.
Beautiful decoration of a mug with polymer clay
Decorating a mug with polymer clay
Decorating a mug with polymer clay
An interesting idea for decorating a mug with polymer clay
Decor of a mug with polymer clay
Using the same method, you can make a separate three-dimensional decor, attaching each element with glue. Everything needs to be done carefully, carefully sculpting and attaching all the parts. Now place the entire composition on the mug, secure it carefully with glue, and complete the details.
After waiting until the glue has completely dried (this will take about 12 hours), the mug must... be baked. Place it in the oven for 10 minutes at 130 degrees.
Beautiful decoration of a mug with polymer clay
Decorating a mug with polymer clay
Decorating a mug with polymer clay
An interesting idea for decorating a mug with polymer clay
Decor of a mug with polymer clay
Before use, the mug (the decor on it) must be coated with acrylic varnish in several layers.
What's left to do? Decorate a spoon in this way and give it to a loved one.
Beautiful decoration of a mug with polymer clay
Decorating a mug with polymer clay
Decorating a mug with polymer clay
An interesting idea for decorating a mug with polymer clay
Decor of a mug with polymer clay
Instructions on how to make a wooden mug
- On wood with vertical grains, draw 2 circles (outer and inner sides). If there is enough space, we also move the handle.
- Use a drill to drill a couple of holes inside the circle.
- Using a suitable tool, remove excess wood from inside the circle, from its outer side.
- Rub with sandpaper until completely silky.
- We attach the handle.
DIY FRIEND
Dear visitors to the site “ Self-made Friend ,” today we will look at the process of creating a wooden bowl from wood taken from discarded pallets, and specifically from those pallets that are used for transporting various goods. Nowadays, pallets have simply become a universal and easily accessible material for construction, furniture making, etc., but one Craftsman learned to make dishes from them. It sounds strange, of course, a wooden bowl made from a pallet, but all these are the realities of our present)) By the way, they even build houses from pallets, you can take a look.
In order to assemble one bowl, it was necessary to disassemble more than one pallet, because it requires wood of different species, it is desirable that it differs sharply in color (light-dark)
The planks are first separated from the pallet using a nail puller, then passed through a thicknesser or planer to obtain a smooth and even surface. The prepared planks are sawn into small wedge-shaped pieces. The resulting wedges are laid out on adhesive tape spread out on the table, then the crotch between them is smeared with glue, after which the ends are lifted and the wedges are assembled into a circle and left to dry (24 hours). The resulting circles from type-setting wood are assembled together, coated with glue and tightened with clamps, after drying processing on a lathe.
So let's look at everything step by step.
Materials
- pallets
- wood glue
- epoxy resin
- linseed oil
- wax
Tools
- thicknesser
- wood lathe
- a circular saw
- clamps
- ruler
- pencil
- sandpaper
Step-by-step process for creating a wooden bowl from a pallet with your own hands.
The first thing we found were pallets; the master got them completely free of charge, because they were simply thrown away after unloading goods in a shoe store. A great idea to turn a recyclable material into a piece of art.
The pallets, disassembled into planks, are folded into the vehicle interior for transportation to the workshop.
Already on site, the material should be sorted by wood type and color scheme.
The edges of the boards are sawed off on a circular saw.
Passes through thicknesser.
A base in the form of a circle is cut from a piece of mahogany wood.
Next, blanks in the form of wedges are cut from the boards from the pallet.
Then the tape is carefully lifted and the wedges are glued together.
Leave in this position for a day.
After the glue has completely dried, the resulting wooden ring should be sanded.
The blanks are coated with wood glue and glued together.
Tighten with clamps until the glue dries (24 hours)
Next, we glue the resulting blanks again and tighten them into a single whole.
A blind hole is drilled in the end part.
Loads into a lathe.
The outer part is sewn down.
Then internal.
Sanded with sandpaper.
Covered with linseed oil. This is such a wonderful bowl made from a pallet