How and where did the art of patchwork originate?
Patchwork is translated from English and means “thing made from scraps”, hence the corresponding name. Unfortunately, the person who guessed to sew masterpieces from the remains of fabric by assembling rags like a mosaic is not known. Because such sewing is very ancient, and known even in the ancient world!
Needlewomen in almost all countries have practiced and practice creating masterpieces in a similar direction; only the sewing technique differs. This creative activity is loved because it will not only help you create a toy or pillow, but can also become a clothing saver.
For example, hide torn places or a stain that cannot be removed.
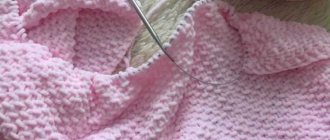
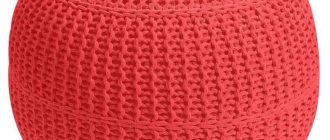
Knitted blanket in patchwork style
You may associate patchwork art with the theme of sewing, but this is not always correct. After all, the pieces of material or fabric that will be reunited can be knitted. If you have small pieces of yarn lying around, they can be put to use right now!
Look at your balls, they should match in color. Then they will be able to harmonize with each other. But, if the colors do not match each other, then it is worth purchasing a couple of balls of a different shade, which will help make the drawing beautiful and pleasing to the eye.
For example, you have an orange and pink ball of yarn, it doesn’t seem bad, but it’s very boring. In this case, purchase brown yarn in a soft and bright shade, and then the knitted blanket in the patchwork style will turn out harmonious.
Now you are one step closer to your goal! The second thing you need to do is decide which knitting device you want and start working, there are 2 main options. The pattern and character of your bedspread depends on this.
Experienced needlewomen write on their forums that knitting such a thing in patchwork style is much better. And there are several advantages here. Firstly, it is much faster and more convenient, and secondly, it is better to use knitting needles to make knitting elements that are ideal for a bedspread.
After determining the color and choosing a work device, you need to think about what your future masterpiece will look like.
Let's say you want to make a blanket for your child. This means that the direction should be fun, say, in the direction of Disneyland. The technique of our product is squares that are sewn together.
And we choose 2 options for figures: the first, which depicts a cartoon character (knitted on the face), the second figure is an empty, monochromatic figure (knitted on the wrong side).
Theoretical work done!
Knitting options and patterns
Knitting blankets yourself in accordance with the patterns will not only add a cozy accessory to your home, but also develop perseverance and attentiveness.
Simple but beautiful bedspread
You can make a simple and beautiful blanket with knitting needles for beginners as in the picture below.
This knitted blanket is made according to a simple pattern. To do this you will need:
- make 8 r. (border) in garter stitch (knit stitch is used for all rows);
- distribute the loops into patterns (you will get 8 border loops at the beginning and end of each row);
- for the main pattern, rows 1, 3, 5, 7, 9, 11 will be knit; 2, 4, 6 – 3 stitches are removed without knitting, and 3 are made from the faces.; 8, 10, 12, performed by persons. loops.
"Parquet"
A beautiful knitted blanket for a sofa can resemble a parquet pattern. To do this, knit and purl. The loops alternate according to the figure below:
Combination of different knitting techniques
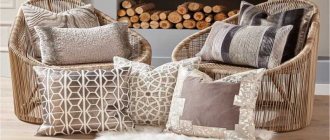
Particular attention is paid to those things that have something unusual about them. The canvas, which is combined, will decorate any interior. The main thing in this matter is to have a sense of taste that will help you make an attractive design or pattern.
Of course, you can’t do without a diagram; you need to not just draw it, but carefully draw it, work it out, select the appropriate knitting techniques and assembling pieces.
There is no need to deviate from the sketch while knitting; if you come up with good ideas, it is better to implement them while knitting another product. Otherwise, everything will have to be bandaged.
You can also combine using different knitting devices. For example, work some with knitting needles, and some with another knitting device. Don't be afraid to bring your ideas and ideas to life!
At the link below you can see a selection of photos where there are very good options for combined bedspreads: https://www.pinterest.ru/pin/564709240772367894/?lp=true
Knitted blanket. Interesting models from the Internet
Plaid knitted “zig-zag”
The blanket is knitted gradually; individual parts do not require stitching. As a result, you get a double-sided canvas. Each strip can be knitted from a different yarn, allowing you to use up leftover yarn
Using this pattern you can knit a rug, blanket or blanket.
This incredibly cozy blanket can decorate your home.
Blanket SAMPLER AFGHAN by Melissa Leapman
Melissa's famous blanket - that's how it was dubbed in the knitting world. This model of a blanket with Celtic knots and weaves will require a lot of work, attention and diligence, but the result will delight you and everyone around you for a very, very long time.
Warm blanket made from leftover threads
This blanket can be knitted or crocheted. You need to crochet the squares with single crochets and embroider them according to the patterns. And it will warm you on cold winter evenings for many years.
Knitted blanket
Size: 65 x 165 cm. You will need: 8 skeins of Zealana Kiwi Lace Weight yarn (40% merino wool, 30% cotton, 30% possum wool, 199m/40g); circular knitting needles No. 3.5; 2 auxiliary knitting needles; 6 markers. Knitting density, sequence of patterns: 27 sts and 30 r. = 10 x 10 cm.
For a single bedspread you will need 2900g of cotton thread, and for a double bedspread - 3600g.
Size: approximately 183 by 223.5 cm.
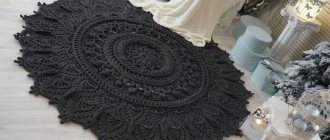
Knitted blanket Floret
When I was compiling this selection, I came across models of blankets knitted in a circle. I really liked the idea, but it seems to me that this technique is more suitable for knitting round pillowcases and rugs. For me, a round blanket with knitting needles is not very convenient to use. But it’s unusual.
Floral motif of a knitted blanket
This is a classic and will most likely never leave our lives. Therefore, such a knitted item will keep you warm for many years to come. There are a lot of knitting patterns in this style. You can make the entire element in the form of a flower; there is an option to tie a flower in the corner of the element, as our grandmothers loved to do.
And the standard one is this fragment in the center of a knitted item. You can use different flowers in one product: let it be a crocheted flower and one knitted in the center of the part. Or the flower motif is the same, but different sizes.
At the link provided below, you can find a video with a master class on how to knit a blanket in a floral motif:
Patchwork knitting squares: patterns
The squares are knitted in any size. For example, if the width consists of 15 loops, then you need to cast on 31 loops for the first square - 15+15+1 - the central loop located at the corner of the square. For convenience, you can make a pattern in the form of a diagram.
Squares using the patchwork technique are knitted with knit stitches on both sides: both on the front and on the back side, thus creating a garter stitch. In every second row you need to make decreases; to do this, knit the three central loops together.
The edge of the squares is made with knots; to do this, you just need to remove the first loop of the row without knitting, and knit the last one. After the last three stitches are decreased in the square row, cut and secure the yarn by pulling it through the last stitch. Thus, the first square is ready.
To make the second square, cast on 15 stitches on the needle in the usual way, and also on the edge of the first square, 16 stitches - insert the needle over the edge and pull the loop out behind the needle.
After that, knit the second square in the same way as the first, not forgetting to decrease in every second row on the central three loops. Continue knitting the first row of squares to the required width of the garment, in the same way as the second square was knitted.
After you complete the first row, move on to the second. To do this, you need to cast on 15 loops along the top of the first square and 16 loops - in the following way: throw the chain loops of the thread that is being worked on the knitting needle.
Then knit the square like everyone else: the first row - with knit stitches, then in every second row make decreases, knitting the three central loops together. To start the second square in the second row, cast on 15 stitches along the edge of the second square of the first row, one loop from the corner and 15 stitches along the edge of the first square of the second row. Knit a square.
Continue knitting in the same way as knitting the second square of this row.
Next, knit the fabric according to the height of the intended product, using the prepared patterns, tying the third, fourth, fifth and so on rows of squares, according to the same principle as described above. Please note that the direction of knitting squares always goes in the same direction - from left to right.
If you have never worked in the patchwork technique before, try to master patchwork knitting, and you will not regret it! New horizons for creating exclusive and original products will open before you! Go for it, and everything will work out for you!
Children's blanket and knitted fragments
Children prefer colorful things, and this should be taken into account. The knitting should be denser, but not stiff, so that there is a pleasant contact with the skin.
But the most important thing is the drawing!
Your children will be pleased if the bedspread replaces “grandmother’s patterns” with interesting drawings, for example, characters from their favorite cartoons. Maybe you can assemble a bear from knitted pieces, which will also please the child. It is good to use knitting techniques where the knitting is convex.
Connecting squares
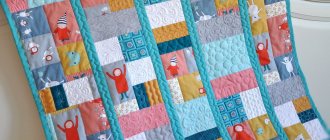
In order to make a blanket from squares, we need to knit the blanks (squares) and connect them together.
In the picture presented you see pieces of our future blanket (20 loops * 30 rows). You can use a needle and thread to connect them. You need to sew evenly, using the edge loops.
But this is not the only connection option. You can also use a crochet hook. To do this, you need to connect the squares by the edge loops with single crochets. This option is illustrated in the photo below.
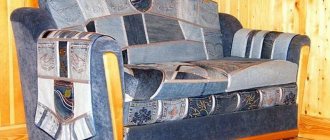
Bedspread of geometric shapes
Elements of the product can be in the form of a triangle, rectangle, rhombus, polygon. Such figures can be plain or have a pattern inside them. The drawing can be in the form of a modified pattern. The classic option is squares.
The quadrangle motif rarely contains more than 2 colors. And the record holder for the maximum color combination is polygons; they are mostly five-colored.
A great idea would be to choose those shapes that are already in your interior, then you can throw the canvas over the chair, thereby making the design of the room more interesting.
Quadruple bedspread motif
One interesting version of a patchwork quilt made from 80 squares was taken from the needlework magazine "Handicrafts for the Home". This idea is extremely interesting, due to which its popularity is growing. As for the tools, you will need two options for knitting devices.
Parts assembly diagram
The diagram is divided into sectors on which numbers and letters are depicted. The letters represent the crocheted areas and the numbers represent the knitted areas.
1 knitting tool:
- bricks;
- 3/3 braids;
- basket;
- nodules;
- stockinet;
- harnesses 2/2;
- checkerboard rubber band;
- deception tourniquets;
- chess pieces;
- rows of cones;
- torn elastic band.
2 knitting tool:
- openwork (A);
- double crochet (B);
- floral motif ©;
- half double crochets;
- cones (E);
- granny square;
- lattice pattern;
- circles double crochet (H);
- double crochet blocks:
- openwork windows;
- openwork cross.
After all the links are ready, you need to assemble them into a single fabric according to the diagram presented above. You can tie the parts together or sew them with a needle.
Patchwork for Beginners: Bedspread
The master class is designed for beginner needlewomen. Its simplicity lies in the two types of fabric used for sewing (a baby blanket) and the equally simple shape of the patches. A traditional patchwork bedspread, sewn by hand, involves working with a large number of different parts, which are assembled according to patterns. Fragments can also be crocheted or knitted. Assembling a composition with your own hands is not always easy; for beginners, you first need to master a two-color version of a bedspread for a children's bed, made using a simple technique.
To work on a bedspread for a one-and-a-half bed 2 m x 1.5 m, you need to prepare:
- Plain fabric – 1.8 m x 0.9 m;
- Fabric with a pattern – 2.6 m x 0.9 m;
- Sintepon according to the size of the bedspread;
- Textile for lining - 2.15 m x 1.6 m;
- Threads to match the main fabric.
In order to sew a bedspread from small fragments, you need to work hard
Master class: DIY baby blanket
Detailed instructions with diagrams and photos will help you understand all the nuances of making a bedspread for a nursery.
A baby blanket or bedspread can be much more difficult to make
Progress:
- From a plain thick fabric (here blue cotton) cut out 18 squares 30 x 30 cm (including allowances, the finished size is 27 x 27 cm). You can make a square template for a pattern in the form of a frame 2 cm wide.
- Cut out the same 17 squares from the printed fabric.
- From this type we also cut out the edging - strips 10 cm wide and 7.2 m in total length. The fabric consumption can be seen in the photo.
- Arrange all the squares in a checkerboard pattern and stitch according to the pattern.
- Sew on the edging. If there is not enough fabric, you can use scraps at the corners, as in the photo.
- The prepared front part is folded with the lining, sewn on the wrong side in the form of a bag and turned inside out.
- We put the padding polyester into the hole left and straighten it out like a blanket in a duvet cover. For good fixation, you need to fasten it in different places with pins.
- We thread two colors of thread into the machine - to match the top and lining, respectively. Along the lines of the squares and edging we stitch together all three layers.
- On the open side, you must first tuck the edge inward.
Related article: How to take meter readings Neva 324
Having mastered the patchwork technique, which is presented in the master class for beginners “Do it yourself”, you can gradually move on to complex patterns with hundreds of multi-colored details.