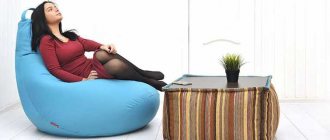
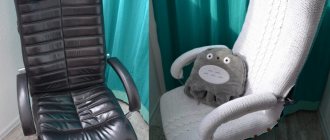
Furniture without a frame has become very popular, it has significant advantages, and it also has an attractive appearance. Frameless furniture is quite convenient to use and gives the interior a modern spirit. Creating such a design yourself will not be difficult. This will not only save your budget, but also help you find a new piece of furniture that will fit into the design. This article will tell you how to sew a beanbag chair with your own hands; step-by-step instructions will allow anyone to feel like a creator.
Features of upholstered frameless furniture
An important feature of this design is that it does not have a rough frame. The chair consists of 2 covers - internal and external. The removable cover can be made from a variety of materials. But the inner cover should be made only from durable and dense fabric.
Jeans bean bag chair
Important! The main feature of a frameless chair is that it completely adapts to the human body, giving you the opportunity to relax and unwind.
Baby chair
Care of the finished product
When cleaning the fabric base of an upholstered chair, it is important to consider the processing method:
- Cotton-based materials must be washed;
- dense compounds (eco leather, suede) are treated with a damp cloth;
- The chair and cover made from flock are recommended to be cleaned using the dry method;
- When choosing a washing temperature (cool, warm), the type of fabric base is taken into account.
The furniture structure has no shape, so it loses volume over time (the granules become deformed and compacted). It is necessary to add new raw materials by mixing with the old one. Do not place the product near heating appliances.
Required materials and tools
To create a beanbag chair with your own hands, you need to prepare, select the necessary materials and tools that will help in the work:
- Large pieces of fabric in different colors;
- Lightning (2 pcs);
- Scissors;
- Threads;
- Sewing machine;
- Filler for the inner case.
Frameless ottoman chair
Master class on making a soft bag
Before sewing a bag chair with your own hands, you need to determine the dimensions, configuration of the model, and prepare a drawing.
The stages of product manufacturing also include:
- cutting of elements;
- fitting of parts, sweeping;
- chair sewing;
- ironing;
- filling of cases.
Creating a pattern
The pattern for the chair is created taking into account the size and model of the piece of furniture. Standard schemes are used or proprietary ones are developed. You can make a pattern for the customer. Patterns are made taking into account seam allowances in accordance with the proportions.
Required:
- the main part that combines the front part, back, and sides;
- top part;
- bottom.
Elements in an enlarged size are transferred to a sheet of special paper (millimetre), cut out, and laid out on a fabric base. It is recommended to place patterns with dimensions on the fabric economically, taking into account the direction of the fabric section. Experienced craftsmen can make a bean bag chair according to a pattern on a ready-made fabric base.
Sewing a cover
After cutting out the parts, we sew the covers. 2 pear-shaped blanks are created. The parts are connected using pins, then you need to sweep the seams of the sidewalls. Sew the elements manually or using a sewing machine. Parts of the structure are then smoothed with a steam iron.
On the main cover, the side seams are sewn, the outer wedges and connecting seams are folded and overcast. It is necessary to allocate about 40-50 cm to add a zipper.
The inner cover is sewn step by step, leaving up to 35 cm under the zipper. The seams are pressed and treated with an overlocker. Zippers are inserted into the segments, basted, adjusted, and stitched on a sewing machine. It is necessary to make a handle that is attached to the long edge and ironed.
The cover blanks must be turned out onto the front surface and smoothed. The top element is basted and sewn onto the bag. The bottom is sewn into the covers. After work, the product is ironed.
Filling the filler
Before you pour the filler into the chair, you need to calculate the volume of raw materials. A package of at least 500 liters is required. The model has a fabric sleeve (50 cm wide and 50 cm high), closed with a zipper or an additional cover.
An open bag of raw materials is placed in the hole; carefully fill the bag. The granules are lightweight, so it is recommended that the work be carried out by 2 people. An important point is the strong electrification of the material, which requires moistening the granules with water from a spray bottle.
If there is a narrow hole in upholstered furniture, it is necessary to use a plastic bottle with a narrowed part. The neck and bottom of the dish are cut off. The edge of the plastic container is lowered into a bag with granular material and secured with fishing line. The other edge of the dish must be lowered into the chair cover, secured with tape or rope, then pour in the granules.
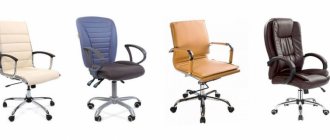
Material selection
Before starting work, you should decide which fabric is best suited for the chair cover. It is important that they meet these parameters:
- Strength;
- Easy to care for. The outer cover will often get dirty, which is why you should select suitable fabrics.
- Appearance The overall appearance of the finished chair depends entirely on the selected material.
Bean bag chair Grusha Jay
Materials for a bean bag chair
While planning to do a master class on sewing the now popular bean bags, or bean bag chairs, I realized that the main difficulties for those who decide to sew themselves a bean bag chair arise with the selection of material.
I won’t explain here what a bean bag chair is, also known as a bean bag; there have already been such publications at the Fair.
In short, a bean bag consists of:
- External cover
- Inner cover
- Fillings in the form of polystyrene foam granules.
That is, to make a bean bag ourselves, we need:
1. Fabric for the outer cover of the chair
2. Fabric for the inner cover of the chair
3. Filling
Well:
- Strong threads
- Long zipper
Let's take a closer look at each point.
Fabric for outer cover. Which one can be used and where can I get it? There are many options. The most inexpensive, and perhaps quite accessible material is Oxford. Fabric reminiscent of a jacket. Tents and various tourist gadgets are made from similar fabric. Usually comes with waterproof impregnation. Found in fabric stores. It's inexpensive. Available in bright, solid colors. And it is often found with a protective, “military” print.
Bean bags made from this fabric are good if the chair is intended to be used, for example, outside, on the veranda of a country house. We had tablet poufs from Oxford for holding public events in nature. For the home, in my opinion, it is better to look for a more comfortable fabric.
Ideally furniture. Fabric used in the manufacture of standard sofas and armchairs. It is better to use plain fabrics: chenille, flock, microcorduroy.
I haven’t seen furniture fabrics in fabric stores, or they are sold in a very, very narrow assortment, and it’s impossible to find something worthwhile there.
You need to look for a company that is engaged in wholesale sales of furniture fabrics and supplies furniture production in your city. As a rule, they all work for cash. True, not everyone cooperates with individuals. So you need to call and find out. And, as a rule, such companies agree to sell at least 1 meter of fabric.
Microvelvet, also called “Velvet LUX”, has a very large selection of solid shades, and the colors are very pleasant. The fabric is also not very expensive. It is cheaper to buy luxury corduroy at a wholesale price than to buy an oxford at a retail price. Another plus of this fabric is that its cover can be washed in a washing machine. However, the manufacturer does not allow this. But I washed mine several times, for a year now, and nothing.
You can also look for faux leather, or as it is called “eco-leather,” and faux fur from suppliers of furniture fabrics. And all this at very reasonable prices! Again, fur and eco-leather are not for everyone. Eco-leather is good for office space, for example.
You can combine eco-leather and fur.
There is also such furniture fabric as faux suede:
As a bonus, you can also ask furniture fabric suppliers for fabric samples; you can use them to create a lot of things.
And very cool bean bags are made from dense printed fabrics, such as tapestry, gabardine, twill. The density is similar to jeans. They are the hardest to find. The chairs look interesting and bright.
You can also take a closer look at curtain fabrics: the choice is much easier, and due to the large width (usually 2.8-3m), you won’t need much fabric at all.
You can find interesting fabrics all at Ikea. You just need to look at which ones are dense and which ones are not. The following chairs were made from IKEA fabrics:
Advice: go through the showrooms with upholstered furniture. All showrooms have fabric samples for choosing upholstery. At the top of the sample there is usually the name of the factory and the website. On the back of the fabric is the name and shade that you need to remember. Next, you can contact the factory, go to their website, find the nearest representative who may sell you the fabric you need.
Yes, an ordinary household sewing machine generally sews furniture fabrics quite well. Faux leather and fur are a little more complicated.
Fabric for the inner cover of the chair . Many manufacturers use dense spunbond. Ideally with small holes for ventilation. This material is cheap and therefore is widely used. Sold mainly in rolls. It is quite difficult to find the required density of spunbond by the meter. If you use loose spunbond, the product may come apart.
Therefore, it is better to use fabric for the inner cover. The fabric should be:
- dense, at least 130-150 g/m;
- breathable, otherwise the balls inside will “stick together”.
Take a closer look at fabrics for workwear, such as medical ones - relative availability and reasonable price.
Chair filler . Expanded polystyrene granules are used as filler. Only balls, no crumbs or waste! Buy from manufacturers or online. The granules are very light (weight depends on density; granules with a density of 15 are usually sold: 1000 liters weighs about 15 kg), so delivery by mail will not be very expensive.
The smaller the balls, the better. Ideally 1-2 mm, 3-5 mm is not bad.
A large bean bag will take 300-400 liters, depending on the pattern. And it’s better to immediately take a reserve, about 100-150 liters, since granules tend to “sag” over time and decrease in volume. 100-150 liters is enough for an ottoman.
You will also need a zipper : a long one for the outer cover so that you can remove the cover, and a short enough one for the inner one. Rolled zippers No. 5 work well.
The threads must be strong. Otherwise, the product will quickly tear at the seams! Regular #40 thread will not work. We used #70 thread. The thread should be difficult to tear with your hands, or not break at all.
And one more small “trifle” - blocks. They are needed if non-breathable fabric is used for the outer cover, or for decorative purposes. Can be put in the studio. You can do without them.
Here, in short, I told you what I knew. I apologize for some of the photos. I hope my publication will be useful to someone!
What size should it be
A piece of furniture such as a beanbag chair is made in two sizes - 50 and 100 centimeters in diameter. These parameters directly depend on a person’s build and height. For a person up to 150 centimeters tall, a diameter of 70 centimeters is suitable. If the height is from 150 to 170 centimeters, the chair must be made from 80 centimeters in diameter, and so on in increasing order.
You might be interested in this: The procedure for sewing elastic into a waistband on a skirt
Parts that need to be sewn
Choice of design and shape
A master who values his comfort will always think about the design of the future product and make it in a style in which it will be convenient for him to use the chair. The most popular forms:
- Pear-shaped;
- Ball shape;
- teardrop-shaped;
- Oval shape;
Wrong size for an adult
Filler - the secrets of choosing the right one
Despite the fact that at first glance the choice of filling for chairs may seem quite simple, in reality it is a little different. In the vastness of the RuNet you can find various videos in which you will be offered recycled polystyrene foam, obtained by processing defective or used foam products, to fill the pear chair. Such expanded polystyrene is categorically not suitable for filling poufs, since it has soft granules with a broken circumference, which quickly shrink and crush.
For furniture stuffing, it is better to use virgin polystyrene foam - its granules have a perfectly round shape and are highly resistant to loads and deformations. The size of primary polystyrene foam balls comes in different sizes, but in our case it is better to use a diameter from 2 to 6 mm.
Granules with a diameter of 5-6 mm
Polystyrene foam granules help the chair keep its shape, adding stability. And in order not only to sew a bag for the chair, but also to provide it with the necessary softness, softening materials should be added to the filler - foam rubber crumbs or holofiber. Foam rubber has low cost and availability, but at the same time it ages quite quickly and turns into dust.
Foam rubber crumbs
As for artificial down (holofiber), its quality characteristics are much higher. It allows air to pass through well, does not absorb odors, is hypoallergenic, does not accumulate dust, and is durable.
Holofiber
Furniture, the filling of which consists of a combined composition, including polystyrene foam and holofiber, will be much softer, more practical and more comfortable.
Saggy chair without artificial down
This is what a chair looks like, complemented with artificial down.
Creating a pattern
In order for the product to turn out smooth, you need to make a detailed pattern, taking into account all the nuances of the material and the shape of the object. You can quickly create a pattern yourself, but there are also a large number of ready-made solutions. If we talk about making your own pattern, you need:
- Make patterns;
- Using them, draw several elements that will make up the chair;
- Place the pattern on the fabric and cut out all the details.
Important! Patterns can be completely different, depending on what properties the chair should have and what materials will be made. Below are several ready-made schemes.
Bag pattern for adults and children
Ottoman diagram
Pattern with detailed dimensions for children and adults
A pattern is made on graph paper and then transferred to fabric where the details are cut out. It is worth leaving allowances for stitching and marking them with dotted lines. The pattern itself will consist of the following set of parts:
- 6 wedge-shaped figures. Their width is 15 cm and 40 at the ends. Length - 130 cm, diameter 50 cm;
- The top is in the form of a diamond with a side of 15 cm;
- The bottom is in the form of a diamond with a side of 40 cm.
For a child, the wedges will be as follows: height - 90 cm, diameter - 45 cm, width - from 22 to 40 cm. The composition of the cross is the same in all cases.
Making a pear chair at home
A master class on making any product begins with preparing all the necessary materials and tools. First of all you will need:
- Fabric for the cover 3 by 2 meters;
- Fabric for cover inside;
- Long zippers of 100 and 30 cm;
- Filler;
- Threads.
Tools you may need:
- Sewing machine;
- Centimeter;
- Scissors;
- Pencil or soap;
- Graph paper for creating a pattern.
Step-by-step manufacturing instructions:
- Create a pattern and transfer it to fabric;
- Cut out all the parts;
- Zigzag the edges of the parts;
- Fold the side wedges and stitch 15 cm at the top and bottom;
- Sew a zipper into them;
- Sew down the side seams of the other wedge and stitch from the “face”;
- Sew the inner cover in the same way.
You might be interested in Features of bloomer pants patterns for men, women and children
Pear
Bucket-shaped bean bag chair
For a similar design, other details are cut out: two circles and a rectangle with a rounded notch along the length of the side. The dimensions are as follows:
- Large circle - 80 cm diameter;
- Small circle - 70 cm diameter;
- The height of the back of the chair is 110 cm;
- The height of the low point is 40 cm;
- Rectangle with a length of 260 cm.
Ladle
Preparatory work
In order for the process of sewing a chair to go smoothly, it is necessary to carefully consider all the details of the future product. The first preparatory stage will be to find the desired shape of the chair and prepare a pattern. Having thought through these points, you can begin to select the material.
Features of the choice of material for the outer and inner covers
The inner case must be durable. The ideal choice would be teak, which is used for sewing pillows. This material has increased strength and wear resistance. To prevent the pattern of the inner cover from showing through, it is better to give preference to light, plain or white fabric.
White inner case
On a note! Knitted outer covers look very nice and cozy, but their wear resistance is insufficient. It is much more convenient to use synthetic fabrics that have water- and dirt-repellent properties.
Threads for sewing also need to be chosen of the appropriate thickness so that as a result of increased load the chair does not come apart at the seams. A metal zipper is ideal as a fastener. You will need 2 of them, 45 and 100 cm long, for the inner and outer covers.
Fastener on the chair
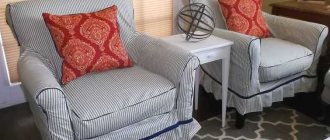
The material of the outer cover depends on the wishes of the owner of the house. If the chair will be used in the living room, then it is better to give preference to pastel colors. To equip children's rooms, you can safely use bright colors of fabrics or leatherettes. Here it is worth paying attention to the quality and composition of the fabric, which should be easy to clean and machine wash.
The best fabrics for frameless furniture
You will also need auxiliary materials:
- scissors;
- chalk;
- needles and threads;
- graph paper for making patterns;
- pins;
- ruler;
- sewing machine.
Sewing machine prices
Sewing machine
When all the materials for sewing the cover are ready, it’s time to think about purchasing high-quality filler.
Where to buy filler
You can use synthetic fibers, millet, buckwheat or rice seeds as a filler for the bag. Down, horsehair, and animal hair are also used. Some manufacturers stuff bean bags with wood shavings. All these materials are suitable as fillers for frameless furniture, but their wear resistance is very low. The fact is that organic materials are very sensitive to moisture and dampness. In addition, dust mites can parasitize in such fillers, and allergy sufferers may experience an exacerbation.
It is much more convenient and practical to use synthetic material - granulated polystyrene foam (foam balls) for filling bean bags and other frameless furniture. They can be purchased at any hardware store.
Prices for granulated polystyrene foam
Granulated polystyrene foam
Filler for bean bag chair
A high-quality filler has the following qualities:
- high wear resistance (up to 50-70 years);
- thermal insulation;
- hypoallergenic;
- lightness, because 98% of the balls consist of air;
- wide temperature range of use;
- moisture resistance.
In addition to the above advantages, the material has an affordable price, which significantly reduces the cost of frameless furniture. Granulated polystyrene foam is sold packaged in special bags. The diameter of the granules is 3-6 mm. To fill one medium-sized chair you will need 300-500 liters of filler.
Dimensions of frameless furniture
Step-by-step instructions for making a bean bag chair
Below are standard instructions for making a medium sized bean bag chair.
Prices for furniture fabric
Furniture fabric
Step 1. Spread the fabric for the inner cover on the floor or other flat surface with the right side facing inward. We fold the fabric crosswise, so that there is an edge along the edges, a fold in front, and cut edges behind.
Fabric for the cover
Step 2. Cut off the compacted edge so that it does not puff up when cutting. On the canvas we mark seam allowances of 1.5 cm, and on the side of the cut edges - 2 cm.
Step 3. On the resulting canvas we make the following marks:
- along the fold – 50 cm;
- along the edge – 135 cm;
- along the cut - 120 cm from the seam allowance line.
Making markings
Step 4. Along the edge line, which is 135 cm, we make marks at the same distance, dividing the line into 3 equal parts of 45 cm. From the first mark towards the center of the canvas we set aside 68 cm, and from the second – 98 cm.
Step 5. Connect the resulting points with a smooth line. This will be the first part that we cut out with scissors.
Cutting out the first part
Step 6. From the cut edge you need to set aside 77 cm, through this point draw a line 50 cm long towards the center. From the resulting point, draw a circle with a radius of 49 cm.
Measure the distance from the edge
Advice! To check the correctness of the drawing, using a measuring tape we measure the length of the resulting circle, which should be 2 times larger than the concave line of the first part (155 cm ×2 = 310 cm).
Draw a circle
Step 7. Cut out the resulting circle on the first layer of fabric, leaving an allowance of 1.5 cm.
Cut out the resulting circle
Step 8. On the bottom layer of fabric, you need to draw and cut out another circle with a radius of 42.5 cm, but do not forget about the seam allowance of 1.5 cm. The length of the circle should be equal to the length along the cut edge of the first one, 275 cm. The circle needs to be cut according to line marking the seam allowance.
Let's mark another circle
Cut it out
At this stage, the cutting of the inner cover is completed. The result is the main side part, the smaller circle is the bottom of the chair, and the larger circle is the inner part.
Two parts side by side
Step 9. On the cut of the main part (where 2 cm was set aside for sewing in the zipper), make a mark of 10 cm, then measure the length of the zipper and mark it again. The marked edges are stitched, and a zipper is sewn into the resulting opening.
The fabric is joined and stitched
Step 10. We grind the zipper or pin it with pins, retreating from the teeth themselves by about 1 mm. The fabric and zipper should lie flat.
We grind the zipper
When all the preparatory work is completed, you can stitch the zipper using a machine. We repeat the same with the other side of the zipper, but at the same time we make a small overlap on the zipper from the front part, which will hide it. The ends of the fastener must be stitched and firmly secured.
Sew
We pin the fabric with pins on the front side
Attaching the second side of the zipper
Zipper sewn in
Step 11. Bend the cut circle with a smaller diameter in half, and then in four. You need to make marks on the fold lines from the wrong side. Then we fold it again, dividing the circle into 8 equal parts, and again mark the folds on each side. We repeat the same thing again, dividing the circle into 16 parts.
Marking a smaller circle
Step 12. Do the same with the larger circle, folding it 2, 4, 8, 16 times. On each layer we make marks for each bend.
Marking a larger circle
Step 13. We fold the main side part in a similar way, into 2, 4, 8 parts on the larger and smaller sides. Next, we connect the main part with the large circle, according to the marked marks. In this way we will assemble all the parts of the case. First we pin the large circle, then the smaller one. Everything that was done needed to be ground and stitched, leaving a 1.5 cm seam allowance.
Sidewall markings
Step 14. We process the resulting internal seams with an overlocker for strength.
Fabric connection
Sew and trim the edges of the cover
Step 15. On the outside, we sew all the resulting seams again, because the load on them will be quite large.
Sew from the front side
Turn it inside out
Now that the manufacturing of the inner cover is complete, we proceed to filling it with polystyrene foam. The chair will need 0.5 m3 of filler.
After this, we repeat all the steps of this instruction for sewing the outer cover. All work is carried out in the same way, with the exception of sewing in a zipper. For an outer cover, the length of the zipper should be at least 70 cm, and even better 1 m. The fact is that the filled inner part of the chair will need to be inserted through this hole.
Advice! A fully filled case will be quite difficult to insert into the outer decorative case. Therefore, it is better to fill it not completely, insert it into the case, and already in this position add the required amount of filler. When sewing, it is necessary to take into account that the zippers should be located in approximately the same place to make it easier to care for the chair and replace the filling.
For those who want to quickly finish sewing a bean bag chair, modern stretch fabrics that fit ideally on furniture of different sizes can be offered as an outer cover. After putting on the outer decorative cover, lightly fluff the resulting chair and give it a comfortable shape.
Ready chair
With prolonged use, the internal filler shrinks, and the chair loses its former shape and comfort. Don't panic! Even a child can change the filling in the chair or add a little something new. All work is performed after unfastening the previously sewn zippers, which also greatly facilitate caring for the chair at home.
Video - About making a bean bag chair with your own hands
Video - Bean bag chair made from old jeans
Sewing a cover
Sewing is done after cutting. Before this, you already need to understand the dimensions of the chair, and the process is carried out like this:
- Create two blanks, fastening all the elements to each other with sewing pins. After this, the side seams are basted;
- Connect the seams by hand or using a machine and smooth them with an iron;
- Delay the side seams on the front side (outer cover);
- Place the wedges on both workpieces and baste;
- Iron all seams;
- Baste zippers for all unstitched areas;
- Make a portable handle if desired;
- Turn both covers inside out and grind off their bottoms, and then baste the circles and the top.
Filling the filler
The penultimate stage of work is pouring the filler into the cover. One of the two cases is filled to 2/3 of the volume. There is no hurry in this matter. If you are not careful, all the granules will scatter around the room and collecting them will be difficult and time-consuming.
Oval
Note! For pouring, it is better to use a regular large funnel or a homemade device made of paper or cardboard.
The final stage is decoration
The inner cover does not require finishing, as it serves as the base. But the outer one can be decorated with something. It could have originally been made from some kind of printed or altered fabric. You can make beautiful applique or embroidery on a simple plain material. You can also cover the chair with an additional bright cape: it will hide the seams and combine the appearance of the chair with the overall interior.
A drop of motley fabric
Advantages and features of such furniture
A soft homemade chair is an excellent alternative to old, large and heavy sofas. It can decorate a room with any design and bring comfort and a special homely atmosphere to it. The main advantage of the bag is the ability to make it yourself and in a very short time. Moreover, everyone can do it.
Now it’s clear what a pear chair is and how the pattern for this product is prepared. Any craftswoman, even an inexperienced one, can make it. The only condition is to choose the right material and filler.