Purpose of the ottoman
If a do-it-yourself ottoman for a hallway is often a single copy, then inside the living room or nursery it is complemented by clones. In any case, the themed product suits all rooms with the exception of the bathroom and kitchen.
Despite the lack of a back and armrests, the ottoman is a fairly comfortable piece of furniture. The corresponding convenience is explained:
- Compactness - the ottoman does not take up much space and can easily fit into any free space;
- Light weight - the thematic object is easy to carry;
- Soft seat - the ottoman is inferior to the armchair in terms of softness, but it easily gives a head start to classic wooden chairs and computer analogues.
Finally, the default ottoman is welcome in a living room where there is often a lack of seating for guests. Therefore, it is recommended to purchase or make ottomans yourself in 2-3 units. The themed product also fits comfortably for children and short people.
The main thing is that the design of the soft “tub” matches the style of the interior. When every moment is taken into account, you can take on the drawings of the ottoman with your own hands, and then move on to the manufacture and assembly of materials.
With and without backrest
This furniture comes with or without a frame. Each individual option is unique in its own way. The frame of the products is made of wood or metal . The top of the pouf is upholstered with foam rubber and textiles.
Frame models are most often installed in hallways, corridors or kitchens. They look harmonious in classic styles.
Frameless poufs are softer and more comfortable to use. They are soft bags filled with foam rubber, holofiber or other filler. They are placed in bedrooms, living rooms and children's rooms. It is pleasant to relax on such a product after a hard day at work. Their peculiarity is that if you have free time and the necessary materials, you can make a piece of furniture with your own hands in a short time. The shape of the products can be round, triangular, or pear-shaped.
According to the classification, poufs are also divided into soft and hard . Soft ones, in turn, come with:
- With open frame. They resemble a small chair with a soft seat. Such models are budget-friendly and easy to make on your own. Their frame can be wooden or metal.
- With a closed frame. Outwardly they look like large pillows. Their frame is upholstered on all sides with textiles. They can be equipped with legs or furniture wheels. The shape of the products is most often round or square.
Rigid models are made of wood and decorated with decorative trim . They are used not only as a seat, but also as a coffee table.
By type, ottomans are divided into:
- Banquettes. They are found in hallways and are used as additional seating. Their height does not exceed 40 cm .
As for the appearance, shape and decorative finish of the bench pouf, there are no restrictions. - Bedside products. They are installed in bedrooms and are made in the same style as the bedroom set.
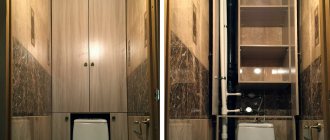
- Pouf-box, chest of drawers. Such models are equipped with additional storage space. They have drawers or shelves in the interior space.
- Transformers. Their characteristic feature is their ease of transformation into a chair, bed or other piece of furniture.
- Poufs with back. They look like armchairs, but they do not have armrests.
Information: in classic interiors, wood is used to make the frame, in modern interiors, metal is used.
Ottoman design
It is only from the outside that the thematic object appears to be a simple product. In fact, the pouf provides:
- Support frame;
- Padding material (internal filler);
- Protective shell (covering the frame and padding);
- Padding layer.
If the frame is made of hard or flexible materials, then soft analogues are suitable for padding:
- Sintepon;
- Polyurethane foam;
- Felt;
- Foam rubber;
- Latex.
Thick vinyl film or textiles are used for the protective shell, and decorative textiles, genuine leather or its substitute are used for padding.
The shape of the ottoman deserves special attention. It can be a barrel, cube, mushroom or octagon. You can also add legs to the bottom of the pouf.
Simple option
An ottoman can be made from ordinary plywood. To do this you will need to knock down a plywood box. Next, its upper part should be covered with foam rubber, this will be the seat, it should be soft.
All walls can be varnished or painted, and a cover made of fabric can be placed over the foam rubber. You can also simply cover the foam with a cloth using a staple gun.
Making your own ottoman
The cost of an ottoman varies. This indicator is influenced by design, style and manufacturer. And since the target audience is increasingly showing creativity and economy, the pouf has long been the object of experiments from scratch. But before you take on a thematic master class, you will have to consider the following points:
- Required number of ottomans (depends on the size of the family and the importance of parties);
- Design (the ottoman must match the soft set, but if there is only one, then the opposite effect can be observed);
- Shape (a cube and a barrel are easier to make than a mushroom and an octagon);
- Composition (the convenience and reliability of the product depend on this indicator);
- Additional features (the design can have legs and even a secret compartment)
Note!
- Do-it-yourself easel - varieties, drawings with dimensions for creating with your own hands. Step-by-step instructions for beginners
- How to Write a Screenplay: Tips and Best Practices for Writing a Screenplay. Step-by-step master classes for beginners with detailed descriptions of the stages
- DIY medical mask: TOP-140 photos of the best DIY options. Instructions for making a mask at home
It is recommended to first make one pouf to gain experience, so that later you can confidently take on the second or third.
Ottoman made from plastic containers
Transparent bottles bend well, come in different sizes and there are always a lot of them. If their displacement is at least 1.5 liters and the quantity is 32 units, then it becomes clear how to make an ottoman from bottles with your own hands. The corresponding process is unique in itself:
- First you need to cut off the tops of the bottles, which occupy 1/3 of the container;
- Next, whole bottles are inserted into the finished glasses to create a pipe that is blind at both ends (containers with solid necks must be closed);
- The previous point is repeated with the remaining containers;
- The container is tied with masking tape at the joining points;
- The bottles are placed next to each other in a 2x2 pattern and tied tightly with tape;
- Four tied fours are placed close together and tied again;
- A pattern with allowances is created for the resulting cube;
- A fabric cover is made according to the pattern;
- The cube is placed in a case, the walls and top of the cube are filled with sheets of foam rubber;
- The cover is complemented by a zipper and decorated with decor.
If desired, foam rubber spreads to the bottom, and the cover is completed with more expressive upholstery.
Main settings
Before you start cutting the future product, you need to decide on its dimensions. Here you can choose the most common option, or you can create a unique product. For inspiration, you can look on the Internet for photos of handmade ottomans; there are many different and interesting ones.
If we are talking about a “test of the pen”, then you shouldn’t bother; it’s better to stick to the usual shape, namely, the shape of a pancake or a pear. Thanks to the use of a special filler, such a bag will be ideal for relaxation.
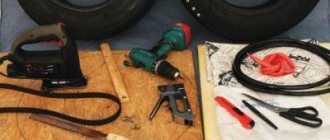
Ottoman made of automobile rubber
There are also always enough worn tires, and there are often few seats inside the garage, veranda and gazebo. In this case, step-by-step instructions with real examples come from the lips of craftsmen. Anyone can use this idea:
- The empty tire is thoroughly cleaned and washed;
- The rubber is trimmed with chipboard circles at both ends (screws and a screwdriver are used for fastening);
- From the very bottom to the top, the tire is wrapped with a thin 12-20 mm rope (the rubber must be lubricated with epoxy glue in advance);
- From the very center to the sides the circle is trimmed with rope (the plywood is also pre-lubricated with glue).
The finished product is suitable for installing legs. The latter are especially relevant if the ottoman will be used in the living room. Moreover, the legs can be borrowed from worn-out stools, chairs and even a table.
Product with box
To make an ottoman with a drawer, you need to follow the following instructions:
- From chipboard we cut out 2 blanks measuring 37x37 cm and 37x40 cm, and one square - 40x40 cm;
- We cut out 4 pieces of 37 cm in length from the timber (4x4 cm in cross-section);
- From these elements we make a box with a height of 37 cm;
- Using wood glue, we fasten the timber in the inner corners;
- We fix the corners from the outside with metal corners or self-tapping screws;
- Apply glue to the bottom and timber. Glue the bottom and let it dry. After this we secure it with self-tapping screws;
- We attach 4 locking bars to the square sheet for making the lid. This will secure the lid in the box;
- We upholster it with soft material (batting, foam rubber, padding polyester).
This piece of furniture can be perfectly used as an ottoman for shoes, which can be put away in a storage box from season to season.
Ottoman made from a plastic bucket
This model is suitable for children, since the latter do not put much strain on the seat. However, the plastic must be thick, so it is better to choose household barrel-shaped buckets for the ottoman. As for the manufacturing itself, it happens as follows:
- First, you need to separate the handle from the bucket;
- Next, the container is treated with glue and tied with a thin rope, as in the case of a tire;
- The bucket is covered with a circle of plywood and tightly tied with tape (the tying must be done lengthwise and crosswise, as is the case with gift wrapping);
- A pre-made round bedding is placed on top of the circle;
- A pattern is made for the container, and a cover is made from the pattern;
- The container is immersed in the case and the pouf is ready.
And if you use a white grocery container instead of a household bucket, then you no longer have to frame the plastic ottoman with your own hands with a cover. After all, the container has a lid that allows you to look inside the product and store different things in it.
Note!
- How to make a piggy bank with your own hands - the best ways to make a piggy bank with your own hands. Detailed master class for beginners with photos and videos
- Cold porcelain: features and methods of making it at home. Reviews of the best recipes + 120 photos
- Cake decorating: TOP-170 photos of the best ideas for decorating a cake at home + instructions for beginners with simple patterns
The main thing is to insert a couple of circles into the product, which will not allow the bottom and thin walls to bend or break. After this, the product must be upholstered with fabric, and a soft seat must be glued to the lid.
Materials and tools
What fabric is best to use? There are several options here:
- durable furniture material;
- old clothes;
- lining fabric (for the inner cover).
As for the color of the material, it all depends on the decor of the room in which the pouf will be placed. Bright, rich colors are perfect for a child's room. For the hallway - discreet pastel shades that will harmonize with the furniture. Decorating your living room depends on what effect you want to achieve. For example, you can sew a cover to match the curtains or sofa cushions. Or choose a fabric to match the color of the wallpaper or armchairs.
Tired of streaks on your windows? Order a magnetic brush for half the price. The promotion is valid for a limited time.
To make a cover, you will also need thread and a needle, sewing pins, a machine, pattern paper, scissors, a tape measure, and a pencil. So, when you have stocked up with everything you need, you can start choosing the desired form. We will look at how the inner and outer covers are sewn. Now you can proceed directly to the manufacturing process.
Octagonal fabric ottoman
It is no longer so easy to produce the corresponding model, because you will have to make a pattern in advance for a hexagonal petal ending in two cones. After this you need:
- Make eight hexagonal petals from fabric according to the pattern (the length and width of the rectangle in the middle of the petal are 50 and 30 cm, respectively, the length of each side of the cone, except for the bottom edge located between the rectangle and the cone, respectively, is 40 cm);
- Make eight hexagonal petals from a soft base;
- Sew the soft base shape to the back of the fabric shape;
- Iron the seams of the blanks, then sew them in pairs and again in pairs (the upper ends do not need to be sewn so that the cover has a hole);
- Fill 80% of the finished cover with washed old towels, and the top with soft synthetic padding;
- Sew the ends of the holes to close the cover;
- Sew two octagons made of fabric, which served as the main material for making the cover, to the bottom and top of the pouf.
You can use safety pins, a large needle, and thread to get a better stitch pattern. The point is that after pinning the top of the pouf with a needle, you need to guide the thread like an accordion, retreating 0.5-1.0 cm from the seam and each hole.
The corresponding pouf can be made well from scrap materials, including worn-out jeans, and when finished, can be easily transported from place to place due to its low weight. It is also safe, i.e. does not indicate injury at all.
Sewing algorithm
In fact, there is nothing complicated in making a pouf of this type; the main thing is to prepare all the necessary materials. The algorithm for sewing should be as follows:
- Having chosen a suitable diagram or drawn it yourself, you can move on to the next step. The pattern must be transferred to the material chosen for sewing, from which the lower bag and the outer one will be sewn. It is important to remember to leave 1.5 cm at the seams.
- Having cut out the parts, you can begin assembling them. It would be better to sew everything on a typewriter, it will be stronger. Zippers are sewn into the covers.
- When the inner bag is sewn, it needs to be filled with pre-prepared filling.
- Now all that remains is to place the bag with the filling in the outer thick case and the pouf, made by yourself, is ready for active use.
If desired and possible, several external covers can be sewn at once. They can be of different colors, this will allow you to update the pouf in the room from time to time.
The algorithm for sewing such a product is extremely simple, the main thing is to stock up on the necessary materials and the desire, and a modern element will appear in the house on which you can relax and unwind.
Pouf bag
This product is unique in that it has a soft back. To make it you will need:
- Create a pattern in the form of a vase with a narrow bottom (maximum width – 50 cm, neck length – 40 cm);
- According to the pattern, make six pieces each from denim and thin fabrics;
- Guided by the previous pattern, make six blanks again, but from colored fabric (because these petals will be used to assemble the cover);
- Create a new pattern in the form of six semi-ovals for the bottoms of the petal vases, as well as two hexagons for the bottom and top of the entire product - with 40 and 10 cm sides;
- According to the pattern, make blanks for the inner shell and cover, respectively;
- Sew all the pieces together;
- Fill the inner case with polystyrene foam balls;
- Place the inner cover into the outer one, and add the latter with a zipper for fastening and unfastening.
Note!
- How to make a house out of cardboard: 140 best photos of children's crafts with your own hands + step-by-step manufacturing instructions with simple diagrams
- DIY rose lamp - step-by-step instructions for creating a lamp with your own hands + original design ideas with photo reviews
- Furniture decoupage: TOP-140 photos of non-standard decoupage options. Step-by-step instructions for decorating furniture with your own hands
The finished ottoman bag with your own hands welcomes the handle, which is also made of fabric. Without a handle, carrying a large, baggy product is not so much difficult as it is inconvenient.
Choice of design and construction
When deciding on the structure of the accessory, you should build on your own abilities and skill in needlework. For those who master carpentry skills, it will not be difficult to make a multifunctional wooden product with many convenient drawers.
Experienced seamstresses can easily create a designer ottoman of any size, shape and color.
For those who do not have special skills, it is better to get by with a frameless accessory made from simple materials. Tires, a regular household bucket or a wooden box are ideal for this.
How to make soap at home - practical tips
Crafts in the form of letters for school and decor - photo ideas, tips
When choosing the external design of an ottoman, you should take into account the overall interior design. The classic style is perfectly complemented by a simple accessory made of wood. The upholstery should ideally be made of expensive fabric, such as velvet or silk. Luxurious fringe cords will also luxuriously complement the product.
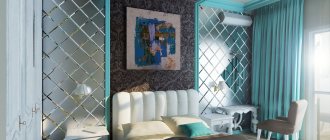
For apartments with a more modern design, a pouf with leather or fur upholstery is ideal. Accessories with an abstract print or an original patch will look interesting. Also, the decor in the Art Nouveau style will be perfectly complemented by a plain soft ottoman in a bright color.
Pouf with interior
Mess, trash, renovations - if there are a lot of things in the house that have nowhere to put, then a chipboard ottoman with an interior will be a real salvation. The design does not have a frame, because the bottom, walls and lid themselves serve as a supporting base. They are assembled as follows:
- Four squares are cut from plywood to fit the walls (sizes are selected depending on the age and height of the future user);
- It is also necessary to make the bottom and lid from chipboard;
- The walls and the lid are attached to each other using four sidewalls, which are sawn from a 40x40 mm bar;
- Sides made of 30x30 mm bars are attached to the edges of the lid (the sides should protrude outward, covering the walls when the lid closes the container);
- The bottom is attached to the walls;
- The sides are finished with padding polyester, and the lid (seat) is finished with foam rubber;
- Each part is upholstered with decorative fabric.
The fastening system is made using screws. When the ottoman with the lid is ready, it remains to be checked for stability. If desired, you can arrange the legs below the structure.
Moreover, it is better to attach the latter to the bottom even before it is attached to the walls. And although the feet leave dents in the carpet and flooring, they can be wrapped in special liners or wrapped with insulating tape.
What to prepare?
This interesting design is assembled from what many people have in their homes. The financial investment is minimal, but the effect is amazing.
It is necessary to prepare 16 pieces of bottles, their volume should be one and a half or two liters, you will also need adhesive tape, it is better if it is double-sided, prepare thick cardboard and foam rubber, fabric for the cover. You will also need cutting materials, scissors or a knife.
Pouf in the form of a barrel
It is clear that making a round pouf with your own hands is easier than its octagonal counterpart. Making a “barrel” is also not complete without chipboard and bars. The corresponding event takes place in stages:
- First you need to make two circles of plywood with a diameter of 40 cm;
- Next, 6-8 bars are attached to one circle to form a kind of chair;
- The next step is to attach the second round disk to the free ends of the legs;
- The round structure is wrapped in flexible cardboard (here it is easier to fasten with a stapler and staples);
- The cardboard facade is wrapped in padding polyester;
- Thick furniture foam rubber is glued to the seat;
- A pattern is made according to the shape and dimensions of the structure;
- Fabric or leather upholstery is made according to the pattern;
- The structure is completed with upholstery and is ready for use.
To the question of how to make an ottoman with your own hands if there is a cat in the house, a simple answer is given - you can cut a hole in the wall of the container so that your pet can get inside the product and live in it. A pouf box is also suitable for this idea.
Decor ideas
Here are some ideas for decorating your homemade pouf.
- When making an interior item from plywood, the side walls (or part of them) can be made from laminated chipboard. This way it will look much more interesting. The texture of the product will resemble the texture of natural wood.
- You can apply a self-crocheted mesh over the upholstery. This will give the product a more interesting and elegant look.
- If the pouf is made from an old tire, then the side walls do not need to be lined with textiles. This way the finished item will look much more interesting. The side walls can be painted in a color that will fit well into the interior.
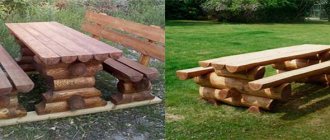
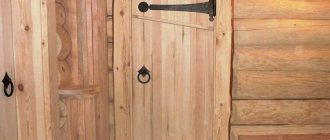
- A pouf can be made not only from an old stool, but also from a wooden box. The side walls are not sheathed, but simply varnished. The appearance of this product is very unusual and will decorate almost any interior.
- Instead of leatherette, you can use natural leather. It looks much more beautiful than leatherette. However, the price of genuine leather is quite high. This should be kept in mind when calculating the cost of materials.
- When making a pouf from plywood, it is better to decorate the internal storage compartment as well. It can be upholstered with the same material as the outer part. You can also simply paint it. True, in this case the edges of the upholstery may be visible, and this is not very beautiful.
- Small textile pockets can be sewn on the sides of the upholstery. This will allow you to store things not only in the internal compartment of the piece of furniture, but also outside. In addition, the pockets perfectly complement the overall decor of the product.
- A children's pouf can be made in the shape of an animal (for example, a hippopotamus).