How to disguise pipes without a box?
The materials used to close communications must meet the following requirements:
- Easy to install. When masking pipes with your own hands, it is important that even a novice master can cope with the task.
- Strength and wear resistance. If the structure is movable, then the material must withstand constant mechanical loads.
- Resistance to humidity. Condensation accumulates on some pipes, and in combined bathrooms the source of moisture is the sink or bathtub.
- Convenience and ergonomics. In typical apartments, toilets do not differ in size, so not only the aesthetic component is important, but also saving space.
Pipes are common property. It is important that in the event of a leak or inspection, access to the devices remains open, so it is not advisable to build blind structures. The main danger of bricked-up pipes is that when they leak, the process will go unnoticed. And when the neighbors below notice the accident, they will have to urgently open the walls.
Before installation work, you should put all pipes in order, check valves and meters: this prerequisite will allow the products to last longer and avoid additional costs in the event of an accident.
Using a plumbing cabinet, you can not only hide the pipes in the toilet, but also create additional storage space for construction tools or cleaning products. The sewer riser will remain freely accessible, and the bathroom will look aesthetically pleasing.
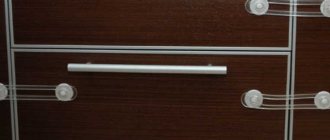
The photo shows a cabinet in a Khrushchev-era building, made to order from laminated chipboard. With its help, it is easy to hide the pipes in the toilet and keep the room looking attractive.
Tools and materials
You can order a closet for the toilet from a furniture company or make it yourself. To work you will need:
- Building level.
- Roulette.
- Screwdriver, screws, dowels.
- Drill.
- Jigsaw.
- Hinges for fastening doors.
- Blanks for creating a toilet cabinet: boards, chipboard, chipboard or MDF.
- Wooden bars.
- A covering film that will protect the floor from damage.
How to close a riser in a toilet
How to hide (close) pipes in a toilet
Our comfort is provided by engineering systems, and their component is pipelines, so pipes in our home are inevitable. But their appearance, even when new, just changed, is far from the most attractive. Therefore, there is a natural desire to hide them. Today we will talk about how to hide pipes in the toilet - it is in this small room that there are usually the most of them.
How to line the pipes in the toilet? For example, gypsum board or plywood
There are different ways to hide pipes in a toilet, but most of the methods involve creating walls from different materials. If you choose this method, it is better to replace old pipes with new ones in advance - both water supply and sewerage. It’s definitely not worth hiding old communications behind the wall; then it’s better to choose a lightweight option that will provide access to the pipes at any time.
How to make a box from plasterboard
You can cover the pipes in the toilet by making a box made of plasterboard. This is perhaps the most popular solution. This is because the technology is very flexible; pipes of any configuration can be hidden. Another nice bonus is the multiple finishing options: lay the tiles with glue, level the surface with putty, then paint or wallpaper.
The box for pipes in the toilet can be vertical or horizontal - this does not change the essence
Peculiarities
If you choose to close the pipes in your toilet this way, there are several points that need to be taken into account. The first one is to all key nodes - counters, filters, etc. must have access. It is advisable to have quick access to shut-off valves. There are several options:
- make one panel folding or rotating (hinged);
- part of the panel can be removable, fastened with a pair of screws and/or magnets;
- install a hatch (plastic or invisible hatch under the tile finishing.
You can, of course, make the structure non-removable, but if necessary, you will have to break everything and then rebuild it, and problems happen even with new pipes.
Special hatch for tiles
Secondly, if you are going to finish the tiles, it is better to glue them with a special glue, rather than lay them on a mixture of cement and sand. The adhesive layer required is thinner and its mass is smaller. Under such conditions, it will be easier to remove/lift the cover.
Work order
First, decide what your box will look like. It is advisable to plan everything so that it not only covers the pipes, but, if possible, also carries a functional load. For example, if the pipes run below along the wall on the right or left, which happens if a hygienic shower is installed in the toilet. the box can be made a little higher, and various necessary little things can be placed on its upper part.
How to close the pipes in the toilet: make a box from plasterboard
If you are closing the risers that run in one of the corners behind the toilet (the layout of standard Khrushchev toilets), it makes sense to close not only that corner, but to sew up the entire wall, making it into a cabinet. Shelves can be open or closed (with or without doors), but in small apartments this is very convenient.
If the pipes are on the back wall, and the toilet is narrow and long, it makes sense to sew up the back wall completely
Having decided what your box will look like, markings are applied to the walls and floor. Then take galvanized profiles for drywall. Down and on the sides there is a supporting profile - PN (UW) - without curved sidewalls. Since the structures are small, a profile of 50*40 mm is sufficient. The jumpers are fitted with a rack profile - PS (CW) - its width is also 50 mm, and the depth can be small if desired.
The jumpers are cut to size (using tin snips) and secured with self-tapping screws. For a short distance - up to 50 cm - one at each end is enough; for a larger beam, put two. The installation step of the racks is about 60 cm, the jumpers - with approximately the same step. In the place where the door is attached (if provided), a reinforced double profile is installed.
The assembled frame is sheathed with gypsum board, cutting it to size. They are fastened with small self-tapping screws with a screw at the end (TEX 3.5 * 9.5 mm). Install fasteners around the perimeter and in places where jumpers/stands go, a step of 20 cm. When screwing, you need to make sure that the cap is slightly buried in the drywall, but does not break through the cardboard.
After the cladding comes the finishing work, and it depends on the chosen finish. Before painting and wallpapering, the box is completely puttied; before laying tiles, only the screw heads are covered with putty.
What else can you use to make a box for pipes in a toilet?
Not everyone likes to work with drywall and profiles for them. In this case, the frame can be assembled from dry wooden blocks. If desired, they can (and in principle should) be treated with antibacterial compounds so as not to rot.
Instead of drywall, you can use OSB, moisture-resistant plywood or flat asbestos-cement sheets. All these materials can hardly be called 100% environmentally friendly, but many are more accustomed to working with them. All of them are moisture resistant and easy to process, so they are a good option. By the way, the tile fits perfectly on asbestos, better than on all other materials, including gypsum board.
Make the back wall of the toilet out of plastic
You can hide the pipes in the toilet behind plastic panels. This method of closing toilet pipes is the cheapest, but also the most short-lived. The plastic is easily pressed, so you have to be careful.
Now a little about aesthetics. If the decoration of the walls in the toilet is planned from the same plastic, then there are no problems at all - everything is in the same style. If the wall decoration is different, there are two options - find plastic panels that are similar in color or play with contrasts by adding a couple more details of the same color.
The colors were chosen very well - exactly to match the tiles
It is easy to cover the pipes in the toilet with plastic panels. First, the frame is assembled, but already made of wood. It is attached to the walls and floor with dowels. Since the structure is small, it will hold up perfectly on nails; large loads are not expected anyway - the plastic can only withstand a very small weight.
Starting profiles for plastic panels are attached to the wooden frame, and sections of panels of the required length are inserted into them. They have a tongue/groove type connection and are installed without gaps. The plastic is attached to the frame using staples and a construction stapler. To ensure easy access to pipes for repair or maintenance, doors are made of plastic in the box/wall. In this case, you can install factory-made plastic hatches - they are lightweight and fit well into the style of rooms decorated with plastic panels. Those who don’t like this option can make the doors themselves, making the frame also from wooden planks and covering them separately with plastic. There is another option - leave several slats loose and remove them if necessary.
Finishing the box and ceiling with one plastic is a good idea
When purchasing, choose plastic wall panels (there are also ceiling panels) - they have thicker walls and are more difficult to press through. If you plan to use the upper surface of the box, it is better to place a sheet of plywood (moisture resistant) under the plastic.
Roller shutters in the toilet
The easiest way to close the pipes in the toilet is to install plumbing shutters (roller blinds, roller blinds). This option is ideal if you need to cover the entire back wall. Guides are installed on the sides, a reel with strips is attached to the top, that’s all, the installation is completed, you can use it.
Roller shutters in the toilet can only cover part of the wall
The disadvantage of this option is the price of roller shutters. She bites. But at any time you can raise the roller shutter that covers the pipes, and you can repair it. There is another way to reduce the price - install roller shutters not from floor to ceiling, but cover only the central part, where all the connections are located.
You can hide the pipes in the toilet behind roller shutters
Even if you do not need to cover the entire wall, but only part of it, you can build a wall from gypsum plasterboard or wall foam blocks and attach roller shutters to this wall.
How else to hide pipes in the toilet
In small-sized apartments, every centimeter of space counts and simply covering at least some part of the room is a real luxury. Then you can close the pipes by making a utility cabinet. For this, narrow toilets in Khrushchev buildings are an ideal option.
You can close the pipes in the toilet by making a utility closet
Planks are attached to the walls on both sides, and hinged doors are attached to them. The shelves are assembled locally. They can be made removable to provide access to the pipes if necessary.
What are the doors made of? The simplest option is from laminated chipboard, but you can also order them from MDF. They will be made to your measurements by workshops that manufacture furniture. If you also choose a color to match the main finish or make a cabinet the same color as the entrance doors, you will get a good interior.
A very inexpensive way to make the back wall of the toilet attractive is to use horizontal or vertical blinds. There is no hassle at all with installation, the only thing is that you need to find the right size. Then nail the bar to the ceiling, and attach the blinds themselves to it.
Blinds in the toilet on the wall - an inexpensive way to hide pipes
When selecting, it is also important to guess the color - either match the tone, or use contrast. And by the way, plastic horizontal blinds will be more practical in this case - they will not bend if you accidentally touch them. In general, a good option in all respects.
How to properly hide pipes in a bathroom or toilet: options and nuances
Numerous pipes, risers, bends, meters and valves - all this is located in a small bathroom, which is not particularly beautiful anyway. It's no surprise that doing renovations. Many people think about how to hide pipes. In this article, we will figure it out and show photos of how to properly hide pipes in a toilet or bathroom.
In standard apartments, as a rule, there is a separate bathroom and the bulk of communications such as sewerage. plumbing system, a heated towel rail and water heated floor are also connected there, and all this is located in the toilet, turning it into a kind of technical booth where the toilet was accidentally installed. In a private house, the situation is simpler and, nevertheless, there are a couple of pipes that catch the eye. There are many ways to decorate them, but before you hide the pipes in the toilet, you need to carry out a number of preparatory work.
Before starting work
When planning a bathroom and toilet renovation, be sure to consider a way to disguise water pipes
First of all, you need to make sure that communications are working properly. Under no circumstances should there be any corrosive areas, much less leaks. Before hiding heating and water supply pipes, it is advisable to insulate them. It is necessary to determine in advance the location of technological hatches and install main filters for water purification. Recently, roller shutters for toilets have become especially popular. This option combines a neat appearance and full access to communications. Be sure to pay attention to the condition of the walls. You need to make sure that there are no traces of mold or mildew on them. If the latter are present, carry out thorough mechanical cleaning and double treatment with fungicides.
Important! Plumbing hatches will provide easy access to those areas of communications that require periodic maintenance, such as meters and filters.
How to choose a plumbing hatch: access to communications
A plumbing or inspection hatch installed in the walls allows you to maintain access to the main elements of communications. There are several options available on the construction market:
- Finished hatches. Typically made of plastic, they can also be made of metal or stainless steel. Does not require additional finishing.
- Inspection hatches are installed if the question is how to hide all the pipes in the toilet or bathroom under the tiles. They belong to the category of invisible hatches. The sanitary door is decorated with the same finishing materials that are used for the walls, making it almost invisible. The frame of such hatches is steel, and the doors are made of gypsum fiber. They are used for openings of different sizes, making pipe routing in the toilet as accessible as possible.
Inspection hatches: plastic (left) and decorated with tiles (right)
- Plumbing hatches for painting consist of an aluminum frame and a plasterboard door, which can be painted in any chosen color. The design does not imply finishing with other materials.
Pipe box: configuration, installation
A decorative box for covering pipes is suitable in most cases. Depending on the location of communications, it can be made in several versions.
- False wall. A simple and quick way to hide pipes if they are located along one of the walls, usually behind the toilet. Of course, the wall will take up at least 50 cm of the already short length of the toilet. But this problem can be solved by installing a wall-hung toilet, which is mounted on a special module hidden behind the wall. The drain tank will also be located behind the wall inside the pipe box. In this case, in order to provide access to important communications elements or to change the coarse water filter, several simple plumbing hatches are installed.
- Sloped false wall. This option is used when thinner branches go in different directions from the nodal riser. The wall in this case is located at an acute angle to the side and rear walls. This option looks interesting, but it will take up a lot of usable space.
Sloped false wall (left) and flat false wall (right)
- Multi-level boxes. In some toilets, if you fence off all communications with a wall, there will simply be no room left for a toilet. In this case, they resort to a multi-level box. Each individual structural element masks a specific section of the pipe. Multi-level structures look very interesting and allow you to functionally use the end part of the pipe box.
- A square box is installed when the pipe layout in the toilet is simple, all pipes and a coarse water filter are located in one corner. It takes up little space.
Choosing material for finishing the box
Typically, the same material is used for lining boxes as for walls. And the most popular, undoubtedly, is ceramic tile. And not only for aesthetic reasons, it is easy to clean, resistant to disinfectants and durable.
Finishing the box with plastic (left) and tiles (right)
In addition to ceramics, plastic panels are laid. They are cheaper and less reliable, but if pipe repairs are required, such a box is easier to dismantle. Sometimes the box structure, made of plasterboard, is only painted, but the option is not practical and durable. In addition, dirt accumulates in the pores of the paint, which promotes the development of bacteria. Facing stone, brick or mosaic are often used only in fragments, to highlight certain areas. Thus, for example, you can highlight a plumbing hatch under ceramic tiles.
Box installation
At the initial stage, you need to decide on the choice of material for finishing the box. If it is ceramic tiles or mosaic. the frame is made of a metal profile and sheathed with plasterboard. For plastic or wooden panels with a waterproof coating, the frame can be made of wooden blocks, which does not require additional cladding. The installation of the box is carried out in several stages. Preparatory work includes measurements and marking the location of the structure, taking into account the thickness of the material. The box structure must be at a distance of at least 3 cm from the pipes. The next stage is securing the frame elements. When a profile is fixed along the perimeter of the future structure, guide elements lead from it and form an angle. Drywall sheets are cut in such a way that the box for covering the pipes, if possible, consists of separate strips.
Drywall is attached to the profile with self-tapping screws. If further finishing involves painting or wallpapering, the structure is primed, puttied and sanded with sandpaper. Under no circumstances should the so-called inspection areas be closed; they are used for cleaning sewer pipes. They also provide access to the meter, taps and open the coarse filter for tap water.
Roller shutters for the toilet
Plumbing modern roller shutters in the toilet are installed if all the pipes are located along the back wall. They are a sheet of lamellas that moves along vertical guides and is wound on top of a shaft protected by a box.
Roller shutters for hiding pipes in the toilet and bathroom
The main advantage of roller shutters is that they are able to provide free access to pipes. Most often, bathroom shutters are attached directly to the wall and ceiling. Installation is carried out both at the initial stage of repair work and after its completion. Before you begin installing blinds, you need to measure the diagonals of the openings. The difference between the two measurements should not exceed 5 mm. And make sure that the vertical and horizontal slopes are level. The most practical option for a toilet would be a built-in installation, with the box inward or outward.
Important! It is better to install roller shutters before laying the tiles. This way, it will be possible to hide the gaps between the wall and the guides.
Installation of roller shutters
Markings are made on the guide rails. 10-15 cm retreat from each edge of the tire; on the remaining segment, the marks are distributed evenly, in increments of 45-50 cm. Holes with a diameter of 11.8 mm are drilled in the inner wall of the tire to attach the box to the opening. At the edge of the front flange of the box and its lid, joint holes with a diameter of 4.2 mm are drilled, two on each side. In the future, they will be used to secure the box lid with rivets. Next, a hole with a diameter of 8 mm is identified and drilled in the upper flange of the box panel to secure it in the opening.
Installation diagram of roller shutters for a sanitary cabinet
Assemble the roller shutter frame (frame and guides) and install it in the opening strictly according to the level. The iron sheet is inserted over the drive shaft from the rear wall of the box into the guide bars. Traction springs are attached to the edge of the web and secured to the shaft. Fix the box lid. Close the holes with plugs. Check the operation of the system.
Advice! Roller shutters for the toilet are usually plain, and this does not have the best effect on their aesthetic qualities. You can make them more attractive and consistent with the finish using airbrushing.
Practical furniture
Numerous pipes in the toilet can be hidden under furniture. This option is practical, functional and relatively low cost. Furniture camouflage allows you to maintain the necessary access to communications. If necessary, carry out repairs, replace the filter or take meter readings. If we talk about how to hide water pipes and heating, then it is worth considering that condensation can form on them.
Special bathroom furniture can also hide pipes
This will negatively affect the condition and service life of wood-containing materials, so the communications are additionally covered with insulating material. You can develop the furniture design yourself or contact specialists who are engaged in manufacturing and installation. In some cases, the above methods for decorating pipes can be combined.
How to install roller shutters: video
When renovating toilets, the question always arises of how to hide the pipes in the toilet. After all, the appearance of the pipeline creates the impression of “eternal” repair. The building materials market offers many types of finishing materials that can disguise a technical unit.
The camouflage of the water supply and sewerage systems should be such that access to valves and meters is convenient. In the event of a breakdown, the masking structure must provide access to the main components. Many owners have a question about how to hide pipes in the toilet, and, most importantly, with what. There are three design options for decorating the pipeline.
1. Pipe box in the toilet
One of the simplest designs. Drywall or plastic is useful for covering pipes. This method is quite simple: just purchase a sheet of drywall, preferably moisture-resistant. The cost of one sheet is about 4.5 dollars. In addition to the gypsum board, you will need a profile. It can be wooden or metal. It is better to choose a metal profile. It comes in two types:
- Guide. They form a contour and are attached at 4 corners, at a distance of at least 10 cm from the pipes.
- Wall. Serve to strengthen the structure.
- It is necessary to install the frame around the perimeter at a distance of 5-10 cm from the pipes.
- If the height of the box is more than two meters, it is worth strengthening the structure with a transverse profile or wooden blocks.
- Cover with PVC panels. A square meter of such material will cost an average of about $5.
- How to close the pipes in the toilet? Materials for decoration Drywall PVC panels Box Plumbing cabinet Roller shutters Blinds Available materials Covering methods…
- How to seal pipes in a toilet How to hide (close) pipes in a toilet Our comfort is provided by engineering systems, and their component is...
- How to hide pipes in a toilet with access How to hide pipes in a toilet The interior of a modern toilet room should contain not only...
- How to close a sewer pipe in a toilet How to close a sewer riser in a toilet Mandatory conditions and materials Preparatory stage Types of boxes False panels…
Plasterboard box with inspection hatch
If the height of the box is less than a meter, then you can do without them. After installing the frame, a sheet of drywall is attached to it using self-tapping screws.
Such a box can be tiled and made invisible. The cost of creating a box from gypsum plasterboard will be slightly higher than covering it with plastic panels.
The principle of constructing a box from plastic panels is the same as from gypsum plasterboard. In short, covering the pipes in the toilet with plastic panels is very simple:
The method is quite simple and inexpensive, but due to lack of space it can be very difficult to install the box correctly.
Frame installation process
Hidden inspection hatch, decorated with tiles
2. Plumbing cabinet
A useful cabinet that will not only cover the pipes in the toilet, but also leave room for storing cleaning products. It is very popular among apartment owners. Such a cabinet can be built from the same plasterboard. Laminated boards or regular edged boards are suitable as a cheap option. The frame is usually wooden, it is sheathed with the necessary material. Various locker options do not require large financial investments. The area under the cabinet is often hidden with plywood, plasterboard or laminated board. All that remains is to select and attach the doors.
Such a screen requires technological holes for the water supply hose. The advantage of this method is its functionality, because the plumbing cabinet not only hides the pipes, but also serves as a place to store toiletries. In addition, you can close the pipes with roller shutters or buy ready-made doors for bathroom cabinets - these options are also quite popular.
Hinged doors for sanitary cabinets
Furniture fronts for sanitary cabinets
Doors like a wardrobe are also suitable for hiding pipes in the toilet
3. How to hide the pipes in the toilet using blinds
Blinds in the toilet are the best option for those who do not want to bother with drywall and build various structures. This option is suitable for small bathrooms. It is much easier to close communications using blinds, but its cost is 2-3 times higher than the cost of a box or plumbing cabinet. Regular blinds can be made from floor to ceiling. Installation of blinds takes little time and leaves virtually no construction waste.
When choosing a method for masking communications, determine the possibility of installing a particular structure in your toilet. To avoid pipe breakage, before installing the camouflage structure, it is worth checking all connections for leaks.
Blinds in the toilet with installation
Roller blinds in the toilet
Step-by-step instruction
Let's get started:
- First of all, it is necessary to take all measurements and draw up a detailed drawing. The purchase of materials and accessories is made in accordance with the dimensions of the future cabinet, as well as the features of the layout and pipe routing.
- If the toilet cabinet is made of wood, the material should be impregnated with a moisture-repellent composition or varnished. Stain is also used: you can use different shades to make the cabinet more original.
- If there is space behind the toilet for internal shelves, we make supports for them from corners or scraps of timber. We lay the shelves after cutting out holes for the pipes. If high loads are not expected, plywood can be used.
- To install a built-in wardrobe, we make markings on the side walls of the toilet. We build a frame from timber, connecting the parts with self-tapping screws.
- We install the frame by nailing the corners to the walls and ceiling with dowels. If the location of the pipes allows, you can attach the side walls of chipboard with a thickness of 16–18 mm to the walls to the full depth.
- We screw the doors with self-tapping screws or using a screwdriver to the vertical beam of the frame. Apartment owners often choose louvered doors, as in the photo below. They look stylish and modern, can be painted in any color, and the holes in the doors will help ventilate the finished cabinet.
Step-by-step instructions for covering pipes with drywall
A material such as drywall is attached to a metal profile. To mount the box, you need the following:
- Measure the desired length of the profile and cut it. Use a pencil to mark the floor (3-4 cm from the pipes) and screw the profile along the markings (with dowels). Do the same on the ceiling and walls.
- Cut racks from the profile (the length is up to the ceiling), install them in the corners and near the walls and screw them from the bottom and top with special profile screws (“bugs”).
This will create a frame for the box
- Cut the rack profile with a hacksaw and mount the sheathing horizontally from them. For fastening you will need the same “bugs”.
Horizontal sheathing will be needed to attach drywall to it.
- Mount a window for the hatch from sections of the profile. To do this, place the profile sections vertically and horizontally (in the form of an opening) in the selected location.
- Using a painting knife, cut the drywall into sheets of the required size.
Using a screwdriver, attach the sheets to the sheathing
Attention: when attaching drywall, make sure that the screw head is flush, but does not break through its surface.
Prices for drywall and sheet materials
Drywall and sheet materials
Video - Create a box from plasterboard
Covering the pipes with plastic panels
A box or false wall made of PVC panels is another cheap and practical way to hide sewer and water pipes in the toilet. Plastic is not afraid of moisture and fungus, it is durable and lightweight, and easy to care for.
This method is appropriate if the entire bathroom is lined with PVC panels: then the box will fit perfectly into the interior. Installation of products with the right approach will not cause difficulties and will not take much time.
In the event of an accident when dismantling the structure, the material will not be damaged - this is especially true for pipes that are not insured against leaks. After eliminating the damage, the box can be easily put back together.
In the photo, the sewer pipes in the toilet are hidden in a box made of plastic panels. Other walls are covered with ceramic tiles, but the finishing material is matched to match, so the difference is not immediately obvious.
Tools and materials
To cover the pipes in the toilet with PVC panels, you will need:
- Level.
- Roulette.
- Self-tapping screws, European screws and dowels.
- Sharp knife.
- Metal profiles or wooden blocks.
- Plastic panels for finishing.
- Special hatches.
- Skirting boards designed to mask joints.
- A jigsaw or hacksaw if the frame is made of wood.
- Screwdriver.
The photo shows fittings for plastic panels: finishing profile, connecting profile, internal corner and external corner.
Step-by-step instruction
- We take the necessary measurements, draw a drawing, taking into account the holes for access to the pipe distribution and meters. We start working with the supporting profiles: vertical and horizontal guides (or wooden posts) will determine the size of the box or partition. We attach them to the walls using European screws and dowels.
- To reliably cover pipes and other communications in the toilet with plastic panels, it is necessary to add jumpers. To do this, measure out equal sections 50 cm long. Next, install the starting profile, securing it around the perimeter with small screws.
- We install decorative panels in accordance with the instructions. If the sheathing is smooth, then there will be no problems with installation.
- We cut inspection holes and close them with hatches. One of the panels can be secured with silicone sealant to provide access to the pipeline elements. At the joints we install plastic corners and plinths, fix them with glue or “liquid nails”. PVC plates are both the main and finishing materials, which is why they are so popular in Russia. The photo shows how neat the back wall of the toilet began to look after masking the pipes.
Roller shutters in the toilet
The easiest way to close the pipes in the toilet is to install plumbing shutters (roller blinds, roller blinds). This option is ideal if you need to cover the entire back wall. Guides are installed on the sides, a reel with strips is attached to the top, that’s all, the installation is completed, you can use it.
Roller shutters in the toilet can only cover part of the wall
The disadvantage of this option is the price of roller shutters. She bites. But at any time you can raise the roller shutter that covers the pipes, and you can repair it. There is another way to reduce the price - install roller shutters not from floor to ceiling, but cover only the central part, where all the connections are located.
You can hide the pipes in the toilet behind roller shutters
Even if you do not need to cover the entire wall, but only part of it, you can build a wall from gypsum plasterboard or wall foam blocks and attach roller shutters to this wall.
How to cover pipes with plasterboard?
A gypsum board box is a product that even a beginner can handle creating. First, as for PVC panels, a frame is constructed from a metal profile. Some people use wooden blocks, but metal is considered a more suitable material. The frame is covered with moisture-resistant plasterboard, since the toilet is a room with high humidity. It is recommended to decorate the finished structure with a suitable material: tiles, mosaics, paint or wallpaper.
The pipes can be partially sewn up, giving the box almost any shape (for example, leaving space for a sink and faucet, going around a water heater) or erecting an overall structure. If the pipes are located on the side or in the corner of the toilet, creating a box is the best choice, since the installation will leave a lot of free space.
The photo shows a box made of moisture-resistant plasterboard with a communication hatch and porcelain tile cladding.
Tools and materials
To hide the sewer pipes in the toilet with your own hands, you will need:
- Screwdriver and screws
- Scissors and tin snips.
- Level.
- Roulette.
- Spatulas.
- Drywall knife.
- Roller.
- Moisture-resistant drywall.
- Aluminum profile.
- Screws and dowels.
- Finishing materials, putty, primer.
- Reinforcing tape.
- Sound insulation material.
The photo shows the minimum list of materials intended for creating a plasterboard box.
Step-by-step instruction
Let's start making the box:
- We make a drawing in accordance with the measurements. Space should be left for thermal insulation material.
- We make markings on the floor and walls in accordance with the diagram. You can use a simple or laser level. We fasten the metal guides with dowels.
- To make the sheathing more reliable, we create stiffening ribs: we cut additional elements from the metal profile, the width of which corresponds to the distance between the vertical guides. The corner profile is attached at the top and bottom with small self-tapping screws.
- Before sheathing the frame, we make markings on sheets of drywall in accordance with the drawing.
- We cut the material: we cut the cardboard layer with a knife, slightly deepening the blade into the plaster. Carefully bend the sheet and cut it on the opposite side.
- Before covering all the pipes in the toilet with plasterboard, we cut out inspection holes for hatches and access to communications. Only after this we proceed to the sheathing. We attach the parts of the plasterboard sheets to the sheathing and fasten them with self-tapping screws. We carefully trim the unevenness with a knife.
- We eliminate defects (joints and holes from self-tapping screws) using plaster and putty: we prime the structure, then we reinforce the corners with special tape so that the solution does not crack when drying. Defects are eliminated by sanding with sandpaper.
- Prime the surface again to increase adhesion. After the primer has completely dried, you can glue ceramic tiles, mosaics, and even install laminate flooring. Durable porcelain tiles will allow you to disguise the hole if you use the tiles as the front of the door, as in the photo below. The structure can also be painted or covered with moisture-resistant wallpaper.
Finishing materials for pipes in the toilet: options
Among the finishing materials, there are several of the most convenient and practical; each of them, to one degree or another, meets the requirements and has its advantages. Let's look at each in more detail.
Table. Characteristics of finishing material options
| Name of finishing material | Name of finishing material | Characteristics / properties |
| Drywall. The most common option | pros | Easy to install. To install or dismantle plasterboard trim, you will need ordinary tools (not highly specialized ones). It will also be quite easy to make mortises and inserts (hatches) into a profile from this material. |
| Environmental friendliness. Drywall is an environmentally friendly substance. Flammability – minimal | ||
| Moisture resistance. There are types of material that do not react to high humidity | ||
| Availability. The material is inexpensive and will not harm the budget | ||
| Finishing. Some people consider this a disadvantage, but many people like the opportunity to decorate a plasterboard wall as dictated by the overall style of the bathroom. | ||
| Minuses | If repairs are necessary, you will have to dismantle the box. This is easy to do, but you will need to create another one from new drywall | |
| Plastic panel (PVC). Very popular | pros | Cheap. This is the most budget option. |
| Easy to install. To install PVC panels you will need a metal or wooden frame made of beams | ||
| Lungs. The weight of this material is small, but sufficient to withstand the installation of hatches | ||
| Resistant to moisture. Fungus and mold do not form on PVC panels and are easy to clean | ||
| Beautiful. A variety of shades and patterns allows you to choose the material to suit any interior | ||
| Flaws | Fragility, it is quite easy to damage the PVC panel | |
| Aluminum blinds. The option is not very common, suitable for small toilet rooms | pros | Small price |
| Functionality. The space behind the blinds can accommodate shelves that will be hidden from prying eyes | ||
| Durability. Aluminum blinds can last for many years | ||
| Moisture resistance. They are not afraid of dampness, they are easy to care for | ||
| Easy to install. To install blinds, you only need to strengthen them from above; you don’t need to touch the side walls for this. | ||
| Minuses | Low noise insulation | |
| Gaps between walls | ||
| Additional complications (the pipe coming from the toilet will prevent the blinds from completely lowering, you will have to make a separate plastic box for the bottom) | ||
| May change color over time (turn yellow, darken) | ||
| Laminated MDF (sanitary cabinet). Often used in Khrushchev buildings. As a rule, doors are made of this material and are attached to the side walls using timber and hinges. The result is a design similar to a utility cabinet. | pros | Space saving. You can put various household items in the cabinet niche |
| Convenience. Always have access to communications | ||
| Aesthetics. Doors can be made in the general style or become an advantageous accent in the room | ||
| Minuses | Cost (if doors are made to order) | |
| Fragility (MDF does not always withstand moisture) | ||
| Roller shutters. One of the most modern finishing options | pros | Style and beauty. Even photo printing is possible on the surface of this finishing material (to order) |
| Professional installation. Installation is carried out by specialists, which will eliminate errors and unnecessary hassle. | ||
| Ease of use. Roller shutters do not obstruct access to communications | ||
| Flaws | High price | |
| Difficulties in placement (ventilation from above and toilet pipes from below will cause additional difficulties) |
Please note: in some cases, gypsum fiber boards, hinged plastic doors, or waterproof plywood can also be used to cover toilet pipes. A good and economical option is a former countertop or cabinet door.
We hide the pipes and leave access
Another modern way to disguise pipes in a toilet is roller shutters (or blinds), which were previously installed to protect entrance doors from burglary. Today, these structures have become more widely used in the home and perform the following functions: they close a closet on the balcony, hide sewer pipes, and are even used as a door to a storage room.
Roller shutters are mobile: they can be easily lifted and provide access to communications and metering devices. The design has a smooth, monochromatic surface, but for greater attractiveness and comfort, you can choose models with a pattern that is applied through photo printing. Roller shutters are made in different sizes, and the opening method allows you to save toilet space.
The photo shows a combined bathroom with a box in which access to sewer pipes is left. White roller shutters were used as the door.
Roller shutters are made of aluminum or plastic. The latter must be handled with care: despite being resistant to moisture and rust, plastic is not as durable as metal. Aluminum roller shutters are considered more suitable for toilets: their cost is higher, but they are durable and aesthetically pleasing. This is especially true if the partition will be raised and lowered frequently.
Tools and materials
For self-installation you will need:
- Roller shutters with a protective box, canvas and mechanism.
- Drill with drill bits for metal.
- Pliers.
- Hammer.
- Screwdriver.
- Metal scissors.
- Screwdriver.
The photo shows a standard diagram of the product, consisting of slats, a protective box, guide rails and a roller shutter shaft.
Installation instructions
To choose the right box, you need to take into account the dimensions of the rectangular opening. Let's get started:
- We completely clean the area intended for installing the box. We decide on the installation method. If the depth of the plumbing niche allows, a massive structure is installed inside: this arrangement looks more attractive:
- If there is not enough space, the box is installed outside:
- After installing the box, adjust its position using a level. If the pipes below interfere with closing, then the structure is mounted in two parts with a rise at the junction.
- We assemble the canvas and attach it to the shaft. We install the stopper and check the smooth movement. It is important that the shutters do not creak and move freely. Specialists are usually involved to select a model and carry out installation. But you can assemble the structure yourself by studying the detailed description in this video:
How to make a closet in the toilet behind the toilet yourself
The construction of the structure consists of several stages:
- planning;
- preparation of parts according to the project;
- frame assembly;
- installation of the internal part;
- hanging doors and decorating.
All operations are easily performed without an assistant.
Dimensions and design
Before making a closet in the toilet behind the toilet, you should measure the height, width and depth of the future structure. If you choose to install a free-standing structure, then its dimensions are determined by tying them to the width of the wall. In a small room where the cabinet takes up the entire wall, you will need to take several measurements of the width and depth along the entire height of the structure. This will allow you not to make a mistake if the walls are not too smooth, and not to fit an already assembled cabinet into place.
When drawing up a project, you need to think about the location of the shelves and the distance between them. External design consists of the choice of facade panels or doors, their size and quantity. For free-standing models, you will also have to choose a method for finishing the visible parts. A hanging cabinet above the installation will require solving the same problems, but it is recommended to evaluate the height at which its lower edge will be located: if it protrudes beyond the front wall of the tank, there is a risk of hitting your head when rising from the toilet.
Preparing material and tools
Among the tools that will definitely be required when hanging or building a cabinet of any model should be a drill or hammer drill with different attachments. They will be needed for drilling concrete or brick walls of a room to which parts of the structure or hooks for hanging need to be attached. The hammer drill will also require fasteners: self-tapping screws with dowels at least 7-10 cm long.
The rest is selected depending on the material from which the cabinet is built:
- hacksaw or electric saw for wooden parts;
- metal scissors and a screwdriver for drywall products.
Measuring tools (tape tape, building level, square) will come in handy.
The materials for making shelves in a rack must withstand the weight of objects that will be placed on them. The best choice would be boards or metal lattice structures of various types. You can buy them at a hardware or construction store. To attach them to the walls, a block with a cross section of 2x2 or 3x3 cm is used. Its quantity is estimated by calculating the total length of all supports of the rack.
A niche or built-in closet is often made from gypsum plasterboard. This material is easy to process and allows you to build light and durable false panels placed at the required distance from the wall. The frame for the structure is made of a bar or a special profile.
Exterior finishing can be done using various materials. The main requirement for them is moisture resistance.
Tree
Wooden panels can be used to cover part of the walls where shelves are not installed. If the wood will not be covered with other materials, it must be painted or varnished to protect it from moisture. It is desirable that the wooden panels are in harmony with other furnishings.
To make a cabinet, you can use different types of wood materials:
- solid wood board (lining, floor slats, etc.);
- furniture board;
- plywood with a thickness of at least 0.5 cm;
- Chipboard and its varieties.
Plastic
Panels can also be made from leftover plastic wall coverings or slope finishing. These materials are convenient for the construction of frame structures (niches, built-in cabinets). They are also suitable for hiding the presence of shelves. To do this, you can use a finish that matches the panels on the walls of the toilet.
You can choose another plastic material that is well suited for this purpose: polycarbonate. Rigid sheets will allow you to make transparent or translucent doors and beautifully decorate the wall above and below the cabinet. The main advantages of plastic are moisture resistance and easy surface care.
Ceramics
Ceramics are used only for finishing a structure already assembled from other materials. Using adhesives, the tiles can be fixed not only to the fixed parts of the structure, but also to its doors. You can use tiles, imitation stone, mosaic or mirror varieties. Even broken tiles after renovation are suitable for finishing: you can create mosaic panels from pieces of ceramics and hide both a temporary wall and doors under the tiles.
Drywall
A homemade closet in the toilet is often assembled from gypsum plasterboard. Depending on the design option and the size of the room, the structure can only serve as a false wall with a niche or be used as the walls of a free-standing shelving unit. Only shelves that are going to be heavily loaded should not be made from gypsum plasterboard: the material breaks easily.
Which method is better for a small toilet?
To build a complex dimensional partition in a bathroom, you will need a lot of material and free space, which means the method is not suitable for a cramped toilet. The optimal solution is considered to be boxes that follow the curves of water supply units: they not only mask the pipes, but also serve as additional shelves for hygiene items. Various blinds also save useful space: unlike swing doors, they take up less space.
To minimize the loss of bathroom space, you can use hidden installation of pipes. This option is suitable for small toilets. It is implemented at the initial stage of repair and only after a complete replacement of communications with modern ones. For hidden installation, pipes made of copper or plastic are used: they are sewn directly into the wall or floor. The grooves are made using a hammer drill and a grinder in accordance with the number and diameter of pipes. This decision requires a considerable amount of money and certain skills. We should not forget about the holes for accessing the meters.
Use the internal method - gating
Strobing is the internal camouflage of communications in the walls. Using a wall chaser or hammer drill, special grooves are made where the pipes are hidden. Grooving saves space in the room.
There are a number of limitations for “invisible” installation: the presence of electrical networks, it may not be intended for load-bearing walls or may only be suitable for soldered pipes.
Photo:
There are many ways to hide the unaesthetic appearance of pipes in the bathroom. What to choose depends on the design style and size of the room. Remember that pipes must always be accessible. Choose other criteria at your discretion.
What other options are there without renovation?
In order to hide a wall with pipes without extra costs, it is recommended to use regular blinds. This budget method is perfect for those who do not want to build complex structures or are considering a temporary option. Wooden blinds fit perfectly into an eco-style, and plastic ones into a modern one. But if the bathroom interior is made in a classic style, the products are unlikely to fit into the overall design.
Plastic blinds will last as long as possible: they are practically not afraid of water and are easy to care for. The modern market offers a wide range of products, which allows you to choose a design to match the color of the finish. Unfortunately, the blinds do not have sound insulation, and also do not completely cover the pipes - you will have to build a separate box for the bottom.
If a major renovation is not planned, and the pipes do not fit into the interior, you can order a special wall cabinet. Its installation will not take much time, but some of the communications will be hidden.
Many women will appreciate another idea for decorating pipes in the toilet: an ordinary roller blind will help hide unsightly elements - the main thing is to purchase a product that is suitable in width and height. There will be no difficulties with its placement. Roller blinds come in a wide range of colors, and the material is protected with special antistatic and antibacterial compounds.
In the photo, bright blinds located at an angle successfully hide communications. In an emergency, they will allow you to instantly shut off the water supply.
For connoisseurs of the loft style, the situation is even simpler: if the toilet is designed in an industrial style, the pipes can serve as an excellent decor that matches the chosen style. You just need to put the communications in order by eliminating defects, cleaning off old layers or simply replacing them with modern ones.
The photo shows a loft-style bathroom - brickwork serves as finishing, and black pipes near the sink are painted the same color. Standing out against the terracotta background, exposed pipes become one of the main highlights of the interior.
Blinds
Blinds are one of the easiest ways to hide pipes.
- Firstly, it’s cheap: prices depend on the required size and city, but on average you can count on 700 rubles.
- Secondly, to order blinds for the toilet, you do not need to call measurers and somehow complicate the process, since there are no subtleties in this. Measure the opening with a regular tape measure and contact us immediately to order.
- Thirdly, blinds are easy to install, since they only need to be screwed to the wall.
If desired, the blinds can also be fixed to the ceiling, but it will depend on its finish.
Another advantage of blinds is the ability to choose them in any color and shade. The classic option is white horizontal aluminum blinds. As practice shows, they fit best into the interior.
But among the shortcomings, it is definitely worth noting that it is not the greatest ease of use. If the pipes are simply hidden behind the blinds and the space is not used in any way, no problem. However, if behind them there are shelves with frequently used things, raising and lowering the blinds every time will not be very convenient. In this case, it is better to pay attention to the doors.
Procedure for drywall
When deciding to sew up a riser in a bathroom with plastic panels or plasterboard, it is important to understand a simple thing: it will no longer be possible to simply open access to communications. The structure will have to be completely demolished. Restoration work will require additional costs and will not always allow you to return to its original appearance.
If the risks are fully assessed and justified, you can proceed to the following actions:
- Cleaning the wall of old coating;
- Alignment;
- Space marking;
- Laying out a metal profile around the perimeter of the future cabinet;
- Preparation of plasterboard slabs;
- Next we hide the pipes - laying the material;
- We close the raw material - carrying out design work.
You can use plasterboard in the toilet without moisture protection
Experienced craftsmen can easily carry out work “by eye”. For those who are faced with this issue for the first time, it is better to first make a schematic project.
It is not necessary to describe everything as accurately as possible: just approximate dimensions are enough. Having seen his future creation clearly, the master may want to change some details. In the finished version, doing this will be very problematic.
How to make a box from plasterboard
You can cover the pipes in the toilet by making a box made of plasterboard. This is perhaps the most popular solution. This is because the technology is very simple; pipes of any configuration can be hidden. Then there are many options for finishing this box: lay the tiles with glue, level the surface with putty, then paint or wallpaper.
The pipe box in the toilet can be vertical or horizontal
Peculiarities
If you choose this option for closing the pipes in the toilet, then you should consider some points. The first is all plumbing fittings - meters, filters and must be accessible. There are several options:
- make one panel folding or rotating (hinged);
- part of the panel can be removable, fastened with a pair of screws and/or magnets;
- install a hatch (plastic or invisible hatch under the tile finishing.
You can, of course, make the structure non-removable, but if necessary, you will have to break everything and then rebuild it, and problems happen even with new pipes.
Special hatch for tiles
Secondly, if you are going to finish the tiles, it is better to glue them with a special glue, rather than lay them on a mixture of cement and sand. The adhesive layer required is thinner and its mass is smaller. Under such conditions, it will be easier to remove/lift the cover.
Work order
First, decide what your box will look like. It is advisable to plan everything so that it not only covers the pipes, but, if possible, also carries a functional load. For example, if pipes run below along the wall on the right or left, which happens if a hygienic shower is installed in the toilet, the box can be made a little higher, and various necessary little things can be placed on its upper part.
How to close the pipes in the toilet - make a box from plasterboard
If you are closing the risers that run in one of the corners behind the toilet (the layout of standard Khrushchev toilets), it makes sense to close not only that corner, but to sew up the entire wall, making it into a cabinet. Shelves can be open or closed (with or without doors), but in small apartments this is very convenient.
If the pipes are on the back wall, and the toilet is narrow and long, it makes sense to sew up the back wall completely
Having decided what your box will look like, markings are applied to the walls and floor. Then take galvanized profiles for drywall. Down and on the sides there is a supporting profile - PN (UW) - without curved sidewalls. Since the structures are small, a profile of 50*40 mm is sufficient. The jumpers are fitted with a rack profile - PS (CW) - its width is also 50 mm, and the depth can be small if desired.
Jumper connection
The jumpers are cut to size (using tin snips) and secured with self-tapping screws. For a short distance - up to 50 cm - one at each end is enough; for a larger beam, put two. The installation step of the racks is about 60 cm, the jumpers - with approximately the same step. In the place where the door is attached (if provided), a reinforced double profile is installed.
The assembled frame is sheathed with gypsum board, cutting it to size. They are fastened with small self-tapping screws with a screw at the end (TEX 3.5 * 9.5 mm). Install fasteners around the perimeter and in places where jumpers/stands go, a step of 20 cm. When screwing, you need to make sure that the cap is slightly buried in the drywall, but does not break through the cardboard.
After the cladding comes the finishing work, and it depends on the chosen finish. Before painting and wallpapering, the box is completely puttied; before laying tiles, only the screw heads are covered with putty.
What else can you use to make a box for pipes in a toilet?
Not everyone likes to work with drywall and profiles for them. In this case, the frame can be assembled from dry wooden blocks. If desired, they can (and in principle should) be treated with antibacterial compounds so as not to rot.
Instead of drywall, you can use OSB or moisture-resistant plywood. All these materials can hardly be called 100% environmentally friendly, but many are more accustomed to working with them. All of them are moisture resistant, easy to process - this is a good alternative.